Creating a new project
-
To launch Unreal Engine, open the Epic Games launcher and click on Library. Choose a supported version and click Launch. When you launch Unreal Engine, the Unreal Project Browser automatically opens.
-
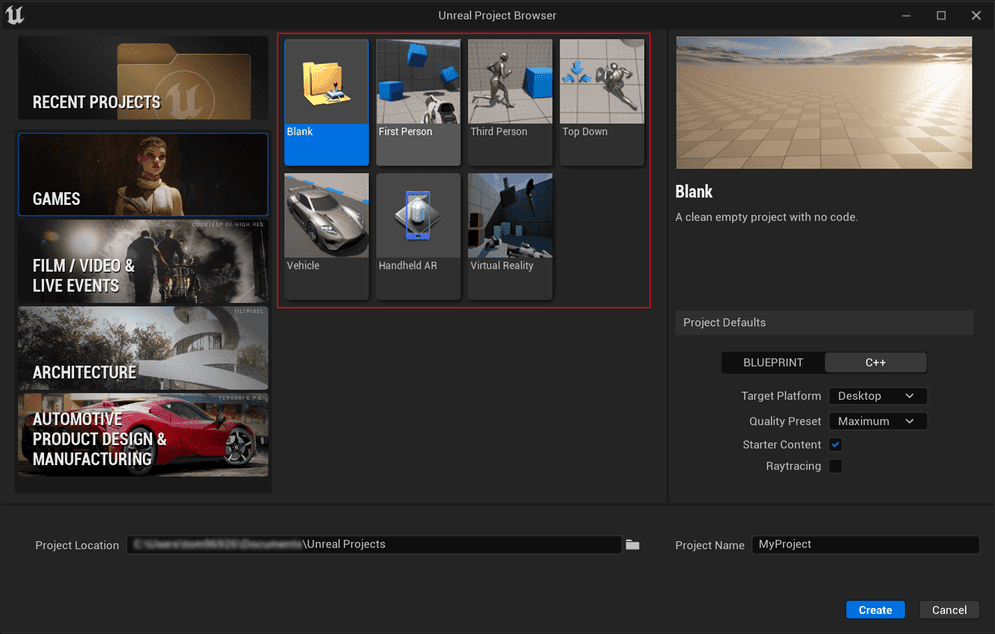
Under Recent projects, select the development category that best matches your industry. If you are unsure which category to pick, select the Games category.

-
Select a template for your project from the list. We recommend using a blank template to initialize the plugin.
-
Set the project to a C++ project. This will create a Visual Studio project and fulfills the requirement to have at least one empty C++ class in the source code folder. You can select the quality/performance level, target platform, whether to include Starter Content, and more. See the Deployment page for more information.

-
At the bottom of the window, select where you want to store your project, and give your project a name. Click Create to finish.

For more information on project settings see Creating a New Project from Unreal Engine 5 Documentation.
Install the plugin
The ArcGIS Maps SDK for Unreal Engine should be installed in the project directory.
-
Exit Unreal Engine and close Visual Studio. Then create a Plugins folder in the main project directory.

-
Extract the ArcGISMapsSDK folder from the .zip file and copy it to the new Plugins folder.

-
Once your project is open, navigate to Edit -> Plugins in the menu bar to confirm the ArcGIS Maps SDK for Unreal Engine plugin is correctly installed.

For Unreal Engine 5.0
The steps below are for Unreal Engine 5.0 only. You can omit those if you are using Unreal Engine 5.1 or higher.
-
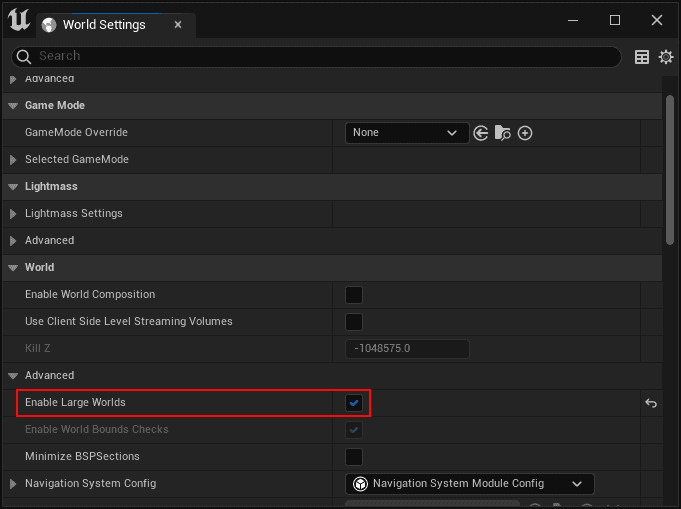
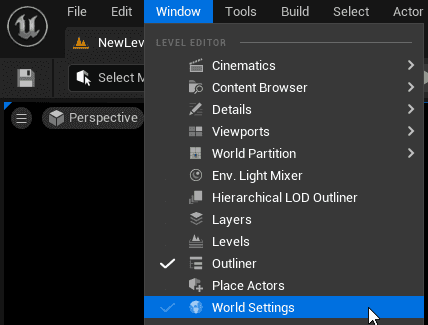
Navigate to Window > World Settings in the menu bar. This will open the World Settings panel.
-
In the World Settings panel, go to the World group and open Advanced settings. Check the Enable Large Worlds option.