Learn how to set a basemap, elevation source, and add data layers, as well as display a specific area using the Map Creator UI and the High Definition Render Pipeline from Unity.
In this tutorial, you will create a local scene in Unity that contains a basemap layer service and data layers.

Prerequisites
Before starting this tutorial, you should:
-
You need an ArcGIS Developer account or ArcGIS Online account and an API key to access ArcGIS services. If you don't have an account, sign up for free.
-
Ensure your development environment meets the system requirements.
-
Follow install and setup steps and install the plugin. Make sure to import the sample assets.
-
Create a new HDRP project if you have not already done so.
If you are not familiar with Unity's interface, see Unity Manual for information about the most common editor windows, and how to make full use of them.
Steps
Create a new scene and open the Map Creator UI
-
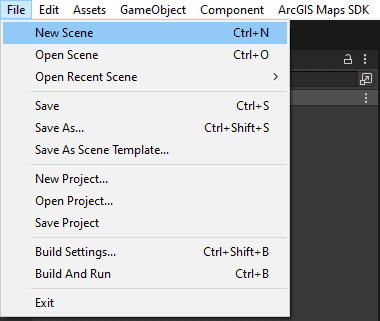
In the top menu, click File > New Scene and open the pop-up window.
-
Select Basic Outdoors (HDRP) template and click the Create button, then save the scene with a scene name.

-
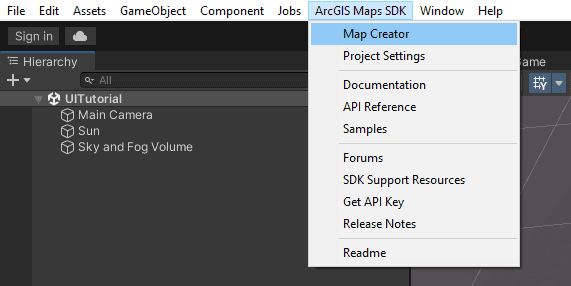
In the top menu, click ArcGIS Maps SDK > Map Creator. Adjust the window size after opening the Map Creator UI if it is needed.
Create a map
In this tutorial, you will create a local scene and set a circular extent.
-
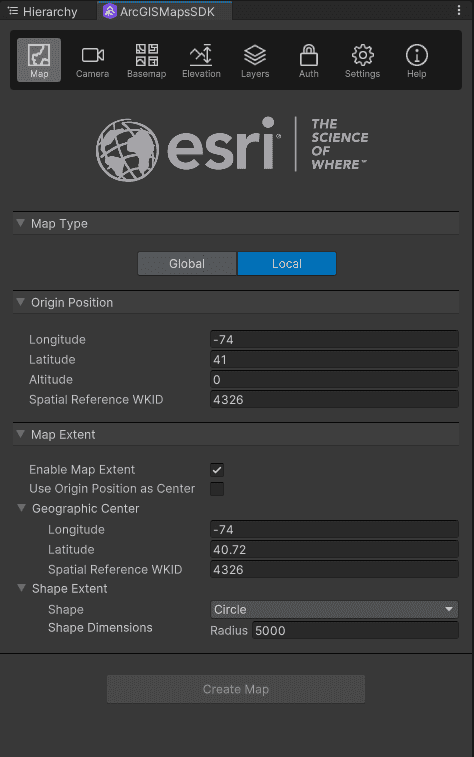
Click the Map tab and display the panel content.
-
Click Local in the Map Type section.
-
In the Origin Position section you can set up the center of your GIS scene with its coordinates and a spatial reference Well-Known ID (WKID). For the tutorial, set the parameters to these values:
- Longitude: -74
- Latitude: 41
- Altitude: 0
- Spatial Reference WKID: 4326
For information regarding the spatial reference, see the spatial references page.
-
Check the Enable Map Extent check box to display the Map Extent section and set the extent of the map to these values:
- Longitude: -74.0
- Latitude: 40.72
- Shape: Circle
- Spatial Reference WKID: 4326
- Shape Dimensions: (Radius) 5000 meters
-
Click Create Map to add ArcGIS Map game object to the scene.
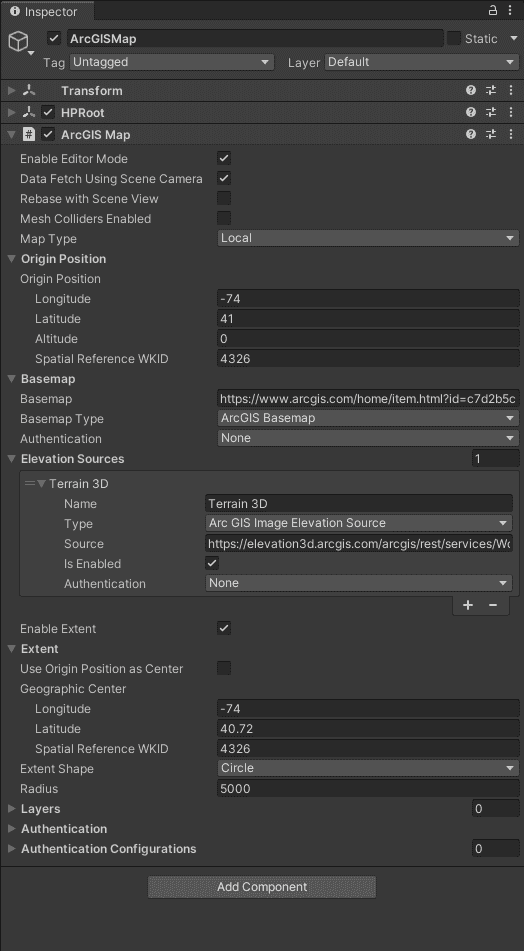
This is the result of the Map panel.
In the Hierarchy window, you can find the ArcGISMap game object created.
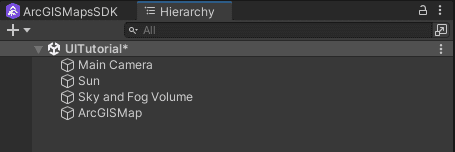
When you click the ArcGISMap game object in the Hierarchy window, you can see that the game object has the ArcGIS Map component attached.
For more information about creating an ArcGIS Map, refer to the Maps page.
Create and set up a camera
ArcGIS Maps SDK for Unity will show higher resolution LODs for areas closer to the camera and lower resolution LODs for the areas that are further away from the camera.
-
Click the Camera tab.
-
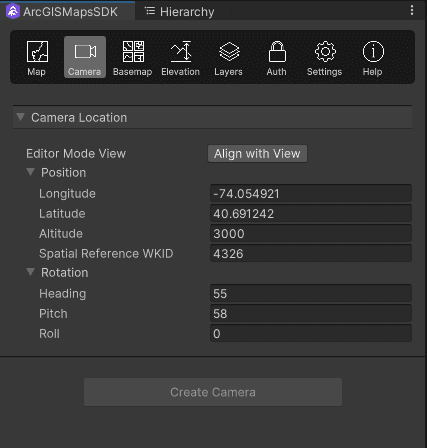
The Camera Position defines the initial point of view of the camera. Set the parameters to these values:
- Longitude: -74.054921
- Latitude: 40.691242
- Altitude: 3000
- Spatial Reference WKID: 4326
-
The Camera Rotation defines the angle of the camera.
- Heading: 55
- Pitch: 58
- Roll: 0
-
Click the Create Camera button.
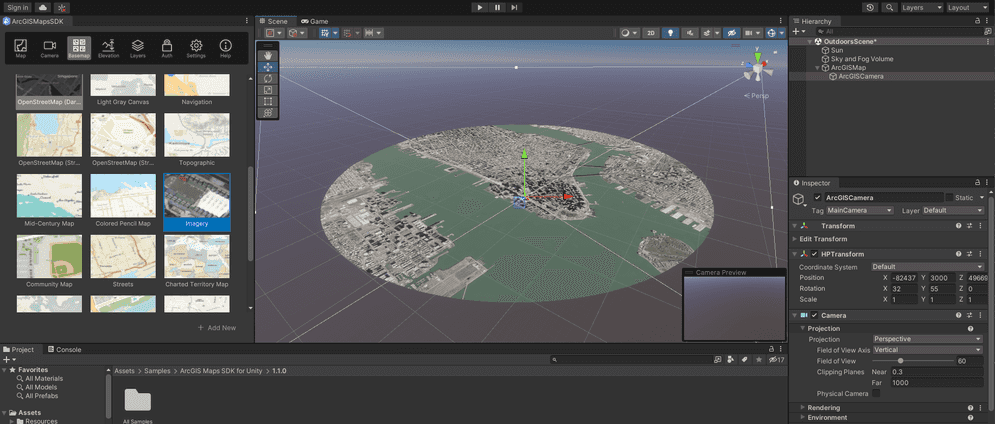
This is the result of the Camera panel.
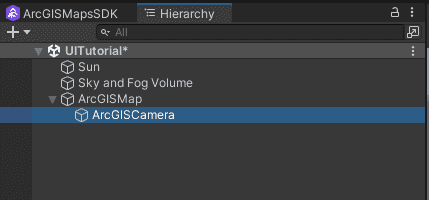
In the Hierarchy window, you can find the Main Camera game object has been converted to ArcGISCamera game object and moved under ArcGISMap game object.
At this point, you may want to disable Fog in the Sky and Fog Volume to see the basemap and data layers you will add. At the last of this tutorial, you will adjust the lighting.

For information about the camera, see the Camera page.
Set basemap
In this tutorial, you will select a basemap from a preset option.
-
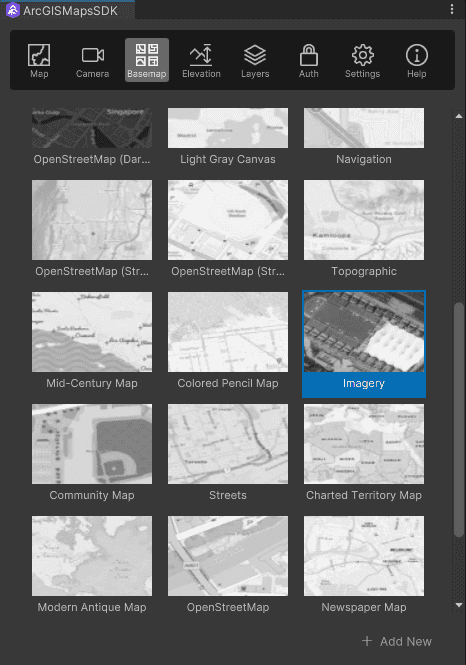
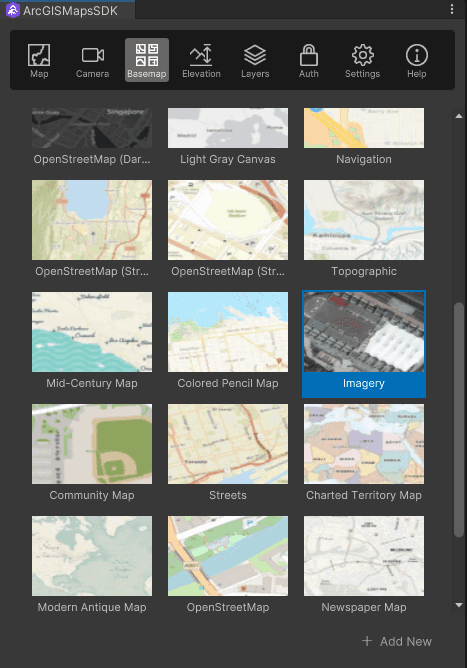
Click the Basemap tab and display the panel content.
-
Select the Imagery basemap from the preset basemap gallery.
This is the result of setting up the basemap to Imagery from the preset.
Set the API key
The preset basemap that is selected in the previous section requires an API key.
-
Go to your developer dashboard to get your API key.
-
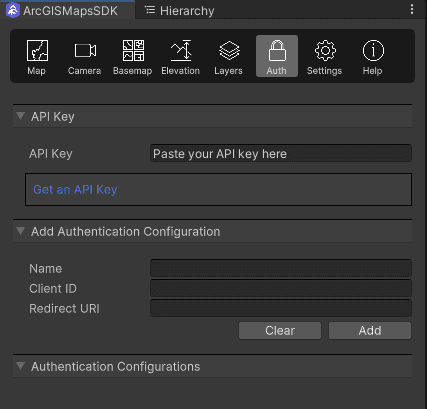
Click the Auth tab to display the panel content.
-
Set the API key in the API Key section.
Make sure your API key is in the field where you see Paste your API key here in this screenshot. You can find the information about how to get API keys by clicking on Get an API Key in the UI.
Another way to set up a global API key for multiple scenes in your Unity project is through the project settings. For more information about the API key, refer to the API keys section.
After switching back to the Basemap tab, the previously grayed-out basemap icons should now be enabled, indicating that the API key successfully registered.
At this point, you should see the map data with the local extent. If you cannot see anything in the Scene view, open the Hierarchy window and double-click the ArcGIS Camera to move the editor camera position, then adjust the angle to see the map.
Set elevation
In this tutorial, you will use the default elevation to define the terrain.
-
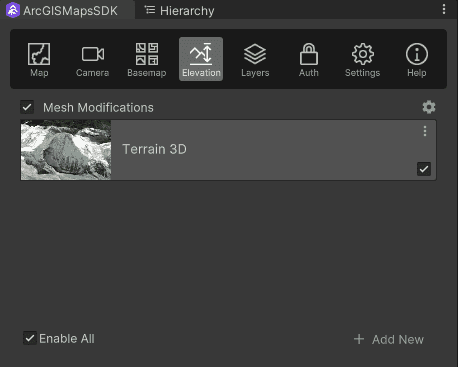
Click the Elevation tab and display the panel content.
-
Make sure Terrain 3D is selected and the Enable All checkbox is checked.
This is the result of the elevation panel.
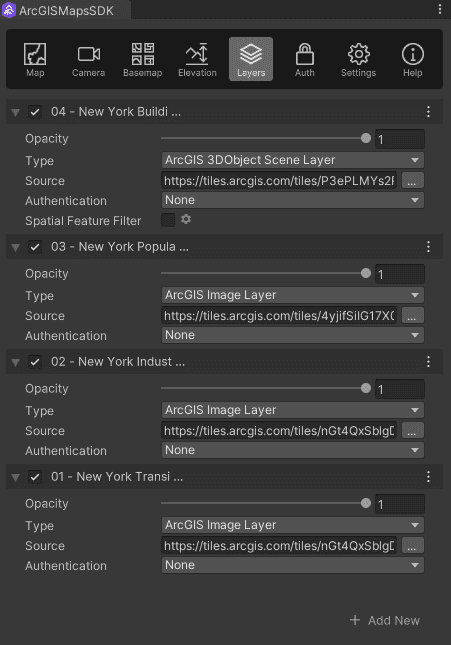
Add data layers
You will add operational data from ArcGIS Online.
-
ArcGIS Online item: UrbanObservatory_NYC_TransitFrequency
- Layer name:
01 - New York Transit Frequency - Type:
ArcGIS Image Layer - Online service URL (source):
Use dark colors for code blocks Copy https://tiles.arcgis.com/tiles/nGt4QxSblgDfeJn9/arcgis/rest/services/UrbanObservatory_NYC_TransitFrequency/MapServer- Opacity:
0.9
- Layer name:
-
ArcGIS Online item: New_York_Industrial
- Layer name:
02 - New York Industrial Areas - Type:
ArcGIS Image Layer - Online service URL (source):
Use dark colors for code blocks Copy https://tiles.arcgis.com/tiles/nGt4QxSblgDfeJn9/arcgis/rest/services/New_York_Industrial/MapServer- Opacity:
0.6
- Layer name:
-
ArcGIS Online item: NewYorkCity_PopDensity
- Layer name:
03 - New York Population Density - Type:
ArcGIS Image Layer - Online service URL (source):
Use dark colors for code blocks Copy https://tiles.arcgis.com/tiles/4yjifSiIG17X0gW4/arcgis/rest/services/NewYorkCity_PopDensity/MapServer- Opacity:
1.0
- Layer name:
-
ArcGIS Online item: New York, USA Buildings
- Layer name:
04 - New York Buildings - Type:
ArcGIS 3D Object Scene Layer - Online service URL (source):
Use dark colors for code blocks Copy https://tiles.arcgis.com/tiles/P3ePLMYs2RVChkJx/arcgis/rest/services/Buildings_NewYork_17/SceneServer- Opacity:
1.0
- Layer name:
Follow these steps to add each layer.
-
Click the Layers tab.
-
Click the + Add New button located on the lower right to open an Add New Layer pop-up window.
-
Select a layer type from the Type drop-down list.
-
Enter the layer's online service URL in the Source field to add an image tile layer.
-
Type the layer name in the Name field.
-
Click the Add button to add the layer to your map. Once it is added, it will appear in the Layers section.
-
Move the Opacity slider or type an exact value in the Opacity field to set the layer opacity.
This is the result of the Layers panel.
Adjust sky and lighting
Unity provides a sky and lighting system. See the Sky and lighting page for more information. In this tutorial, you will adjust the settings for the game objects that were added by the template.
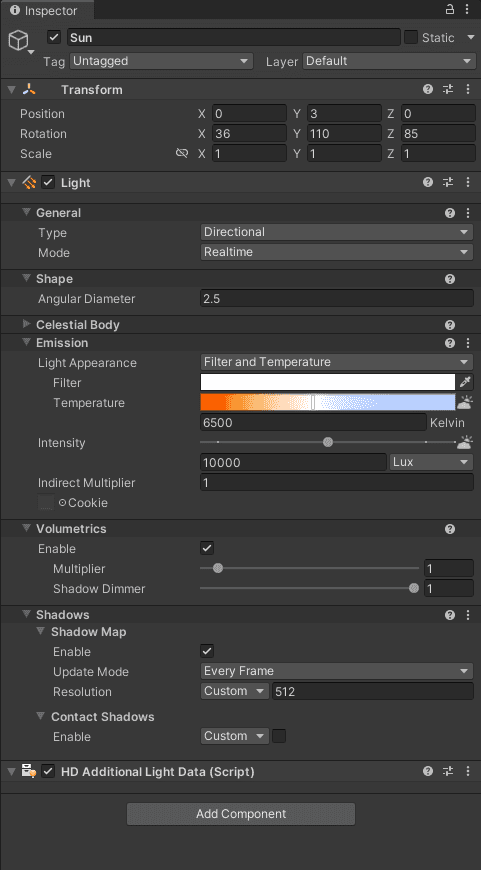
Adjust the Sun
-
In the Hierarchy window, click the Sun game object.
-
In the Inspector window, set the rotation to the following values in Transform section.
- X:
36 - Y:
110 - Z:
85
- X:
-
Open the Emission section and set the Intensity value to
10000.
This is the result of the Sun game object.
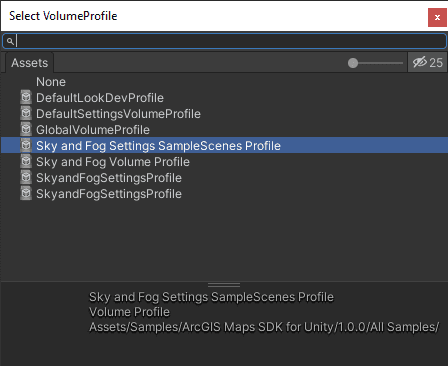
Adjust the Sky and Fog Volume
-
Click the Sky and Fog Volume in the Hierarchy window.
-
ArcGIS Maps SDK for Unity has a sample profile for Sky and Fog volume for HDRP. click the icon next to the Profile name in the Inspector window Volume section.
-
Select the Sky and Fog Settings SampleScenes Profile in the pop-up window.
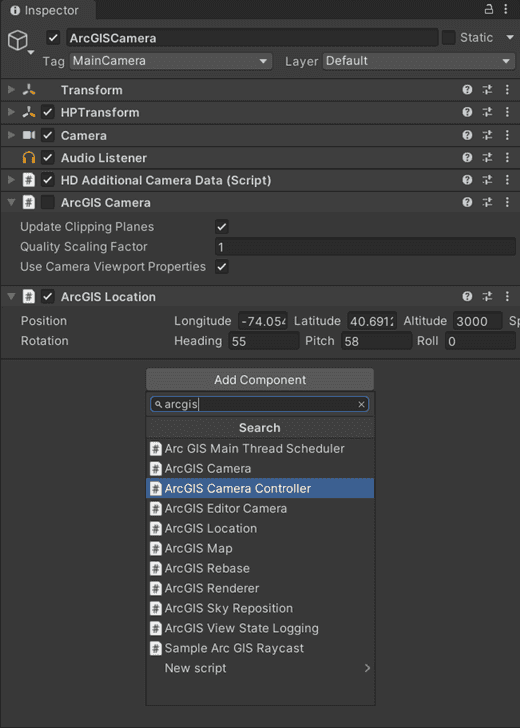
Attach a camera controller
During the editor time, you have the Scene view camera to navigate around in the viewport when the Editor mode is enabled. For the play mode, you must attach a camera controller to explore your scene. In this tutorial, you will attach a controller from the ArcGIS Maps SDK for Unity's sample assets.
-
Click the ArcGISCamera in the the Hierarchy window.
-
In the Inspector window, click the Add Component button.
-
Search for the ArcGIS Camera Controller and attach it to the ArcGISCamera game object.
You have successfully configured a map with the Map Creator UI. Click the Play icon on the Toolbar and see your map in the Game view.
Use the WASD keys to move left/right/forward/backward. Use the left mouse button to pan around the scene, the right button to orbit and the scroll wheel to zoom in or out.