Learn how to display a Scene with a basemap layer and terrain provider using CesiumJS.
You can display a map with Cesium by using an ArcGIS map tile service. The ArcGIS: map tile layer contains sattelite imagery with global coverage that can be used in conjunction with world terrain.
In this tutorial, you display a scene of the Santa Monica Mountains using the ArcGIS: base layer and Cesium world terrain.
This code is used as the starting point for the other CesiumJS tutorials.
Prerequisites
You need an ArcGIS Developer or ArcGIS Online account to access the developer dashboard and create an API key.
Steps
Create a new pen
- Go to CodePen to create a new pen for your application.
Add HTML
Define an HTML page to create a scene that is the full width and height of the browser window.
-
In CodePen > HTML, add HTML and CSS to create a page with a
divelement calledcesium.Container This HTML will create a page with a
divthat is the full width and height. Thecesiumdiv is the element used to display the scene.Container The
<!DOCTYPE html>tag is not required in CodePen. If you are using a different editor or running the page on a local server, be sure to add this tag to the top of your HTML page.Use dark colors for code blocks <!DOCTYPE html> <html lang="en"> <head> <meta charset="utf-8" /> <title>CesiumJS: Display a Scene</title> <style> html, body, #cesiumContainer { margin: 0; padding: 0; width: 100%; height: 100%; } </style> </head> <body> <div id="cesiumContainer"></div> </body> </html>
Add script references
-
In the
<head>tag, add CDN references to the CesiumJS JavaScript and CSS libraries.Use dark colors for code blocks <meta charset="utf-8" /> <title>CesiumJS: Display a Scene</title> <script src="https://cesium.com/downloads/cesiumjs/releases/1.114/Build/Cesium/Cesium.js"></script> <link href="https://cesium.com/downloads/cesiumjs/releases/1.114/Build/Cesium/Widgets/widgets.css" rel="stylesheet">
Get a Cesium ion access token
All Cesium applications must use an access token provided through Cesium ion. This token allows you to access assets such as Cesium World Terrain in your application.
-
Go to your Cesium ion dashboard to generate an access token. Copy the key to your clipboard.
-
In the
<body>tag of your code, create a<script>element.Use dark colors for code blocks <body> <div id="cesiumContainer"></div> <script> const arcGisImagery = Cesium.ArcGisMapServerImageryProvider.fromBasemapType(Cesium.ArcGisBaseMapType.SATELLITE); </script> -
Create a
cesiumvariable and replaceAccess Token YOUR_with the access token you copied from the Cesium ion dashboard.CESIUM_ ACCESS_ TOKEN Use dark colors for code blocks <script> const cesiumAccessToken = "YOUR_CESIUM_ACCESS_TOKEN"; const arcGisImagery = Cesium.ArcGisMapServerImageryProvider.fromBasemapType(Cesium.ArcGisBaseMapType.SATELLITE); </script> -
Configure
Cesium.Ion.defaultwith the Cesium access token to validate the application.Access Token Use dark colors for code blocks <script> const cesiumAccessToken = "YOUR_CESIUM_ACCESS_TOKEN"; Cesium.Ion.defaultAccessToken = cesiumAccessToken; const arcGisImagery = Cesium.ArcGisMapServerImageryProvider.fromBasemapType(Cesium.ArcGisBaseMapType.SATELLITE); </script>
Get an ArcGIS API key
To access location services, you need an API key or OAuth 2.0 access token. To learn how to create and scope your key, visit the Create an API key tutorial.
-
Go to your developer dashboard to get an API key. Copy the key to your clipboard.
-
Create an
apivariable to store your API key. ReplaceKey YOUR_with the API key you previously copied from the developer dashboard. You will need to use this API key each time you access an authenticated ArcGIS service.API_ KEY Use dark colors for code blocks <script> const apiKey = "YOUR_API_KEY"; const cesiumAccessToken = "YOUR_CESIUM_ACCESS_TOKEN"; Cesium.Ion.defaultAccessToken = cesiumAccessToken; const arcGisImagery = Cesium.ArcGisMapServerImageryProvider.fromBasemapType(Cesium.ArcGisBaseMapType.SATELLITE); </script> -
Set the
defaultincluded with Cesium to authenticate requests to the basemap styles service.Access Token Use dark colors for code blocks <script> const apiKey = "YOUR_API_KEY"; Cesium.ArcGisMapService.defaultAccessToken = apiKey; const cesiumAccessToken = "YOUR_CESIUM_ACCESS_TOKEN"; Cesium.Ion.defaultAccessToken = cesiumAccessToken; const arcGisImagery = Cesium.ArcGisMapServerImageryProvider.fromBasemapType(Cesium.ArcGisBaseMapType.SATELLITE); </script>
Create a scene
Create a Viewer that accesses the World Imagery base layer. Use the ArcG class to make an authenticated request to the basemap styles service.
-
Create a new
ArcGusing thei s M a p Server Imagery Provider SATTELITEbasemap type. This enumeration accesses theArcGIS:map tile service.World Imagery Use dark colors for code blocks <script> const apiKey = "YOUR_API_KEY"; Cesium.ArcGisMapService.defaultAccessToken = apiKey; const cesiumAccessToken = "YOUR_CESIUM_ACCESS_TOKEN"; Cesium.Ion.defaultAccessToken = cesiumAccessToken; const arcGisImagery = Cesium.ArcGisMapServerImageryProvider.fromBasemapType(Cesium.ArcGisBaseMapType.SATELLITE); </script> -
Create a
Viewerattached to thecesiumelement. Create a newContainer Imageryfrom your imagery provider and set it as theLayer baseproperty.Layer Use dark colors for code blocks const arcGisImagery = Cesium.ArcGisMapServerImageryProvider.fromBasemapType(Cesium.ArcGisBaseMapType.SATELLITE); const viewer = new Cesium.Viewer("cesiumContainer", { baseLayer: Cesium.ImageryLayer.fromProviderAsync(arcGisImagery), }); -
Set optional additional parameters to configure the viewer appearance. Disable the timeline, animation, and geocoder controls. Add Cesium World Terrain.
Use dark colors for code blocks const viewer = new Cesium.Viewer("cesiumContainer", { baseLayer: Cesium.ImageryLayer.fromProviderAsync(arcGisImagery), terrain: Cesium.Terrain.fromWorldTerrain(), timeline: false, animation: false, geocoder:false }); -
Use
viewer.camera.setto set the zoom and extent of the scene to the Santa Monica Mountains.View Use dark colors for code blocks terrain: Cesium.Terrain.fromWorldTerrain(), timeline: false, animation: false, geocoder:false }); viewer.camera.setView({ destination : Cesium.Cartesian3.fromDegrees(-118.705, 33.957, 35000), orientation : { heading : Cesium.Math.toRadians(0.0), pitch : Cesium.Math.toRadians(-70.0), } });
Run the app
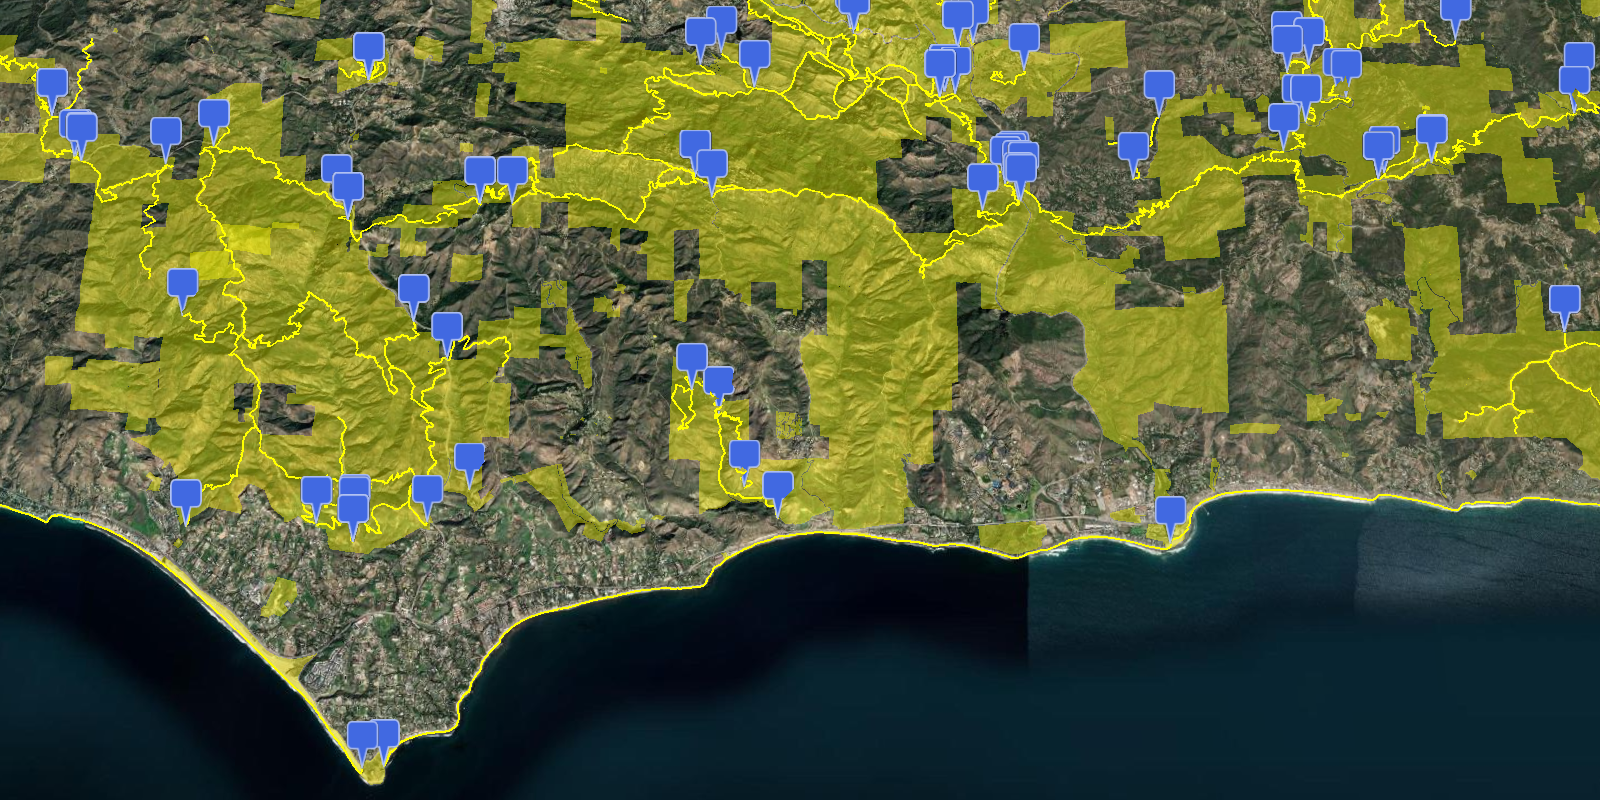
In CodePen, run your code to display the map.
The map should display the World Imagery basemap layer for an area of the Santa Monica Mountains in California.
What's next?
Learn how to use additional ArcGIS location services in these tutorials: