Learn how to create and display a map with a basemap layer.
A map contains layers of geographic data. A map contains a basemap layer and, optionally, one or more data layers. You can display a specific area of a map by using a map view and setting the location and zoom level.
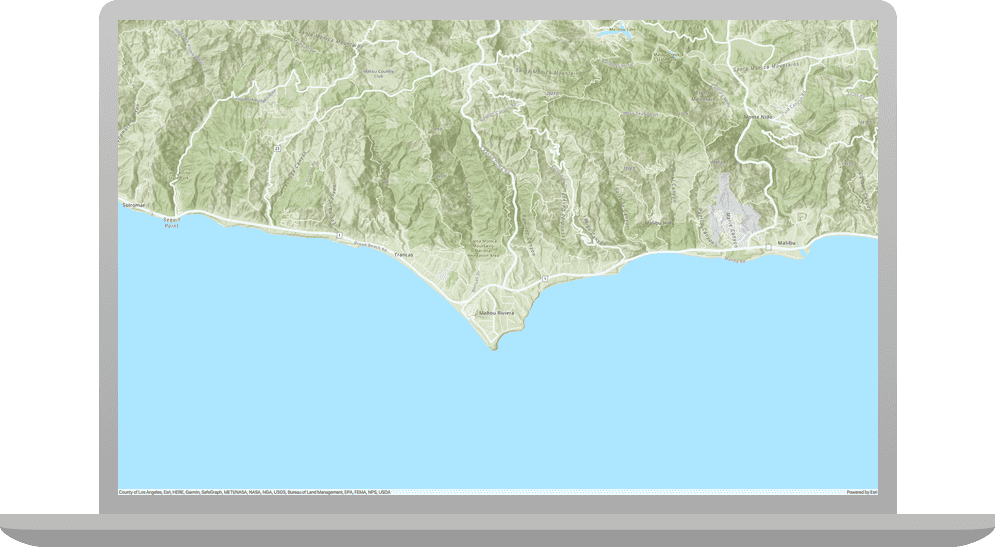
In this tutorial, you create and display a map of the Santa Monica Mountains in California using the topographic basemap layer.
The map and code will be used as the starting point for other 2D tutorials.
Prerequisites
The following are required for this tutorial:
- An ArcGIS account to access your API keys. If you don't have an account, sign up for free.
- Confirm that your system meets the minimum system requirements.
- An IDE for Java.
Steps
Create a new Java project with Gradle
-
Open IntelliJ IDEA.
-
From the Welcome to IntelliJ IDEA screen, click the New Project button. (If you're already inside a project, click File > New > Project in the menu bar.)
-
In the New Project window, do the following:
-
Enter a name for your new project and choose a location to save it. Your app name can contain only Latin characters, digits,
_,-and:. -
Deselect Create Git repository, if necessary
-
Select Java as your programming language, if necessary
-
Select Gradle as your build system
-
Select a supported JDK
-
Select Groovy as your Gradle build language (i.e. DSL), if necessary
-
Check the Add sample code box, if necessary
-
Click Advanced Settings to expand the drop-down. Set the Gradle distriution to Wrapper and check the Auto-select box for the Gradle version. Optionally, you can enable or disable the ability to use these settings for future projects. For GroupId enter com.example.app. You can leave the default for ArtifactId.
-
Click Create to build your new project.
-
-
In the Project tool window, replace the contents of the build.gradle file with the following script to configure your app and reference the API. Make sure that you load the gradle changes after modifying build.gradle.
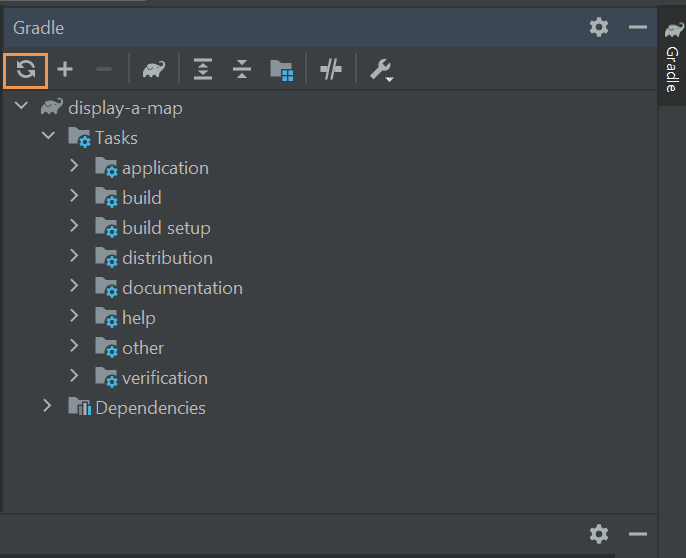
To load the Gradle changes, in the Gradle window, click the Reload All Gradle Projects icon in the upper left corner.
 build.gradle
Use dark colors for code blocks Copy plugins { id 'application' id 'org.openjfx.javafxplugin' version '0.1.0' id 'idea' } idea { module { downloadJavadoc = true } } ext { arcgisVersion = '200.4.0' } repositories { mavenCentral() maven { url 'https://esri.jfrog.io/artifactory/arcgis' } } configurations { natives } dependencies { implementation "com.esri.arcgisruntime:arcgis-java:$arcgisVersion" natives "com.esri.arcgisruntime:arcgis-java-jnilibs:$arcgisVersion" natives "com.esri.arcgisruntime:arcgis-java-resources:$arcgisVersion" implementation 'org.slf4j:slf4j-nop:2.0.12' } javafx { version = "21.0.2" modules = [ 'javafx.controls', 'javafx.graphics', 'javafx.fxml', 'javafx.web', 'javafx.media' ] } application { mainModule = "com.example.app" mainClass = "com.example.app.App" } task copyNatives(type: Copy) { description = "Copies the arcgis native libraries into the .arcgis directory for development." group = "build" configurations.natives.asFileTree.each { from(zipTree(it)) } into "${System.properties.getProperty("user.home")}/.arcgis/$arcgisVersion" } run { dependsOn copyNatives } wrapper { gradleVersion = '8.6' } -
Click View > Tool Windows > Gradle to open the Gradle view, then in Tasks > build, double-click copyNatives. This unpacks the native library dependencies to $USER_HOME/.arcgis.
You can also run Gradle tasks via the command line. Consult Gradle's documentation to learn how this is done.
-
In the Project tool window, under your package com.example.app, right-click Main and click Refactor > Rename....
-
Rename the Java class to App and click Refactor.
Add a UI for the map view
A map view is a UI component that displays a map. It also handles user interactions with the map. Use JavaFX to add a map view to the UI.
-
In App.java, define a class named
Appthat extends the JavaFXApplicationclass.-
Add a private member variable with type
MapView.The
mapmember variable allows you to easily reference yourView MapViewfrom other parts of the application. -
Inside the
main()method, replace the print statement with a call toApplication.launch(args).This code calls the static method
launch()of the JavaFX classApplication, which creates an instance of yourAppclass on the JavaFX Application Thread and then calls thestart()method. For a description of the JavaFX life-cycle, seeApplication. -
Override the
start()method, in which you configure the JavaFXStagewith a title and dimensions, and then show it.Note that the
start()method is abstract in the JavaFXApplicationclass and must be overridden in your application code. Thestart()method takes a single parameter of the JavaFX typeStage. -
Create a JavaFX
Stackand use it to create a JavaFXPane Scene. Then set thesceneon thestage.App.javaUse dark colors for code blocks Add line. Add line. Add line. Add line. Add line. Add line. Add line. Add line. Add line. Add line. Add line. Add line. Add line. Add line. Add line. Add line. Add line. Add line. Add line. Add line. Add line. Add line. Add line. Add line. public class App extends Application { private MapView mapView; public static void main(String[] args) { Application.launch(args); } @Override public void start(Stage stage) { // set the title and size of the stage and show it stage.setTitle("Display a map tutorial"); stage.setWidth(800); stage.setHeight(700); stage.show(); // create a JavaFX scene with a stack pane as the root node, and add it to the scene StackPane stackPane = new StackPane(); Scene scene = new Scene(stackPane); stage.setScene(scene); } }
-
-
Initialize your member variable,
map, and add it to the JavaFX UI.View App.javaUse dark colors for code blocks Add line. Add line. Add line. // create a JavaFX scene with a stack pane as the root node, and add it to the scene StackPane stackPane = new StackPane(); Scene scene = new Scene(stackPane); stage.setScene(scene); // create a map view to display the map and add it to the stack pane mapView = new MapView(); stackPane.getChildren().add(mapView);
Add a map
Use the map view to display a map centered on the Santa Monica Mountains in California. The map will contain a topographic basemap layer.
-
Create a new
ArcGISMapwith a topographic basemap style.App.javaUse dark colors for code blocks Add line. // create a map view to display the map and add it to the stack pane mapView = new MapView(); stackPane.getChildren().add(mapView); ArcGISMap map = new ArcGISMap(BasemapStyle.ARCGIS_TOPOGRAPHIC); -
To display the map in the map view, call the
MapView.setMap()method, passing the newly createdArcGISMapas a parameter.App.javaUse dark colors for code blocks Add line. Add line. ArcGISMap map = new ArcGISMap(BasemapStyle.ARCGIS_TOPOGRAPHIC); // set the map on the map view mapView.setMap(map); -
Center the map view at a specific point and scale on the Earth by setting a
Viewpoint(double,double,double)on themap.View Provide latitude and longitude coordinates and a scale value as parameters to a new
Viewpoint. Then set it on themapwithView setViewpoint().The
Viewpoint(double,double,double)constructor used in this tutorial takes a scale parameter. The scale value 144447.638572 is converted from zoom level 12. Zoom levels are often used as a shorthand for predetermined scale values in Web Mercator maps. Learn more in Zoom levels and scale.App.javaUse dark colors for code blocks Add line. ArcGISMap map = new ArcGISMap(BasemapStyle.ARCGIS_TOPOGRAPHIC); // set the map on the map view mapView.setMap(map); mapView.setViewpoint(new Viewpoint(34.02700, -118.80543, 144447.638572));
Set your API key
An API key is required to enable access to services, web maps, and web scenes hosted in ArcGIS Online.
If you haven't already, go to your developer dashboard to get your API key. For these tutorials, use your default API key. It is scoped to include all of the services demonstrated in the tutorials.
-
Set the API key property on the
ArcGISRuntimeEnvironmentwith your API key.
In the code below, replace YOUR_API_KEY with your actual API Key. The value is a string so surround it with double quotes.
@Override
public void start(Stage stage) {
// set the title and size of the stage and show it
stage.setTitle("Display a map tutorial");
stage.setWidth(800);
stage.setHeight(700);
stage.show();
// create a JavaFX scene with a stack pane as the root node, and add it to the scene
StackPane stackPane = new StackPane();
Scene scene = new Scene(stackPane);
stage.setScene(scene);
// Note: it is not best practice to store API keys in source code.
// The API key is referenced here for the convenience of this tutorial.
String yourApiKey = "YOUR_API_KEY";
ArcGISRuntimeEnvironment.setApiKey(yourApiKey);
Release API resources
To ensure that API resources used in the application are released when it is closed, override the JavaFX stop() method and call the dispose() method on the map:
/**
* Stops and releases all resources used in application.
*/
@Override
public void stop() {
if (mapView != null) {
mapView.dispose();
}
}
Modularize the app
A Java module adds a higher level of aggregation above packages. A module must provide a module descriptor that specifies the dependencies, the packages the module makes available to other modules, and more.
You will create the module descriptor for this project in a file named module-info.java.
-
In the Project tool window, under src/main, right-click the java folder, and click New > module-info.java.
-
Inside module-info.java replace the module name (i.e. highlighted text) with com.example.app.
-
In the body of the module descriptor, define the three required packages this application depends on:
com.esri.arcgisruntime,javafx.graphics, andorg.slf4j.nop. -
Export this project's module package to make it accessible to code in all other modules.
module com.example.app {
// require ArcGIS Runtime module
requires com.esri.arcgisruntime;
// requires JavaFX modules that the application uses
requires javafx.graphics;
// requires SLF4j module
requires org.slf4j.nop;
exports com.example.app;
}Run the app
Run the app. Ensure to run the app as a Gradle task and not as an application in your IDE. In the Gradle tool window, under Tasks > application, double-click run.
You should see a map with the topographic basemap layer centered on the Santa Monica Mountains in California. Click, drag, and scroll the mouse wheel on the map view to explore the map.
What's next?
Learn how to use additional API features, ArcGIS location services, and ArcGIS tools in these tutorials: