This sample demonstrates how multiple service interceptors interact with a hosted feature service. Each interceptor performs a unique task in the chain, separating the logic into manageable units. This sample uses three interceptors:
- Geocoding - fetches the address information based on user input location.
- System Integration - updates the attributes of existing features by integrating with an external system.
- Response Enrichment - intercepts the response for adding static values to specific fields when perform a query or edit operation.
Supported ArcGIS Enterprise SDK Versions
- 12.0 Windows/Linux
Configure the hosted feature service for this sample
Follow the steps below to create a hosted feature service using Portal for ArcGIS.
- Download the sample dataset from here.
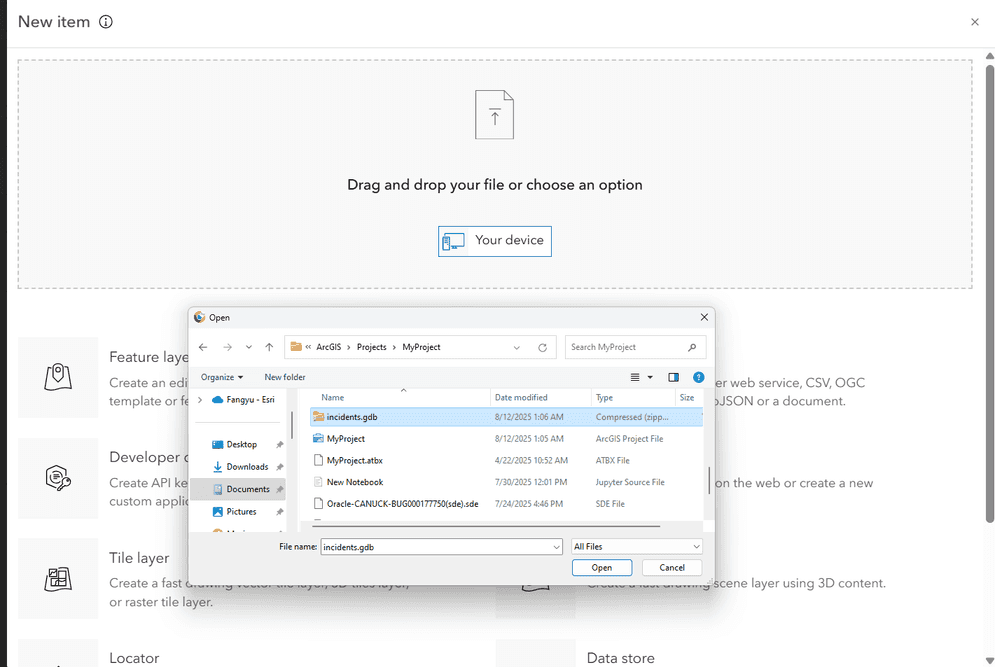
- In Portal for ArcGIS, go to Content > My Content and click the New item.
- Drag or upload
incidents.gdb(zipped) to the New item window.
- Under File type, select
File geodatabase. Under How would you like to add this file? selectAdd incidents.gdb.zip and create a hosted feature layer. Click the Next.
- Ensure the Title for the hosted feature service is
incidentsand click the Save. - Navigate to Content > My Content and click on the
incidentshosted feature layer to open the item page. Go to the Settings and click Feature layer (hosted). - Make sure to enable the editing capabilities for hosted feature service.

Alternatively, you can also create the editing-enabled hosted feature service using ArcGIS Pro.
Download the sample code
- The pre-built chaining sample is available here: Chaining Interceptors
Deploy the Interceptors
Deploying the interceptors is done in two parts: upload and register.
Upload and Register
After downloading the three interceptor samples, follow the steps below to deploy each of the three interceptor samples.
- Unzip the sample into a location of your choosing.
- Navigate to ArcGIS Server Administrator Directory and sign in as an administrator.
- Click uploads > upload.
- On the Upload Item page, click the Choose File and select the
<sample namefile located in the>.interceptor <sample namefolder in the directory where you unzipped the sample in Step 1 above.>/target - Click the Upload. Once the file is uploaded, you will be directed to the Uploaded Item page. Copy the Item ID.
- Navigate to Home > system > interceptors. The corresponding URL is:
<domain.>/ <server-web-adaptor >/admin/system/interceptors - Click register and paste the value of the Item ID obtained in Step 5 into the input field.
- Click the Register to complete the register.
Manage the Chaining Order
This sample applies business rules using three interceptors. The first interceptor automatically derives and inserts address information for new incidents feature based on the map location selected by the user. The second interceptor synchronizes business-critical fields, including incident ID, agency name, and other attributes, from external systems. The third interceptor enriches the service response with static values whenever query or edit operations are performed.
- Navigate to
<domain.>/ <server-web-adaptor >/admin/system/interceptors/chainingorder - In the Chaining Order input box, chaining order should match what is shown below:
[
{
"interceptorName": "Geocoding",
"chainingOrder": 1,
"urlPatterns": ["Hosted/incidents/FeatureServer"]
},
{
"interceptorName": "SystemIntegration",
"chainingOrder": 2,
"urlPatterns": ["Hosted/incidents/FeatureServer"]
},
{
"interceptorName": "ResponseEnrichment.interceptor",
"chainingOrder": 3,
"urlPatterns": ["Hosted/incidents/FeatureServer"]
}
]Verify the results
Once all three interceptors are registered, they are functioning immediately. Make sure you have updated the chaining order exactly as shown above.
To inspect the behavior of the Chaining sample, follow steps below.
- In Map Viewer, add the
incidentshosted feature service to a new map. - Before enabling the Chaining interceptors, ensure that the attributes
agency,agency,_name resolutionand_description lastare empty for existing features. You can verify this in Map Viewer._action _date 
- Open the Edit tool.
- Create a new incident by clicking the Add in the Edit pane. Choose the appropriate
complaint typeandlocation typeand leave the remaining information blank in the editing widget. - Click the newly created point to view the incident feature. You will observe that all fields, other than
complaintand_type location, are empty._type 
- Register the three interceptors with the steps listed in the above section Deploy the Interceptors.
- In the Map Viewer, refresh the map to ensure the latest version of the
incidentshosted feature service is loaded. - Create a new incident on the map by adding a new point feature. Choose the appropriate
complaint typeandlocation typeand leave the remaining information blank in the editing widget. - Leave edit mode by clicking the Edit tool again.
- Click on the newly created incident feature to see the information popup. Make sure the
address,street,_name city,zipcode,incident,_id agency,agency,_name resolutionand_description lastinformation is added._action _date 
- Click on other existing incident features to see if the
incident,_id agency,agency,_name resolutionand_description lastinformation is inserted to those features as well._action _date 