This sample demonstrates how to intercept the response of query operation of a feature service. The response format can be PBF or JSON. This response enrichment interceptor detects the outgoing response for query operation, intercepts it to add sample values for select fields, and sends a modified response to client.
Supported ArcGIS Enterprise SDK Versions
- 11.5 Closed Beta; Windows/Linux
Configure the hosted feature service for this sample
Follow the steps below to create a hosted feature service using Portal for ArcGIS.
- Download the sample dataset from here.
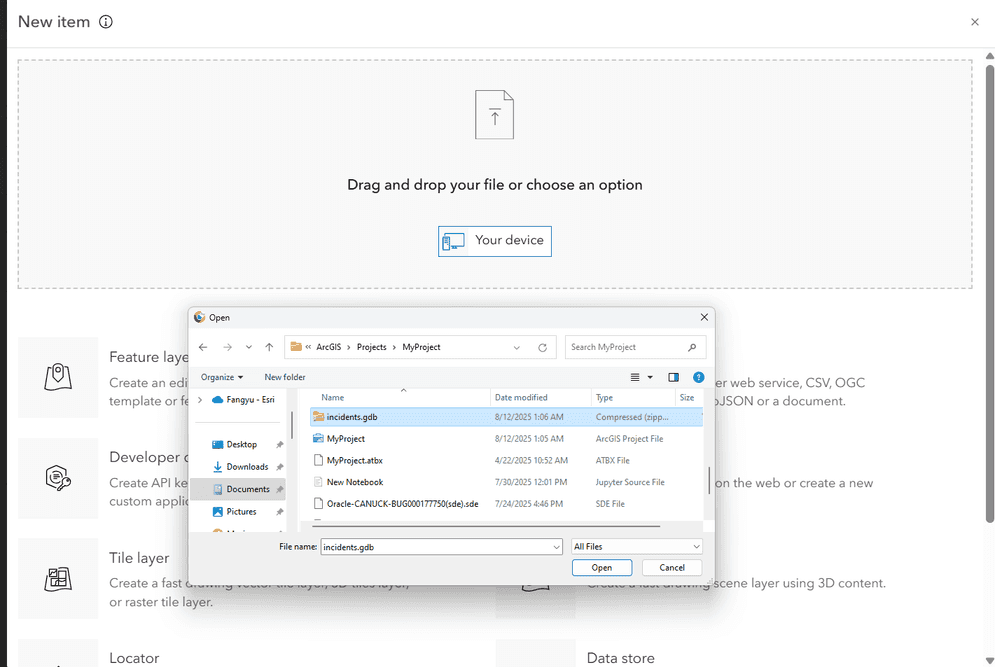
- In Portal for ArcGIS, go to Content > My Content and click the New item button.
- Drag or upload
incidents.gdb(zipped) to the New item window.
- Under File type, select File geodatabase. Under How would you like to add this file?, select "Add incidents.gdb.zip and create a hosted feature layer". Click the Next button.

- Ensure the Title for the hosted feature service is “incidents” and click the Save button.

- Navigate to Content > My Content and ensure that the incidents hosted feature layer item is available.
- Open the incidents hosted feature layer in ArcGIS Map Viewer and select any of the point features.
- Inspect the popup and note that the fields
agency,agency,_name status,resolution, and_description lastdo not have values._action _date
Download the sample code
The pre-built audit log interceptor sample is available here: Response enrichment interceptor
Deploy the Interceptor
Deploying the interceptor is done in two parts: uploading and registering.
Upload and Register
After downloading the interceptor sample, follow the steps below to deploy the interceptor.
- Unzip the Response enrichment interceptor sample into a directory of your choosing.
- In a web browser, navigate to the ArcGIS Server Administrator Directory and sign in as an administrator.
- Click uploads > upload.
- On the Upload Item page, click the Choose File button and select the
Responsefile located in theEnrichment.interceptor Responsefolder in the directory where you unzipped the sample in Step 1 above.Enrichment/target - Click the Upload button. Once the file is uploaded, you will be directed to the Uploaded Item page. Copy the Item ID.
- Browse to Home > system.
- If you do not see a navigation link to interceptors on the page, append
/interceptorsto the URL in the browser, i.e.,<domain.>/ <server-web-adaptor >/admin/system/interceptors - Click the register link and paste the value of the Item ID from Step 5 above into the input box. Click the Register button.
Verify the result
Once the interceptor is registered, it is functioning immediately. To inspect the behavior of the response enrichment interceptor, follow the steps below.
- Add the incidents hosted feature service to a map in ArcGIS Map Viewer.
- Select any of the records on the map to see the information popup for that feature.
- Note that the following fields and their values are updated as shown below. The value for
lastwill reflect the current timestamp._action _date Field Value agency NYPD agency_name New York City Police Department status In Progress resolution_description This is a test resolution description last_action_date 2025-08-18T11:45:59-07:00 - Repeat clicking on any other records to ensure the results are the same.