- 🔬 Data Science
- 🥠 Deep Learning and Object classification
Introduction
We have generally applied object detection on images taken looking straight down at the ground, like traditional satellite imagery, predictions from which can be visualized on a map and incorporated into your GIS. Other imagery, however, is more difficult to visualize and incorporate into your GIS. Such non-nadir oriented imagery includes oblique, bubble, 360-degree, street-side, and inspection imagery, among others. Through this sample, we will demonstrate the utility of an object detection model for detecting objects in an oriented imagery using ArcGIS API for Python.
The arcgis.learn module supports number of object detection models such as SingleShotDetector, RetinaNet, FasterRCNN, YoloV3 and even more. In the notebook, we will be using YoloV3 model for detecting traffic lights in the oriented imagery. The biggest advantage of YOLOv3 in arcgis.learn is that it comes preloaded with weights pretrained on the COCO dataset. This makes it ready-to-use for the 80 common objects (car, truck, person, etc.) that are part of the COCO dataset. Using this model, we will try to detect traffic light in the oriented imagery.
Necessary imports
import os, json, cv2
from math import *
import numpy as np
import itertools
import pandas as pd
import zipfile
from pathlib import Path
import arcgis, arcpy
from arcgis import GIS
from arcgis.geometry import Point
from arcgis.learn import YOLOv3Download & setup data
We will need oriented imagery and oriented imagery meta data file so that we can use that for inferencing and plotting the points. We have sample images uploaded on the ArcGIS Online org. We will download those items below and use those for our workflow.
gis = GIS(
    "home"
)
# Sample data can be directly downloded by clickng on the link below
oriented_imagery_data = gis.content.get("d606e6827c8746e383de96d8718be9a8")
oriented_imagery_data
filepath = oriented_imagery_data.download(save_path = os.getcwd(), file_name=oriented_imagery_data.name)with zipfile.ZipFile(filepath, 'r') as zip_ref:
zip_ref.extractall(Path(filepath).parent)After the extraction of the zip file, we will set the path of the items which are there in the zip file which we will use in this workflow.
data_path: Folder containing all the oriented imagery.image_meta_data: File containing meta data for all the oriented images in the data_path.depth_image_path: Folder containing all the relative estimated depth image of oriented imagery.
data_path = Path(os.path.join(os.path.splitext(filepath)[0]), "street_view_data")
image_meta_data = Path(os.path.join(os.path.splitext(filepath)[0]), "oriented_imagery_meta_data.csv")
depth_image_path = Path(os.path.join(os.path.splitext(filepath)[0]), "saved_depth_image")
image_path_list = [os.path.join(data_path, image) for image in os.listdir(data_path)]Model training
Since we will be using the pretrained YOLOv3 model so we will pass pretrained_backbone as True. In this way while initializing the YOLOv3 model the pre trained weights of the YOLOv3 model with COCO dataset will be downloaded. We will later be using these weights to detect traffic lights.
yolo = YOLOv3(pretrained_backbone=True)Model inferencing
Once we have the model loaded and ready for inferencing, we will be create a function named traffic_light_finder that will take oriented image as input and will return 2 things.
- Json containing traffic lights coordinates
- Traffic lights annotated image
We will save all the traffic lights annotated image into a folder named traffic_light_marked and save all the annotations in a combined json file on the disk.
def traffic_light_finder(oriented_image_path):
    flag = 0
    coordlist = []
    temp_list = {}
    out = yolo.predict(oriented_image_path, threshold=0.5, batch_size = 4) # Depending upon your GPU capability, batch_size number can be changed.
    test_img = cv2.imread(oriented_image_path)
    if len(out[0]) == 0:
        temp_list["object"] = False
    else:
        for index, (value, label, confidence) in enumerate(zip(out[0], out[1], out[2])):
            if label == "traffic light":
                flag = 1
                coordlist.append(
                    [int(value[0]), int(value[1]), int(value[2]), int(value[3])]
                )
                test_img = cv2.rectangle(
                    test_img,
                    (int(value[0]), int(value[1]), int(value[2]), int(value[3])),
                    (0, 0, 255),
                    10,
                )
                textvalue = label + "_" + str(confidence)
                cv2.putText(
                    test_img,
                    textvalue,
                    (int(value[0]), int(value[1]) - 10),
                    cv2.FONT_HERSHEY_SIMPLEX,
                    1.5,
                    (0, 0, 255),
                    2,
                )
        if flag == 1:
            temp_list["object"] = True
            temp_list["coords"] = coordlist
            temp_list["assetname"] = "traffic light"
    return temp_list, test_img
Here we will create a folder named traffic_light_marked which will contain all the images with traffic lights detected on them. We can use these images to check the output of the model. Later we can use them for our use case.
marked_image_saved_folder = os.path.join(os.getcwd(), "traffic_light_marked")
os.makedirs(marked_image_saved_folder, exist_ok=True)
print("Path created for saving the images with traffic light detected on them : - ", marked_image_saved_folder)
Path created for saving the images with traffic light detected on them : - C:\Users\roh12004\Documents\arcgis-python-api\samples\04_gis_analysts_data_scientists\traffic_light_marked
detections = {}
for e, image in enumerate(image_path_list):
    try:
        val_dict, out_image = traffic_light_finder(image)
        if bool(val_dict):
            detections[os.path.basename(image)] = val_dict
            cv2.imwrite(os.path.join(marked_image_saved_folder, os.path.basename(image)), out_image)
    except Exception as e:
        print(e)
Here we are also saving the coordinates of the traffic lights in a json file. We can use these coordinates to create a webmap or in any of the other use cases.
with open("traffic_light_data_sample.json", "w") as f:
    json.dump(detections, f)
Below are some of the images showcasing how the pretrained YOLOv3 model performs on the oriented imagery.

Relative depth estimation model
We now have run the YOLOv3 pretrained model on all the oriented images and got the coordinates of detected traffic lights in them.
We will now calculate the relative estimated depth of the objects in the oriented imagery. For that we have a pretrainded model available from the Open-source Bts-PyTorch based on From Big to Small: Multi-Scale Local Planar Guidance for Monocular Depth Estimation.
We have packagaed the model as a dlpk file which we can use with ArcGIS Pro to calculate the relative estimated depth of the objects in the oriented imagery.
For this sample notebook, we have already provided the output of this model on all the sample images in the folder saved_depth_image with the sample data downloded in the Oriented Imagery Sample Data.
depth_model_item = gis.content.get("c19f7ce733cd4811b5609566fa4cf5bb")
depth_model_item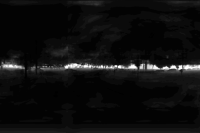
Once we have downloaded the dlpk file we will use it for calculating the estimated depth of the oriented images.

with arcpy.EnvManager(processorType='cpu'):
    out_classified_raster = \
        arcpy.ia.ClassifyPixelsUsingDeepLearning(image_path_list[0],
            r"D:\sample\relative_depth_estimation.dlpk", None,
            'PROCESS_AS_MOSAICKED_IMAGE', None)
    out_classified_raster.save(r"D:\sample\samplename.png")
Below is the image showcasing how the pretrained relative depth estimation model performs on the oriented imagery.

Extract location of traffic lights on map
We now have run the YOLOv3 pretrained model on all the oriented images and got the coordinates of detected traffic lights in them. We now also have the relative estimated depth of objects in oriented imagery.
We also have an oriented image meta data file in csv format (downloaded above) which contains the meta data of the oriented imagery like the coordinate at which the image was taken, AvgHtAG, CamHeading, CamOri, HFOV, VFOV etc. You can understand more about these data points from this document.
Using these data, now we will now try to find the exact location of the traffic lights on the map.
camera_df = pd.read_csv(image_meta_data)
camera_df.head()| Unnamed: 0 | AcquisitionDate | AvgHtAG | CamHeading | CamOri | CamPitch | CamRoll | FarDist | HFOV | Image | Name | NearDist | OBJECTID | OIType | SHAPE | VFOV | |
|---|---|---|---|---|---|---|---|---|---|---|---|---|---|---|---|---|
| 0 | 0 | NaN | 2.5 | 320.86540 | 3|3346||582715.827|6063651.438|111.212|-38.134... | 88.64669 | -1.58360 | 50.0 | 360.0 | https://orientedimagerysamples.s3.amazonaws.co... | pano_000050_000371 | 1.0 | 26716 | B | {'x': 2814531.6957999994, 'y': 7304332.8588000... | 180.0 |
| 1 | 1 | NaN | 2.5 | 358.02590 | 3|3346||582717.142|6063646.62|111.26|-0.97405|... | 88.97281 | -2.20641 | 50.0 | 360.0 | https://orientedimagerysamples.s3.amazonaws.co... | pano_000050_000372 | 1.0 | 26717 | B | {'x': 2814533.810899999, 'y': 7304324.47829999... | 180.0 |
| 2 | 2 | NaN | 2.5 | 6.04420 | 3|3346||582716.637|6063641.632|111.262|7.0442|... | 88.89201 | -3.11810 | 50.0 | 360.0 | https://orientedimagerysamples.s3.amazonaws.co... | pano_000050_000373 | 1.0 | 26718 | B | {'x': 2814532.786800001, 'y': 7304315.84749999... | 180.0 |
| 3 | 3 | NaN | 2.5 | 6.31495 | 3|3346||582716.017|6063636.642|111.284|7.31495... | 88.85389 | -3.14057 | 50.0 | 360.0 | https://orientedimagerysamples.s3.amazonaws.co... | pano_000050_000374 | 1.0 | 26719 | B | {'x': 2814531.5621999986, 'y': 7304307.2359, '... | 180.0 |
| 4 | 4 | NaN | 2.5 | 6.27997 | 3|3346||582715.377|6063631.674|111.302|7.27997... | 88.77918 | -3.34327 | 50.0 | 360.0 | https://orientedimagerysamples.s3.amazonaws.co... | pano_000050_000375 | 1.0 | 26720 | B | {'x': 2814530.293200001, 'y': 7304298.6629, 's... | 180.0 |
dets = list(detections.keys())def find_intersection(
x1,
y1,
x2,
y2,
x3,
y3,
x4,
y4,
):
px = ((x1 * y2 - y1 * x2) * (x3 - x4) - (x1 - x2) * (x3 * y4 - y3
* x4)) / ((x1 - x2) * (y3 - y4) - (y1 - y2) * (x3 - x4))
py = ((x1 * y2 - y1 * x2) * (y3 - y4) - (y1 - y2) * (x3 * y4 - y3
* x4)) / ((x1 - x2) * (y3 - y4) - (y1 - y2) * (x3 - x4))
return [px, py]
def process(input_list, threshold=(10, 10)):
combos = itertools.combinations(input_list, 2)
points_to_remove = [point2 for (point1, point2) in combos
if abs(point1[0] - point2[0]) <= threshold[0]
and abs(point1[1] - point2[1]) <= threshold[1]]
points_to_keep = [point for point in input_list if point
not in points_to_remove]
return points_to_keepOBJECT_HEIGHT_IN_WORLD = 0.9
(H, W, _) = cv2.imread(image_path_list[0]).shape
points = []
for i in range(len(dets) - 1): # check coordinates of two consecutive images
# load data of image1
img1 = (dets[i])[:-4]
cam1 = camera_df[camera_df['Name'] == img1].to_dict('records')[0]
bboxes1 = detections[img1 + '.jpg']['coords']
# load data of image2
img2 = (dets[i + 1])[:-4]
cam2 = camera_df[camera_df['Name'] == img2].to_dict('records')[0]
bboxes2 = detections[img2 + '.jpg']['coords']
for bbox1 in bboxes1: # loop over all the bbox in image1
if bbox1[3] > 50: # ignore small bboxes
# calculate the anngle of the object in image1
direction_angle1 = cam1['CamHeading'] + cam1['HFOV'] / 2. \
* (bbox1[0] + bbox1[2] / 2 - W / 2.) / (W / 2.)
angle_subtended_by_object1 = cam1['VFOV'] * bbox1[3] / H
# calculale the distance of object in image1 from center
dist1 = OBJECT_HEIGHT_IN_WORLD \
/ tan(radians(angle_subtended_by_object1))
dist1 = dist1 * pi
# find coordinate of object in image1
x12 = Point(eval(cam1['SHAPE']))['x'] + dist1 * cos(pi / 2
- radians(direction_angle1))
y12 = Point(eval(cam1['SHAPE']))['y'] + dist1 * sin(pi / 2
- radians(direction_angle1))
x11 = Point(eval(cam1['SHAPE']))['x']
y11 = Point(eval(cam1['SHAPE']))['y']
for bbox2 in bboxes2: # loop over all the bbox in image2
if bbox2[3] > 50: # ignore small bboxes
# calculate the anngle of the object in image2
direction_angle2 = cam2['CamHeading'] + cam2['HFOV'
] / 2. * (bbox2[0] + bbox2[2] / 2 - W / 2.) \
/ (W / 2.)
angle_subtended_by_object2 = cam2['VFOV'] \
* bbox2[3] / H
# calculale the distance of object in image2 from center
dist2 = OBJECT_HEIGHT_IN_WORLD \
/ tan(radians(angle_subtended_by_object2))
dist2 = dist2 * pi
# find coordinate of object in image2
x22 = Point(eval(cam2['SHAPE']))['x'] + dist2 \
* cos(pi / 2 - radians(direction_angle2))
y22 = Point(eval(cam2['SHAPE']))['y'] + dist2 \
* sin(pi / 2 - radians(direction_angle2))
x21 = Point(eval(cam2['SHAPE']))['x']
y21 = Point(eval(cam2['SHAPE']))['y']
# fin the point where coordinate from image1 and image2 intersect
pointval = find_intersection(
x11,
y11,
x12,
y12,
x21,
y21,
x22,
y22,
)
# load estimated depth image and select the mininum depth from the area where object is identified
(xmin, ymin, xmax, ymax) = (bbox2[0], bbox2[1],
bbox2[0] + bbox2[2], bbox2[1] + bbox2[3])
depth_image = \
cv2.imread(os.path.join(depth_image_path, img2
+ '.jpg'))
cropped_depth_image = depth_image[ymin:ymax, xmin:
xmax]
# take the estimated depth as distance from the center
DIST = np.min(cropped_depth_image[:, :, 0])
DIST = DIST + 7
# find coordinate of object using estimated depth as distance
x22_1 = Point(eval(cam2['SHAPE']))['x'] + DIST \
* cos(pi / 2 - radians(direction_angle2))
y22_1 = Point(eval(cam2['SHAPE']))['y'] + DIST \
* sin(pi / 2 - radians(direction_angle2))
point0 = np.array([float(pointval[0]),
float(pointval[1])])
point1 = np.array([float(x22_1), float(y22_1)])
# calculate euclidian distance between the point where coordinate from image1 and image2 intersect and point calcuated using estimated depth
dist_points = np.linalg.norm(point0 - point1)
# if distance is less than 5 then take the point
if dist_points < 5:
points.append(pointval)After the above mentioned process we have got some coordinates where there will be traffic lights but as one traffic light can be detected in multiple images therefore we will further cluster the data and take only one traffic light from a cluster.
In this way we will remove the redundant traffic light near a point.
print 'Number of traffic lights extracted - {}'.format(len(points))
outpoints = process(points)
print 'Number of traffic lights extracted after clustering and removing redundant traffic light - {}'.format(len(outpoints))
Number of traffic lights extracted - 302 Number of traffic lights extracted after clustering and removing redundant traffic light - 40
Results
We will load a map and draw the final selected coordinates on it. These coordinates are the places where there are traffic lights.
m = gis.map('Vilnius City')
m
m.center = {'x': 25.28489583988743, 'y': 54.70681816057357,
            'spatialReference': {'wkid': 4326, 'latestWkid': 4326}}
m.zoom = 19
m.basemap.basemap = 'satellite'
from arcgis.map.symbols import SimpleMarkerSymbolEsriSMS
for point in outpoints:
intpoint = {'x': point[0], 'y': point[1],
'spatialReference': {'wkid': 102100,
'latestWkid': 3857}}
m.content.draw(arcgis.geometry.Point(intpoint), symbol=SimpleMarkerSymbolEsriSMS(**{
'style': 'esriSMSSquare',
'color': [255,0,0],
'size': 8,
}))Conclusion
In this notebook, we have performed object detection on imagery taken at any angle naming oriented imagery. We use YoloV3 model with pretrained weights for detecting traffic lights and located these on the gis map using ArcGIS API for Python.