Learn how to create a dynamic imagery layer image service using your own imagery data in both ArcGIS Online

Dynamic imagery layers consists of one or more images that enable real-time processing for custom map visualizations. You can query, analyze, and visualize data on-the-fly in these layers using Map Viewer
In this tutorial, you will use data management tools to upload your imagery files and create an image service.
Prerequisites
-
Before you begin, you need an ArcGIS account
An ArcGIS account is an identity with a user type and set of privileges that can access specific ArcGIS products, tools, APIs, services, and resources. The main account types that can be used for development are an ArcGIS Location Platform account, ArcGIS Online account, and ArcGIS Enterprise account. ArcGIS Location Platform and ArcGIS Online accounts are also associated with a subscription. for ArcGIS OnlineArcGIS Online is a GIS mapping, analytics, data hosting, and content management software as a service (SaaS) product. It includes applications, tools, APIs, and location services for users and developers. It is subscription-based and requires an ArcGIS Online account. or ArcGIS EnterpriseArcGIS Enterprise is a GIS mapping, analytics, data hosting, and content management product that can be hosted on-premise or in a cloud infrastructure. It includes software, applications, tools, APIs, and services for users and developers. . -
Optional: Your own collection of raster data (e.g., satellite imagery, drone imagery, or aerial photography)
Steps
Download the data
For this step, you will use the North Carolina imagery data. The imagery was downloaded from the NOAA Data Access Viewer.
- In your web browser, go to the North Carolina Public Imagery item.
- Click Download to download the zip file locally.
- Unzip this file on your machine.
Sign in

In this step, you will sign in to your portal and create an Imagery layer item type.
- Sign in to your portal's organization
An organization a list of members from the same business, association, or entity who can sign in, access tools and applications, and collaborate with other members in a portal. All members have an ArcGIS account and are approved by an administrator to access the same portal. . - Click Content > New item > Imagery layer.
Get started

In this step, you will select Dynamic Imagery Layer to create a dynamic imagery layer from multiple image files. The Source image files wil be converted to Cloud Raster Format (CRF) when uploaded to your portal's organization.
- Choose Dynamic Imagery Layer.
- Click Next.
Configure the layer


In this step, you will create a mosaciked image for your image service. This will allow you to add multiple images to the service.
- Choose One Mosaicked Image.
- Click Next.
Define imagery


In this step, you will define a raster type and upload your imagery.
- Choose Raster Dataset.
- Click Browse to select the North Carolina images stored on your machine.
- Click Next.
Set item details
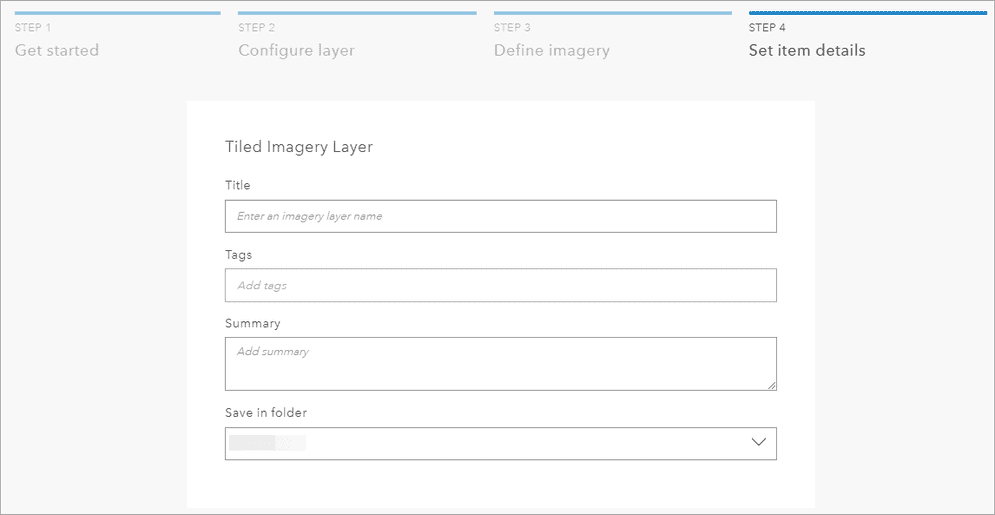

In this step, you will set the details of the image service.
- Set the item details for your image service:
- Title: Give your image service a descriptive title.
- Tags: Add relevant keywords for easy discovery.
- Summary: Provide a brief description of the imagery.
- Save in folder: Provide a location for your service.
Publish the Service
- Review all settings and configurations.
- Click Create to create your image service.
Once the dynamic imagery layer is created, you will be navigated to the item details page of the service allowing you to enter additional information. You can also click on the Map Viewer
Create tile imagery layer
As an optional step, you can create a tiled imagery layer from your newly created dynamic imagery layer image service.
- In the items detail page, click Publish > Tiled Imagery Layer.
- Enter the item details for the new tiled imagery layer.
- Click OK.
Once the new tiled imagery layer is created, you will be navigated to the item details page of the service allowing you to enter additional information.

