Note: Sign in to access the data in this sample. username password
Learn more about utility networks by referring to the Utility Network Guide.
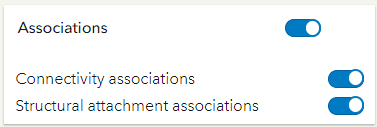
This sample demonstrates how to bring in the UtilityNetworkAssociations widget to view associations in a WebMap published with a utility network. The widget displays connectivity and structural attachment associations from the utility network on the map.
Getting started
First, bring in a Web with a utility network.
// Initialize the WebMap and pass in the webmap id
const webmap = new WebMap({
portalItem: {
// autocasts as new PortalItem()
id: "471eb0bf37074b1fbb972b1da70fb310", // webmap id
},
});When initializing the webmap, the user will need to set the URL to the portal where the webmap is hosted. The default portal url is "https. To do this, the esri/config class needs to be imported, and its portal set. The following code snippet illustrates this workflow.
const [WebMap, MapView, UtilityNetworkAssociations, esriConfig] = await $arcgis.import([
"@arcgis/core/WebMap.js",
"@arcgis/core/views/MapView.js",
"@arcgis/core/widgets/UtilityNetworkAssociations.js",
"@arcgis/core/config.js",
]);
// Set the hostname to the on-premise portal
esriConfig.portalUrl = "https://myHostName.domainName.com/webadaptorName";
const webmap = new WebMap({
portalItem: { // autocasts as new PortalItem()
id: "471eb0bf37074b1fbb972b1da70fb310" // webmap id
}
});
...
});Next, load the UtilityNetwork. Once the utility network loads, assign it to the Utility property.
await webMap.load();
// Check if webMap contains utility networks.
if (webMap.utilityNetworks.length > 0) {
// Assigns the utility network at index 0 to utilityNetwork.
utilityNetwork = webMap.utilityNetworks.getItemAt(0);
// load the UtilityNetwork instance.
await utilityNetwork.load();
// Initialize the UtilityNetworkAssociations widget
const unAssociations = new UtilityNetworkAssociations({
view: view,
utilityNetwork: utilityNetwork,
});
// Add the widget to the view
view.ui.add(unAssociations, "top-right");
}Auto-refresh is enabled by default with the auto property.
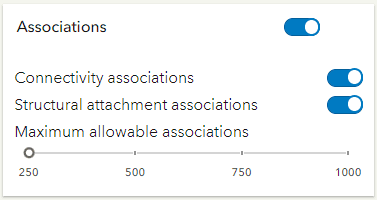
The following code snippet shows an example of how to disable auto-refresh and show the max.
// Initialize the UtilityNetworkAssociations widget
const unAssociations = new UtilityNetworkAssociations({
view: view,
utilityNetwork: utilityNetwork,
autoRefreshAssociations: false,
visibleElements: {
maxAllowableAssociationsSlider: true,
},
});How to view associations with the widget
1. Sign in
The data in this example is secured, as most utility network data will be since the ArcGIS Utility Network user type extension is required. Therefore, the first step is to sign in to load the data.
In this sample sign in with the following credentials: username password.
2. View Associations
Zoom into a location of interest on the map to view the associations. Click the Associations toggle to display the connectivity and structural attachment associations in the current extent. As you pan and zoom the map, the associations will refresh automatically.

Exceeding the maximum allowable associations
If the extent chosen contains associations that exceed the default maximum allowable associations limit of 250, then the server will fail to return any associations. The widget will show a warning, prompting to zoom into a smaller extent to potentially resolve this error. The maximum allowable associations slider can be used to manually increase the maximum allowable associations. By default, this slider is hidden. The maximum threshold for allowable associations can be programmatically set through the maxAllowableAssociations property.

Auto-refresh associations
By default, the widget has auto-refresh enabled through the autoRefreshAssociations property. In this state, viewing associations requires turning on the Associations toggle.
Panning and zooming the map will refresh the associations automatically. When auto is set to false, the widget replaces a toggle switch with a refresh button. In this state, associations will only be displayed whenever the refresh button is clicked.
