Learn how to modify the style of a vector tile layer with the Vector Tile Style Editor.
You can update the styles of an existing vector tile layer with the Vector Tile Style Editor, including the labels, colors, layer zoom, and visibility.
In this tutorial, you create and save a new style for the Santa Monica Parcels vector tile layer with the Vector Tile Style Editor.
Prerequisites
You need an ArcGIS Location Platform
Steps
Access the Vector Tile Style Editor
In most cases, you style the features in a feature layer
-
In your web browser, go to ArcGIS.com to sign in to your portal with your ArcGIS Location Platform
ArcGIS Location Platform, formerly known as ArcGIS Platform, is a Platform as a Service (PaaS) product that gives developers access to location services, APIs, and tools to build mapping and spatial analysis applications. It is subscription-based and requires an ArcGIS Location Platform account. or ArcGIS OnlineArcGIS Online is a GIS mapping, analytics, data hosting, and content management software as a service (SaaS) product. It includes applications, tools, APIs, and location services for users and developers. It is subscription-based and requires an ArcGIS Online account. account. Or, go to your Enterprise portal to sign in with your ArcGIS EnterpriseAn ArcGIS Enterprise account is an identity for an instance of ArcGIS Enterprise. It can be used to access ArcGIS Enterprise tools, applications, and services, and to develop applications. account. -
Go to the Santa Monica parcels vector tiles item page.
-
On the right, click Edit in Vector Tile Style Editor.
Update layer styles
You can use the Edit layer styles or Edit JSON tools to edit layer styles. Use both to update the colors of the layer.
-
In the Vector Style Editor, expand Santa Monica Parcels to see the layers and associated colors. For each selected layer, update the Color in the Appearance box for the following layers:
- Santa_Monica_parcels/Residential: from
rgba(255,222,62,0.7)torgba(255, 222, 62, 0.7). - Santa_Monica_parcels/Commercial: from
rgba(194,158,215,0.7)torgba(107, 120, 255, 0.7). - Santa_Monica_parcels/Industrial: from
rgba(0,76,115,0.7)torgba(97, 219, 242, 0.7). - Santa_Monica_parcels/Government: from
rgba(252,146,31,0.7)torgba(13, 113, 255, 0.7).
- Santa_Monica_parcels/Residential: from
-
Click on the Santa_Monica_parcels/Institutional layer.
-
In the navigation panel, click Edit JSON. You will see the layer
idhighlighted on line 85. -
On line 98, change the
fill-colortorgba(107, 181, 255, 0.7)> Update to see the new color. -
Scroll down and locate the Santa_Monica_parcels/Miscellaneous layer on line 103.
-
On line 116, change the
fill-colortorgba(0, 149, 224, 0.7)> Update to see the new color. -
Scroll down and locate the Santa_Monica_parcels/Recreational layer on line 121.
-
On line 134, change the
fill-colortorgba(59, 47, 191, 0.7)> Update to see the new color.
Save the layer
When you are finished styling the layer you can save and share the style. Saving the style will create a new item
- In the navigation panel, click on the Save as icon.
- In the box, set the:
- Title
- Tags
- Folder
- Optionally, set the sharing level of layer.
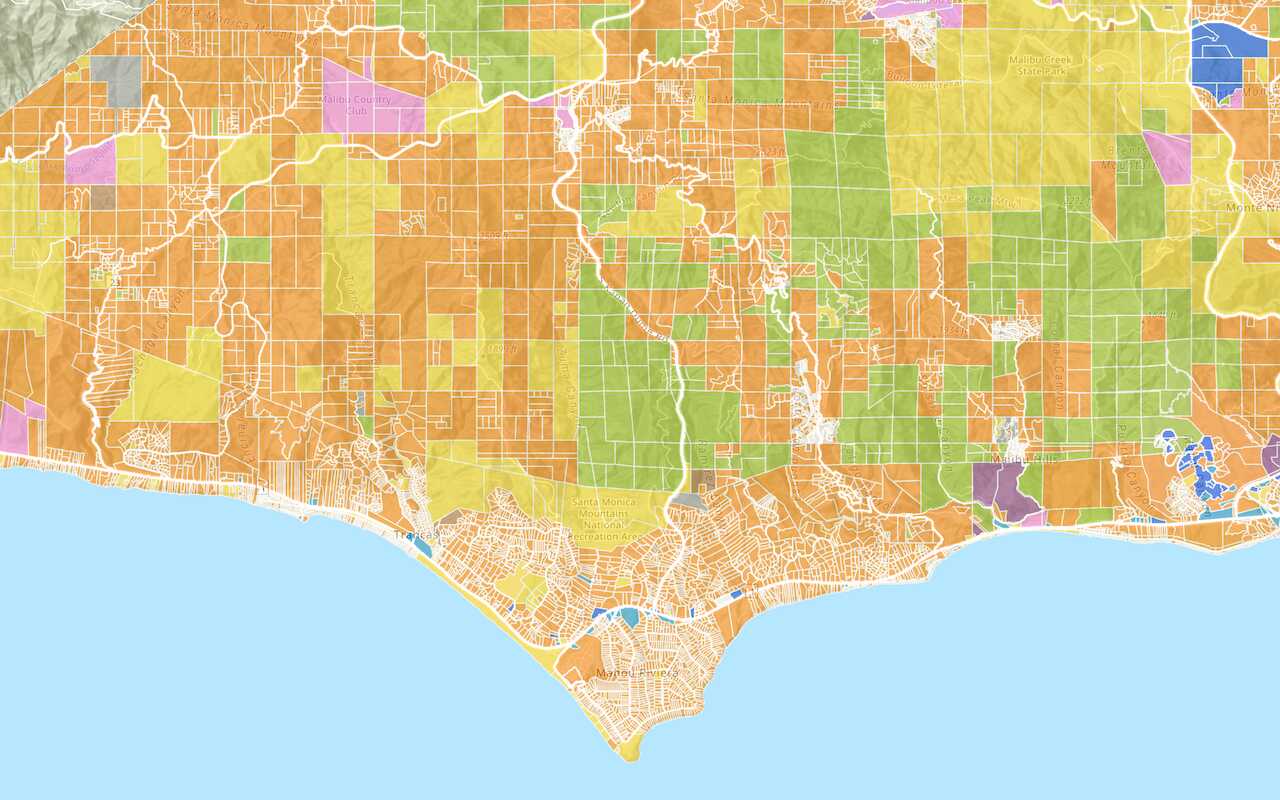
The new style should look something like this.
What's next
Learn how to use additional tools, APIs, and location services in these tutorials:
Tutorials