Visualizing points of interest in cities poses the following challenges:
- Icons can be mostly hidden by buildings
- Distinguishing the actual position of each point can be difficult
- The screen can easily become cluttered in tilted views or small-scale views
This sample shows the features that help solve these problems: relative-to-scene, callout, verticalOffset, occludedVisibility, decluttering and screenSizePerspectiveEnabled.
In this sample we visualize 700 points of interest (museums, restaurants etc.) in Lyon, France. This is how the city would look like by just visualizing all the points without any enhancement:
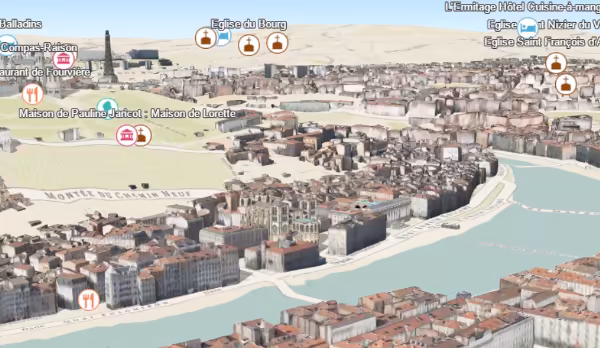
You can’t see points in the center of the city because they are hidden by buildings. Labels and icons overlap, making it hard to understand which label belongs to which icon. All icons have the same size, so it’s difficult to distinguish which icons are closer to the camera. These issues can be addressed through a combination of visualization techniques and layer configuration options, as shown below.
Aligning points with buildings using elevation mode
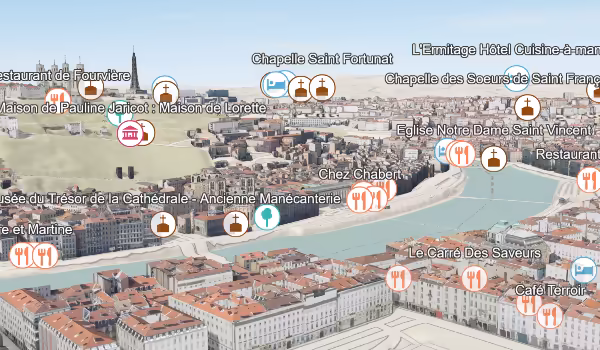
In 3D city visualizations it’s important that points located within the building are displayed on top of the building so they are visible. The relative-to-scene elevation mode aligns points to the height of their corresponding building.

// feature layer representing points of interest as iconsconst pointsLayer = new FeatureLayer({ ... elevationInfo: { // this elevation mode will place points on top of // buildings or other SceneLayer 3D objects mode: "relative-to-scene" }, ...});Revealing ground-level features through vertical offset and callout lines
For some points it’s difficult to identify their location. Moreover, some points are located on the ground and hidden by buildings. To solve this, we set a vertical offset on the points; that way points on the ground can still be visible even if they are located behind a building. Adding a callout line helps to see the actual position of the points.

// symbol representing a point of interestconst symbol = {  type: "point-3d", // autocasts as new PointSymbol3D()  symbolLayers: [    {      type: "icon", // autocasts as new IconSymbol3DLayer()      // add properties for the IconSymbol3DLayer here    },  ],
  verticalOffset: {    screenLength: 40,    maxWorldLength: 200,    minWorldLength: 35,  },
  callout: {    type: "line", // autocasts as new LineCallout3D()    color: "white",    size: 2,    border: {      color: [50, 50, 50],    },  },};
Revealing points hidden by buildings with the occluded visibility mode
An alternative way to reveal points hidden by buildings is to use the occluded visibility mode.
Icon and
Text symbol layers with visible mode are never
occluded by buildings. This is useful for critical information, but can make the view too cluttered in tilted views
close to the ground:

// symbol representing a point of interestconst symbol = { type: "point-3d", // autocasts as new PointSymbol3D() symbolLayers: [ { type: "icon", // autocasts as new IconSymbol3DLayer() occludedVisibility: { mode: "visible", // possible value: "adaptive", "hidden", "visible" }, // add other properties for the IconSymbol3DLayer here }, ],};In adaptive mode, there is a view-dependent tolerance determining how far behind buildings or terrain a point is still visible. This provides a good balance between displaying information and avoiding visual clutter:
In hidden mode, points behind buildings are never visible:

Enhancing depth perception with perspective-based icon scaling
A problem with visualizing features in screen space like icons in 3D tilted views is that depth perception is not very clear. All icons have the same size, so users are not sure which icons are closer or further away from the camera.
The screenSizePerspectiveEnabled property on FeatureLayer helps to better interpret distances in 3D space by making the icons further away from the camera appear smaller than icons that are closer. This setting is enabled by default.
const pointsLayer = new FeatureLayer({ ... // we recommend turning this feature off when // working with size visual variables screenSizePerspectiveEnabled: false, ...});Declutter the view by removing overlapping icons
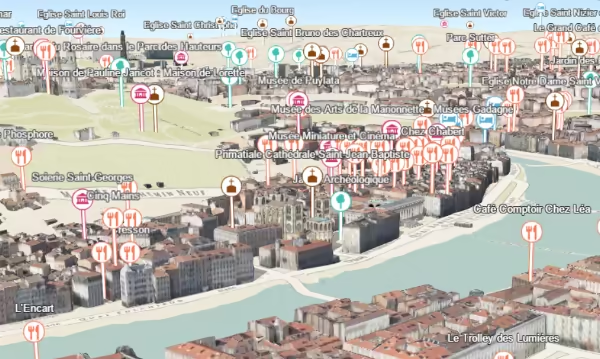
In this view we now see all the icons within the given area. However, this makes the view a bit cluttered at smaller scales. With declutter, we can choose to hide some of the icons that conflict with others. Icons that are closer to the camera remain visible and other distant icons are hidden.
// feature layer representing points of interestconst pointsLayer = new FeatureLayer({ ... featureReduction: { type: "selection" }, ...});See also Using callout lines with labels sample to see how to set callouts of type line on labels.