
What is Survey123 web designer?
The Survey123 web designer is a browser-based tool for creating, sharing, and completing surveys. You can design forms, collect data, and analyze results without installing any software. All survey data is stored securely in ArcGIS and integrates with other mapping and analysis tools.
You use the Survey123 web designer to:
- Create surveys: Build forms using a visual interface with drag-and-drop tools
- Collect data: Gather responses through web browsers on phones, tablets, and computers
- Add smart logic: Show or hide questions based on previous answers
- Validate data: Ensure responses meet your requirements
- Export results: Download data as Excel, CSV, or access through programming interfaces
- Connect to maps: Use survey data in ArcGIS maps and dashboards
How to create a survey with Survey123 web designer
To create a survey with the Survey123 web designer, you access the browser-based interface at survey123.arcgis.com and use the visual form builder to design, configure, and publish your survey. The web designer provides drag-and-drop tools, real-time preview, and built-in templates for efficient survey creation.
The general steps are:
- Access the Survey123 web designer: Navigate to survey123.arcgis.com and sign in with your ArcGIS account.
- Create a new survey: Start with a template or blank survey and provide a name and description.
- Design your survey: Add questions, configure logic, and customize appearance using the visual interface.
- Configure settings: Set permissions, enable attachments, and customize the survey theme.
- Publish and distribute: Publish the survey to generate a shareable URL and QR code for data collection.
Using the interface
The Survey123 web designer provides a visual interface for creating surveys without coding. You can access it through your web browser and use drag-and-drop tools to build forms.
Key interface components:
- Question library: Drag-and-drop question types (text, multiple choice, number, date, location, etc.)
- Design panel: Configure question properties, validation rules, and appearance
- Preview panel: Test your survey in real-time as you build it
- Settings panel: Configure permissions, themes, and advanced options
Survey creation workflow
To create a survey, you follow this workflow:
- Start new survey: Click "New Survey" and choose from templates or start blank
- Add questions: Use the question library to add different question types
- Configure logic: Set up conditional logic to show/hide questions based on responses
- Customize appearance: Apply themes, colors, and branding
- Test and preview: Use the preview panel to test all functionality
- Publish: Make the survey live and get sharing options
How to access
To access the Survey123 web designer, navigate to the Survey123 website:
https://survey123.arcgis.comSurvey configuration options
When creating a survey with the Survey123 web designer, you can configure various options:
Basic settings:
- Survey name and description
- Question types and properties
- Required field validation
- Conditional logic and branching
Advanced settings:
- Permissions and sharing options
- Theme customization and branding
- Attachment and media options
- Webhook and integration settings
Question types available:
- Text input (single line, multiple lines)
- Multiple choice (single select, multi-select)
- Number input with validation
- Date and time pickers
- Location capture (GPS coordinates)
- File and image uploads
- Rating scales and sliders
Code examples
Retrieve survey responses
Surveys created with Survey123 store data in hosted feature layers in ArcGIS Online or ArcGIS Enterprise. The code below shows how to retrieve survey responses programmatically.
# Get all responses from a published survey
import requests
# Replace with your actual survey URL
survey_url = "https://services.arcgis.com/your-org/arcgis/rest/services/your-survey/FeatureServer/0/query"
# Query parameters
params = {
"where": "1=1", # Get all records
"outFields": "*", # Get all fields
"f": "json" # Return JSON format
}
# Make the request
response = requests.post(survey_url, json=params)
# Check if successful
if response.status_code == 200:
data = response.json()
print(f"Found {len(data['features'])} responses")
for feature in data['features']:
print(feature['attributes'])
else:
print(f"Error: {response.status_code}")Tutorials
Create a simple survey
Learn how to use ArcGIS Survey123 to create a simple survey.
Low-code/no-code
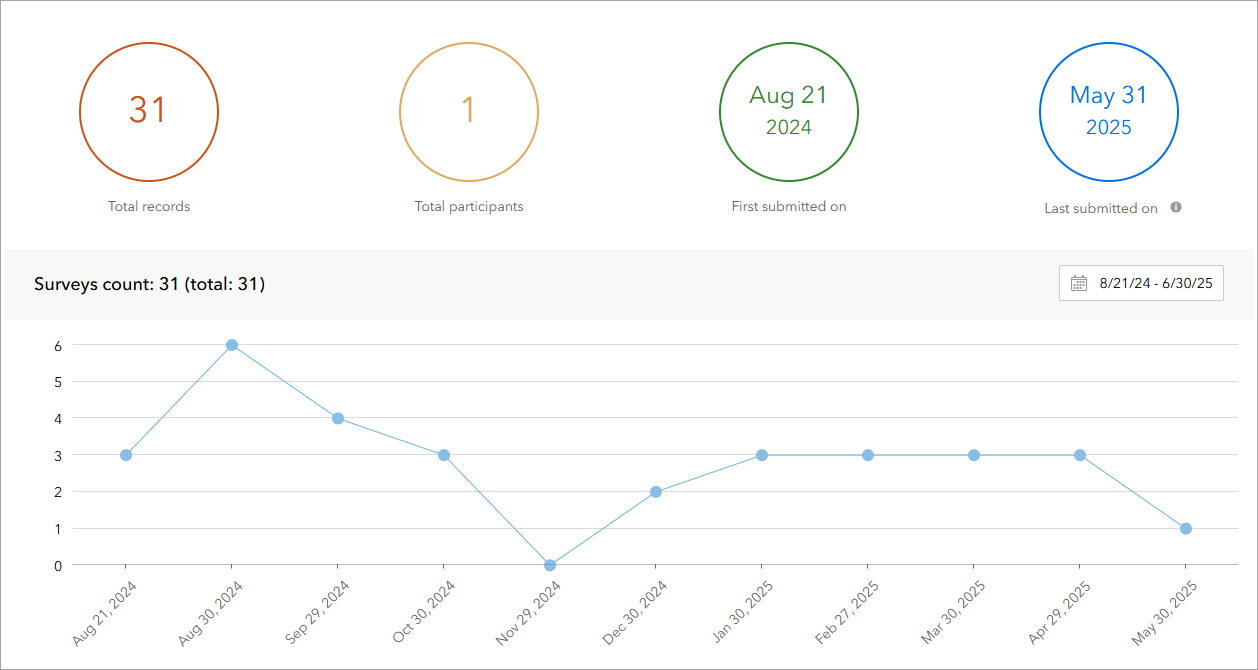
Analyze survey results
Learn how to use ArcGIS Survey123 to analyze survey results.
Low-code/no-code

Create a survey and dashboard for park maintenance
Learn how to integrate ArcGIS Survey123 with ArcGIS Dashboards to create a reporting solution.
Low-code/no-code
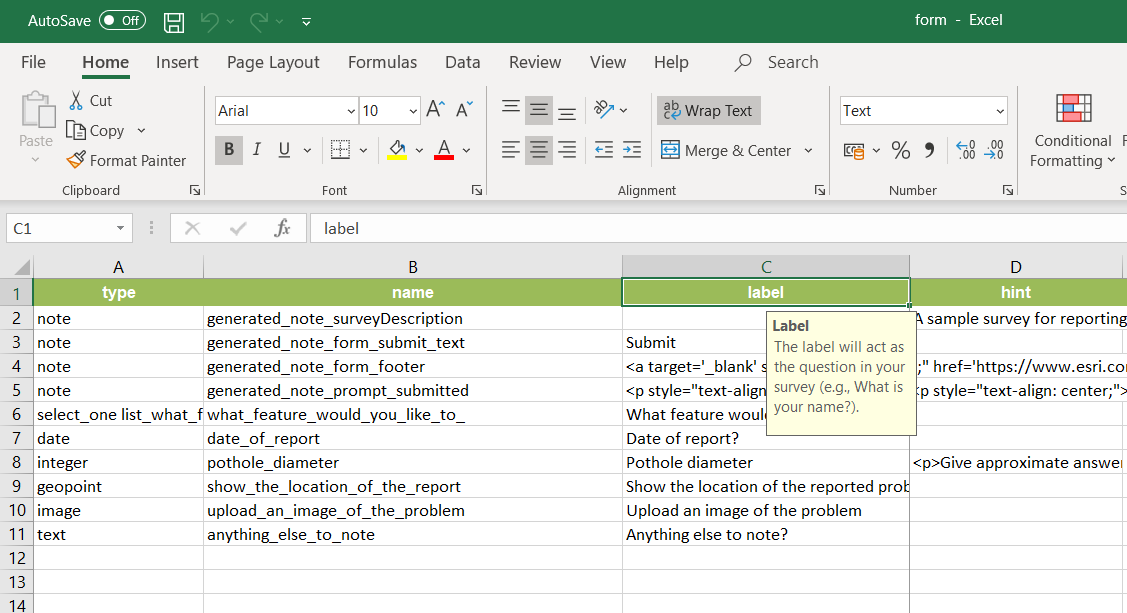
Create a smarter, responsive survey
Learn how to create intelligent surveys with conditional logic, hidden fields, and dynamic visibility using ArcGIS Survey123 and XLSForm.
Low-code/no-code