This sample shows how to add images from an image service in image space instead of projecting them to map coordinates. Using the add method, an instance of ImageryLayer is added to a Map in its original image coordinate system. The image coordinate system (ICS) allows you to display images in a 2D map without any distortion. In some cases, converting images into map coordinates can cause your images to appear skewed or distorted because of various transformations and terrain corrections that are used. Many imagery-centric workflows require displaying images in image coordinate systems instead of map coordinates (geographic or projected coordinate systems). For example, oblique images are distorted significantly when displayed in map coordinates but can be shown without distortion in a top-up view using an image coordinate system.
The following two images show how the same image looks different when it is displayed in its original coordinate system versus WGS84.
| Image in WGS84 | Image in its coordinate system |
|---|---|
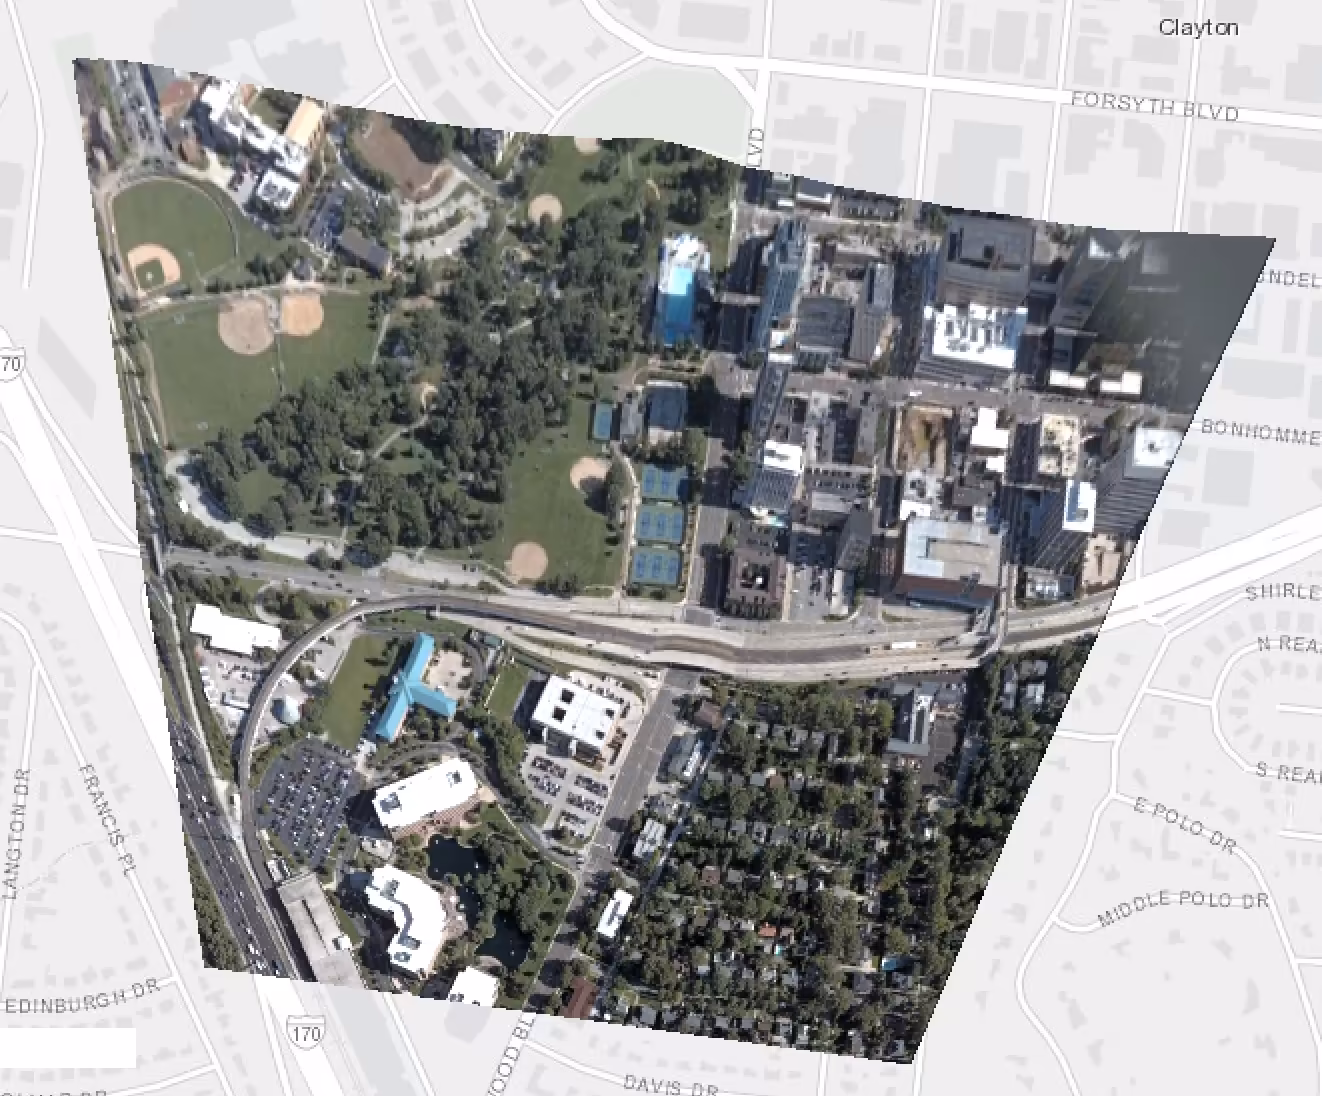 | 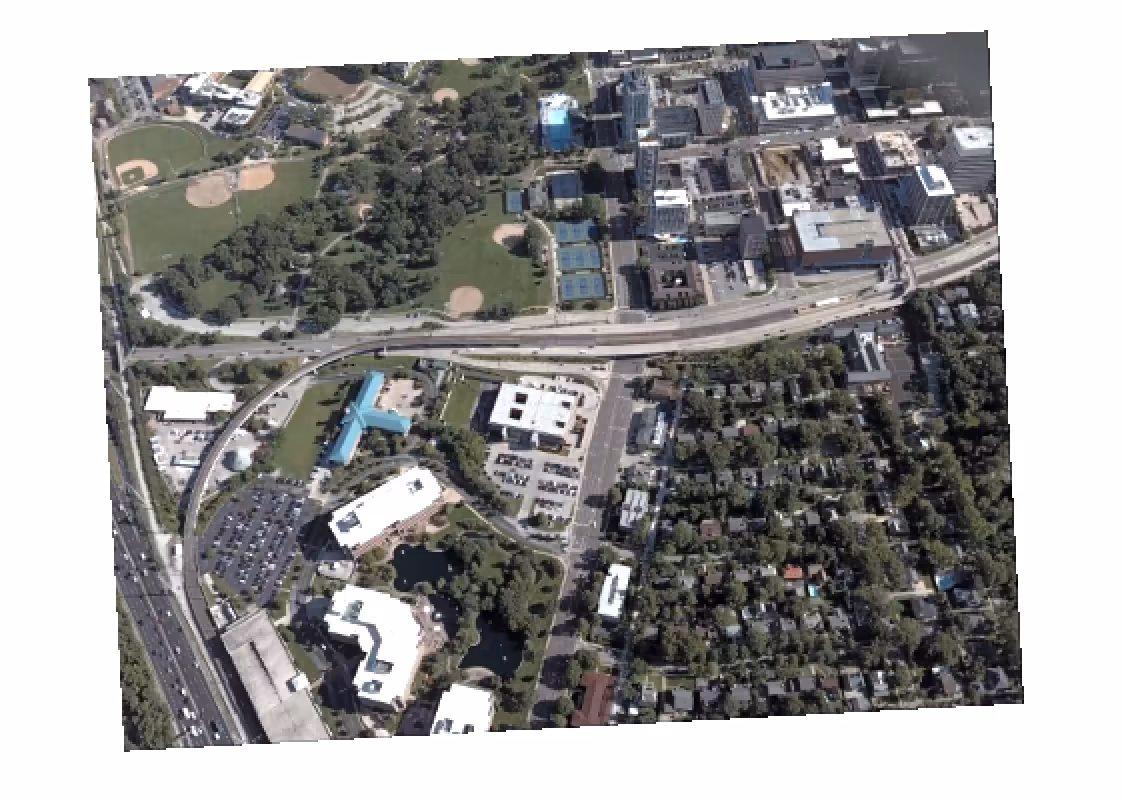 |
How it works
When the app loads, an ImageryLayer is instantiated with a mosaic rule and added to the map. To initialize the layer and handle the selection of different images, setViewIcsInfo() is called. In this function, getCatalogItemICSInfo() is called on the layer with the specified image ID. This method gets the image coordinate system which is used to set the map’s spatialReference.
52 collapsed lines
<!doctype html><html lang="en"> <head> <meta charset="utf-8" /> <meta name="viewport" content="width=device-width, initial-scale=1, shrink-to-fit=no" /> <title>ImageryLayer - image coordinate system | Sample | ArcGIS Maps SDK for JavaScript</title>
<!-- Load the ArcGIS Maps SDK for JavaScript from CDN --> <script type="module" src="https://js.arcgis.com/5.1/"></script>
<style> html, body { height: 100%; margin: 0; } </style> </head>
<body> <arcgis-map> <arcgis-zoom slot="top-left"></arcgis-zoom> <calcite-select slot="top-right"> <calcite-option value="1599">Charles A. Shaw Park</calcite-option> <calcite-option value="883">St. Louis Children's Hospital</calcite-option> <calcite-option value="379">St. Louis Galleria</calcite-option> <calcite-option value="247">County court buildings</calcite-option> <calcite-option value="500">Washington University</calcite-option> </calcite-select> <calcite-card slot="bottom-left"> <span slot="description">Image ID: <b id="image-id"></b></span> <span slot="description">North direction: <b id="north-direction"></b></span> </calcite-card> </arcgis-map>
<script type="module"> const ImageryLayer = await $arcgis.import("@arcgis/core/layers/ImageryLayer.js");
const viewElement = document.querySelector("arcgis-map"); const selectMenu = document.querySelector("calcite-select"); const imageIDElement = document.getElementById("image-id"); const northDirectionElement = document.getElementById("north-direction");
await viewElement.componentOnReady(); // Wait for property methods to be ready.
const url = "https://sampleserver6.arcgisonline.com/arcgis/rest/services/Oblique/WU_Oblique/ImageServer"; const mosaicRule = { method: "lock-raster", operation: "first", lockRasterIds: [] }; const layer = new ImageryLayer({ url, mosaicRule });
viewElement.map.add(layer); await viewElement.whenLayerView(layer);
// New minimum = old center - half of new size const newMin = (min, max, size) => (min + max - size) / 2;
const setViewIcsInfo = async (imageID = 1599) => { const icsInfo = await layer.getCatalogItemICSInfo(imageID); const newExtent = icsInfo.icsExtent.clone();
const { height, width } = viewElement.getBoundingClientRect(); // Get the element's pixel size. const scaleFactor = 5; // Control how far out the extent is set. const scaledWidth = width * scaleFactor; const scaledHeight = height * scaleFactor;
// Adjust the extent based on the raster image's scaled map dimensions. newExtent.xmin = newMin(newExtent.xmin, newExtent.xmax, scaledWidth); newExtent.xmax = newExtent.xmin + scaledWidth; newExtent.ymin = newMin(newExtent.ymin, newExtent.ymax, scaledHeight); newExtent.ymax = newExtent.ymin + scaledHeight;
viewElement.extent = newExtent; // Replace the component's current extent. layer.mosaicRule.lockRasterIds = [imageID]; // Show only the chosen image.
imageIDElement.textContent = imageID; northDirectionElement.textContent = Math.round(icsInfo.northDirection); };9 collapsed lines
setViewIcsInfo(); // Initialize the view.
selectMenu.addEventListener("calciteSelectChange", (event) => { setViewIcsInfo(+event.target.value); // Convert image ID to number and call function. }); </script> </body></html>