Learn how to use Scene Viewer to create a web scene
This tutorial shows you how to use the Scene Viewer
Prerequisites
You need an ArcGIS Location Platform or ArcGIS Online account for this tutorial.
Steps
Set the basemap layer
To create a web scene
-
Open the Scene Viewer and sign in to your ArcGIS account.
-
Click New Scene.
-
In the left toolbar, click + > Browse layers.
- Click the My content dropdown and select ArcGIS Online.
- In the search box, type
Outdoor (for Developers). - Find the resulting Tile Layer from Esri Vector Maps, then click Add.
- Close the toolbar.
-
In the right toolbar, click the Basemap icon.
- Click on the dropdown and select No basemap.
- Close the toolbar.
Add data layers
To display data in a web scene
-
In the right toolbar, click the Search icon.
-
In the search field, type
Santa Monica Mountainsand hit Enter to focus the scene to Santa Monica Mountains area. -
In the left toolbar, click + > Add layer from URL.
-
For each URL:
- Copy and paste the URL in Layer URL and give the layer a name in Layer name > Add.
- Parks and Open Space:
https://services3.arcgis.com/ G Vgb Jbqm8h XASV Yi/ ArcGI S/rest/services/ Parks _and _Open _Space/ Feature Server/0 - Trails:
https://services3.arcgis.com/ G Vgb Jbqm8h XASV Yi/arcgis/rest/services/ Trails/ Feature Server/0 - Trailheads:
https://services3.arcgis.com/ G Vgb Jbqm8h XASV Yi/arcgis/rest/services/ Trailheads/ Feature Server/0
- Parks and Open Space:
- Copy and paste the URL in Layer URL and give the layer a name in Layer name > Add.
-
In the left toolbar, use the tools to drag, zoom, and pan the scene.
Save the web scene
After you create a web scene, you can save it. Saving the scene will create a new item
-
In the left toolbar, click Save. At minimum, you need to provide a title and tags to save the scene.
-
To get the sharing link of the web scene, click the Share icon on the right toolbar. Optionally, set the sharing level of the scene in its item page.
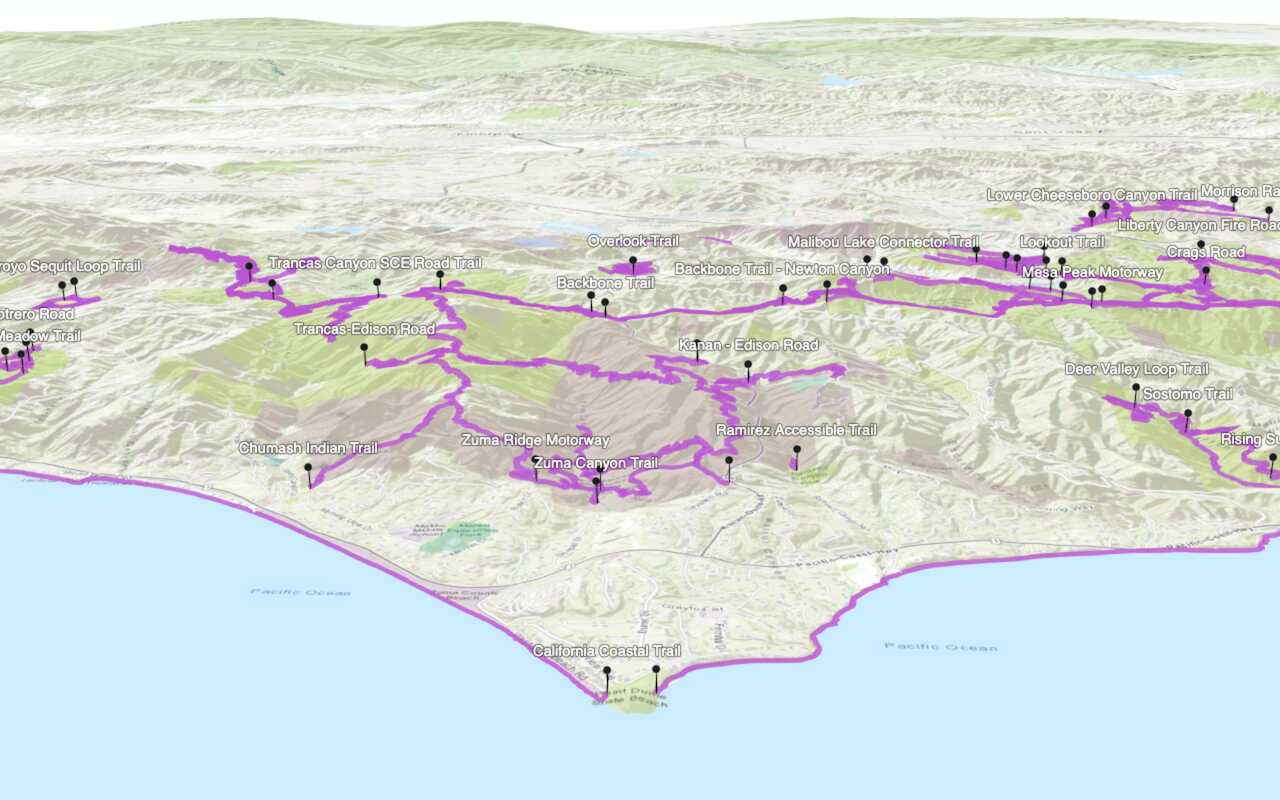
Your web scene should look something like this.
View web scene JSON
A web scene item
-
In your web browser, find the item ID
An item ID is a unique identifier representing a single item stored, managed, and accessed in a portal, such as a web map, hosted layer, or file. at the end of the URL for the web scene you just saved.- For example:
a82026c675804e95be448b300c70bc03.
- For example:
-
In a new browser tab, copy and paste the following URL and insert your item ID
An item ID is a unique identifier representing a single item stored, managed, and accessed in a portal, such as a web map, hosted layer, or file. . This will return the JSON for your web scene.https://www.arcgis.com/sharing/rest/content/items/{ your-item-id }/data - For example:
https://www.arcgis.com/sharing/rest/content/items/a82026c675804e95be448b300c70bc03/data
-
In the JSON, identify the operational (data) layers and the elevation layer. For example:
Use dark colors for code blocks Copy { "operationalLayers":[ { "id":"164a5a3ade4-layer-2", "title":"Parks and Open Space", "url":"https://services3.arcgis.com/GVgbJbqm8hXASVYi/ArcGIS/rest/services/Parks_and_Open_Space/FeatureServer/0", "layerType":"ArcGISFeatureLayer", "popupInfo":{ "showAttachments":true, "popupElements":[ { "type":"fields" }, { "type":"attachments" } ], "fieldInfos":[ { "fieldName":"UNIT_ID",
Now that you have a web scene
What's next?
Learn how to use additional tools, APIs, and location services in these tutorials:

Display a web scene
Create and display a scene from a web scene.