Learn how to create and display a scene
This tutorial shows you how to create and display a scene
Prerequisites
Before starting this tutorial:
-
You need an ArcGIS Location Platform or ArcGIS Online account.
-
Ensure your development environment meets the system requirements.
Optionally, you may want to install the ArcGIS Maps SDK for .NET to get access to project templates in Visual Studio (Windows only) and offline copies of the NuGet packages.
Develop or download
You have two options for completing this tutorial:
Option 1: Develop the code
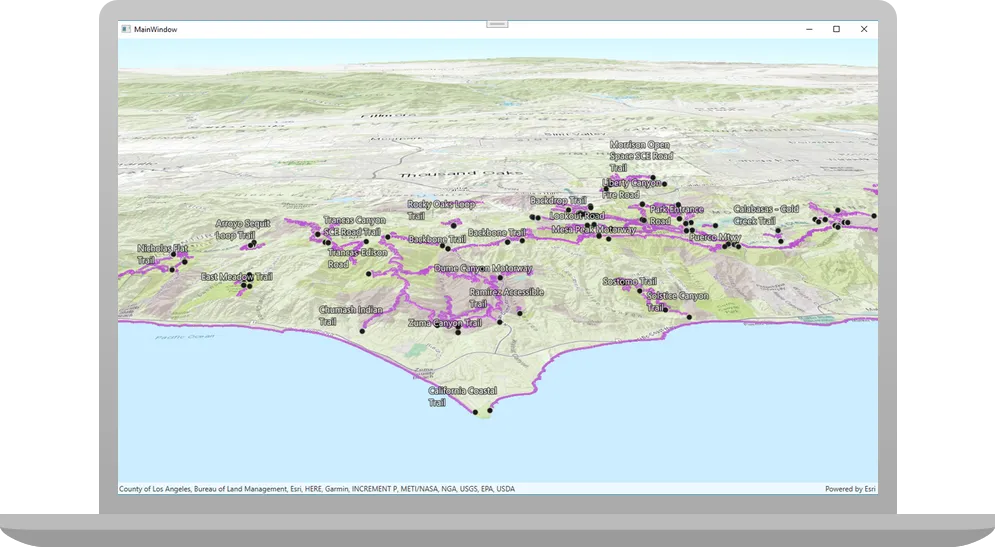
To start the tutorial, complete the Display a scene tutorial. This creates a scene to display an area of the Santa Monica Mountains in a scene view.
Open a Visual Studio solution
- Open the Visual Studio solution you created by completing the Display a scene tutorial.
- Continue with the following instructions to display a web scene hosted on ArcGIS Online in the scene view.
Update the tutorial name used in the project (optional)
The Visual Studio solution, project, and the namespace for all classes currently use the name DisplayAScene. Follow the steps below if you prefer the name to reflect the current tutorial. These steps are not required, your code will still work if you keep the original name.
The tutorial instructions and code use the name DisplayAWebScene for the solution, project, and namespace. You can choose any name you like, but it should be the same for each of these.
-
Update the name for the solution and the project.
- In Visual Studio, in the Solution Explorer, right-click the solution name and choose Rename. Provide the new name for your solution.
- In the Solution Explorer, right-click the project name and choose Rename. Provide the new name for your project.
-
Rename the namespace used by classes in the project.
- In the Solution Explorer, expand the project node.
- Double-click SceneViewModel.cs in the Solution Explorer to open the file.
- In the
SceneViewModelclass, double-click the namespace name (DisplayAScene) to select it, and then right-click and choose Rename…. - Provide the new name for the namespace.
- Click Apply in the Rename: DisplayAScene window that appears in the upper-right of the code window. This will rename the namespace throughout your project.
-
Build the project.
- Choose Build > Build solution (or press <F6>).
Get the web scene item ID
You can use ArcGIS tools
- Go to the LA Trails and Parks web scene in the Scene Viewer in ArcGIS Online
ArcGIS Online is a GIS mapping, analytics, data hosting, and content management software as a service (SaaS) product. It includes applications, tools, APIs, and location services for users and developers. It is subscription-based and requires an ArcGIS Online account. . This web scene displays trails, trailheads and parks in the Santa Monica Mountains. - Make a note of the item ID at the end of the browser’s URL. The item ID should be 579f97b2f3b94d4a8e48a5f140a6639b.
Display the web scene
You can display a web scene
-
In Visual Studio, in the Solution Explorer, double-click SceneViewModel.cs to open the file.
The project uses the Model-View-ViewModel (MVVM) design pattern to separate the application logic (view model) from the user interface (view).
SceneViewModel.cscontains the view model class for the application, calledSceneViewModel. See the Microsoft documentation for more information about the Model-View-ViewModel pattern. -
Add additional required
usingstatements at the top of the class.SceneViewModel.csusing System;using System.Collections.Generic;using System.Text;using Esri.ArcGISRuntime.Geometry;using Esri.ArcGISRuntime.Mapping;using System.ComponentModel;using System.Runtime.CompilerServices;using Esri.ArcGISRuntime.Portal;using System.Threading.Tasks; -
In the SceneViewModel class, remove all the existing code in the
SetupScene()function.SceneViewModel.csprivate void SetupScene(){// Create a new scene with an imagery basemap.Scene scene = new Scene(BasemapStyle.ArcGISImageryStandard);// Create an elevation source to show relief in the scene.string elevationServiceUrl = "http://elevation3d.arcgis.com/arcgis/rest/services/WorldElevation3D/Terrain3D/ImageServer";ArcGISTiledElevationSource elevationSource = new ArcGISTiledElevationSource(new Uri(elevationServiceUrl));// Create a Surface with the elevation data.Surface elevationSurface = new Surface();elevationSurface.ElevationSources.Add(elevationSource);// Add an exaggeration factor to increase the 3D effect of the elevation.elevationSurface.ElevationExaggeration = 2.5;// Apply the surface to the scene.scene.BaseSurface = elevationSurface;// Create a point that defines the observer's (camera) initial location in the scene.// The point defines a longitude, latitude, and altitude of the initial camera location.MapPoint cameraLocation = new MapPoint(-118.804, 33.909, 5330.0, SpatialReferences.Wgs84);// Create a Camera using the point, the direction the camera should face (heading), and its pitch and roll (rotation and tilt).Camera sceneCamera = new Camera(locationPoint: cameraLocation,heading: 355.0,pitch: 72.0,roll: 0.0);// Create the initial point to center the camera on (the Santa Monica mountains in Southern California).// Longitude=118.805 degrees West, Latitude=34.027 degrees NorthMapPoint sceneCenterPoint = new MapPoint(-118.805, 34.027, SpatialReferences.Wgs84);// Set an initial viewpoint for the scene using the camera and observation point.Viewpoint initialViewpoint = new Viewpoint(sceneCenterPoint, sceneCamera);scene.InitialViewpoint = initialViewpoint;// Set the view model "Scene" property.this.Scene = scene;}A web scene
A web scene is a scene stored as a JSON object that defines properties such as the basemap layer, data layers, layer styles, and pop-up styles. Its JSON structure is defined by the web scene specification. can define all of the things that are created in this code, such as the basemapA basemap is the foundational layer and data that provides the overall visual and geographic context for a map or scene. It typically includes geographic features and labels for land, water, roads, buildings, cities, places, and administrative boundaries, but can also include raster data such as satellite and areal images. , elevation layerAn elevation layer is a layer that defines the ground height or the surface for a scene. , and initial viewpointA viewpoint is a set of parameters used to define a geographic area visible in a map or scene. . Loading a scene from a web scene usually requires less code, makes it easier to update a scene used by several apps, and can provide a more consistent experience for your user. -
Modify the signature of the
SetupScene()function to include theasynckeyword and returnTaskrather thanvoid.SceneViewModel.cs55 collapsed lines// Copyright 2021 Esri// Licensed under the Apache License, Version 2.0 (the "License");// you may not use this file except in compliance with the License.// You may obtain a copy of the License at//// https://www.apache.org/licenses/LICENSE-2.0//// Unless required by applicable law or agreed to in writing, software// distributed under the License is distributed on an "AS IS" BASIS,// WITHOUT WARRANTIES OR CONDITIONS OF ANY KIND, either express or implied.// See the License for the specific language governing permissions and// limitations under the License.using System;using System.Collections.Generic;using System.Text;using Esri.ArcGISRuntime.Geometry;using Esri.ArcGISRuntime.Mapping;using System.ComponentModel;using System.Runtime.CompilerServices;using Esri.ArcGISRuntime.Portal;using System.Threading.Tasks;namespace DisplayAWebScene{class SceneViewModel : INotifyPropertyChanged{public SceneViewModel(){_ = SetupScene();}public event PropertyChangedEventHandler? PropertyChanged;protected void OnPropertyChanged([CallerMemberName] string propertyName = ""){PropertyChanged?.Invoke(this, new PropertyChangedEventArgs(propertyName));}private Scene? _scene;public Scene? Scene{get { return _scene; }set{_scene = value;OnPropertyChanged();}}private async Task SetupScene(){}4 collapsed lines}}When calling methods asynchronously inside a function (using the
awaitkeyword), theasynckeyword is required in the signature.Although a
voidreturn type would continue to work, this is not considered best practice. Exceptions thrown by anasync voidmethod cannot be caught outside of that method, are difficult to test, and can cause serious side effects if the caller is not expecting them to be asynchronous. The only circumstance whereasync voidis acceptable is when using an event handler, such as a button click.See the Microsoft documentation for more information about Asynchronous programming with async and await.
-
Modify the call to
SetupScene()(in theSceneViewModelconstructor) to avoid a compilation warning. After changingSetupScene()to an asynchronous method, the following warning appears in the Visual Studio Error List.Because this call is not awaited, execution of the current method continues before the call iscompleted. Consider applying the 'await' operator to the result of the call.Because your code does not anticipate a return value from this call, the warning can be ignored. To be more specific about your intentions with this call and to address the warning, add the following code to store the return value in a discard.
SceneViewModel.cs31 collapsed lines// Copyright 2021 Esri// Licensed under the Apache License, Version 2.0 (the "License");// you may not use this file except in compliance with the License.// You may obtain a copy of the License at//// https://www.apache.org/licenses/LICENSE-2.0//// Unless required by applicable law or agreed to in writing, software// distributed under the License is distributed on an "AS IS" BASIS,// WITHOUT WARRANTIES OR CONDITIONS OF ANY KIND, either express or implied.// See the License for the specific language governing permissions and// limitations under the License.using System;using System.Collections.Generic;using System.Text;using Esri.ArcGISRuntime.Geometry;using Esri.ArcGISRuntime.Mapping;using System.ComponentModel;using System.Runtime.CompilerServices;using Esri.ArcGISRuntime.Portal;using System.Threading.Tasks;namespace DisplayAWebScene{class SceneViewModel : INotifyPropertyChanged{public SceneViewModel(){_ = SetupScene();}26 collapsed linespublic event PropertyChangedEventHandler? PropertyChanged;protected void OnPropertyChanged([CallerMemberName] string propertyName = ""){PropertyChanged?.Invoke(this, new PropertyChangedEventArgs(propertyName));}private Scene? _scene;public Scene? Scene{get { return _scene; }set{_scene = value;OnPropertyChanged();}}private async Task SetupScene(){}}}From the Microsoft documentation:
“[Discards] are placeholder variables that are intentionally unused in application code. Discards are equivalent to unassigned variables; they don’t have a value. A discard communicates intent to the compiler and others that read your code: You intended to ignore the result of an expression.”
-
Add code to the
SetupScene()function to create aPortalItemfor the web sceneA web scene is a scene stored as a JSON object that defines properties such as the basemap layer, data layers, layer styles, and pop-up styles. Its JSON structure is defined by the web scene specification. . To do this, provide the web scene’s item IDAn item ID is a unique identifier representing a single item stored, managed, and accessed in a portal, such as a web map, hosted layer, or file. and anArcGISPortalreferencing ArcGIS OnlineArcGIS Online is a GIS mapping, analytics, data hosting, and content management software as a service (SaaS) product. It includes applications, tools, APIs, and location services for users and developers. It is subscription-based and requires an ArcGIS Online account. .SceneViewModel.cs55 collapsed lines// Copyright 2021 Esri// Licensed under the Apache License, Version 2.0 (the "License");// you may not use this file except in compliance with the License.// You may obtain a copy of the License at//// https://www.apache.org/licenses/LICENSE-2.0//// Unless required by applicable law or agreed to in writing, software// distributed under the License is distributed on an "AS IS" BASIS,// WITHOUT WARRANTIES OR CONDITIONS OF ANY KIND, either express or implied.// See the License for the specific language governing permissions and// limitations under the License.using System;using System.Collections.Generic;using System.Text;using Esri.ArcGISRuntime.Geometry;using Esri.ArcGISRuntime.Mapping;using System.ComponentModel;using System.Runtime.CompilerServices;using Esri.ArcGISRuntime.Portal;using System.Threading.Tasks;namespace DisplayAWebScene{class SceneViewModel : INotifyPropertyChanged{public SceneViewModel(){_ = SetupScene();}public event PropertyChangedEventHandler? PropertyChanged;protected void OnPropertyChanged([CallerMemberName] string propertyName = ""){PropertyChanged?.Invoke(this, new PropertyChangedEventArgs(propertyName));}private Scene? _scene;public Scene? Scene{get { return _scene; }set{_scene = value;OnPropertyChanged();}}private async Task SetupScene(){// Create a portal. If a URI is not specified, www.arcgis.com is used by default.ArcGISPortal portal = await ArcGISPortal.CreateAsync();// Get the portal item for a web scene using its unique item id.PortalItem sceneItem = await PortalItem.CreateAsync(portal, "579f97b2f3b94d4a8e48a5f140a6639b");}4 collapsed lines}} -
Create a
Sceneusing thePortalItem. To display the sceneA scene is a collection of layers that are displayed in 3D. It is typically composed of a basemap layer, data layers, and 3D data. , set theSceneViewModel.Sceneproperty to this newScene.SceneViewModel.cs55 collapsed lines// Copyright 2021 Esri// Licensed under the Apache License, Version 2.0 (the "License");// you may not use this file except in compliance with the License.// You may obtain a copy of the License at//// https://www.apache.org/licenses/LICENSE-2.0//// Unless required by applicable law or agreed to in writing, software// distributed under the License is distributed on an "AS IS" BASIS,// WITHOUT WARRANTIES OR CONDITIONS OF ANY KIND, either express or implied.// See the License for the specific language governing permissions and// limitations under the License.using System;using System.Collections.Generic;using System.Text;using Esri.ArcGISRuntime.Geometry;using Esri.ArcGISRuntime.Mapping;using System.ComponentModel;using System.Runtime.CompilerServices;using Esri.ArcGISRuntime.Portal;using System.Threading.Tasks;namespace DisplayAWebScene{class SceneViewModel : INotifyPropertyChanged{public SceneViewModel(){_ = SetupScene();}public event PropertyChangedEventHandler? PropertyChanged;protected void OnPropertyChanged([CallerMemberName] string propertyName = ""){PropertyChanged?.Invoke(this, new PropertyChangedEventArgs(propertyName));}private Scene? _scene;public Scene? Scene{get { return _scene; }set{_scene = value;OnPropertyChanged();}}private async Task SetupScene(){// Create a portal. If a URI is not specified, www.arcgis.com is used by default.ArcGISPortal portal = await ArcGISPortal.CreateAsync();// Get the portal item for a web scene using its unique item id.PortalItem sceneItem = await PortalItem.CreateAsync(portal, "579f97b2f3b94d4a8e48a5f140a6639b");// Create the scene from the item.Scene scene = new Scene(sceneItem);// To display the scene, set the SceneViewModel.Scene property, which is bound to the scene view.this.Scene = scene;}4 collapsed lines}} -
Click Debug > Start Debugging (or press <F5> on the keyboard) to run the app. If your app uses user authentication, enter your ArcGIS Online credentials when prompted.
If creating apps for Android or iOS, you will need the appropriate emulator, simulator, or device configured for testing (see System requirements for details)
Your app should display the scene that you viewed earlier in the Scene Viewer.
Alternatively, you can download the tutorial solution, as follows.
Option 2: Download the solution
-
Click the Download solution link in the right-hand panel of the page.
-
Unzip the file to a location on your machine.
-
Open the
.slnfile in Visual Studio.
Since the downloaded solution does not contain authentication credentials, you must first set up authentication to create credentials, and then add the developer credentials to the solution.
Set up authentication
To access the secure ArcGIS location services
You can implement API key authentication or user authentication in this tutorial. Compare the differences below:
API key authentication
- Users are not required to sign in.
- Requires creating an API key credential
API key credentials are an item that contains the parameters used to create and manage long-lived access tokens for API key authentication. They are a type of developer credential. with the correct privileges. - API keys
An API key is a long-lived access token created using API key credentials. They are valid for up to one year and are typically embedded directly into client applications. are long-lived access tokens. - Service usage is billed to the API key owner/developer.
- Simplest authentication method to implement.
- Recommended approach for new ArcGIS developers.
Learn more in API key authentication.
User authentication
- Users are required to sign in with an ArcGIS account
An ArcGIS account is an identity with a user type and set of privileges that can access specific ArcGIS products, tools, APIs, services, and resources. The main account types that can be used for development are an ArcGIS Location Platform account, ArcGIS Online account, and ArcGIS Enterprise account. ArcGIS Location Platform and ArcGIS Online accounts are also associated with a subscription. . - User accounts must have privilege
Privileges are a set of permissions assigned to ArcGIS accounts, developer credentials, and applications that grant access to secure resources and functionality in ArcGIS. to access the ArcGIS servicesA service, also known as an ArcGIS service, is software that supports an ArcGIS REST API and provides geospatial functionality or data. A service can be hosted by Esri or in ArcGIS Enterprise. used in application. - Requires creating OAuth credentials
OAuth credentials are an item that contains parameters required to implement user authentication or app authentication, including a .client_id,client_secret, and redirect URIs. They are a type of developer credential. - Application uses a redirect URL and client ID.
- Service usage is billed to the organization of the user signed into the application.
Learn more in User authentication.
To complete this tutorial, click on the tab in the switcher below for your authentication type of choice, either API key authentication or User authentication.
Create a new API key access token
-
Complete the Create an API key tutorial and create an API key with the following privilege(s)
Privileges are a set of permissions assigned to ArcGIS accounts, developer credentials, and applications that grant access to secure resources and functionality in ArcGIS. :- Privileges
- Location services > Basemaps
- Privileges
-
Copy and paste the API key access token into a safe location. It will be used in a later step.
Create new OAuth credentials to access the secure resources used in this tutorial.
-
Complete the Create OAuth credentials for user authentication tutorial to obtain a Client ID and Redirect URL.
A
Client IDuniquely identifies your app on the authenticating server. If the server cannot find an app with the provided Client ID, it will not proceed with authentication.The
Redirect URL(also referred to as a callback url) is used to identify a response from the authenticating server when the system returns control back to your app after an OAuth login. Since it does not necessarily represent a valid endpoint that a user could navigate to, the redirect URL can use a custom scheme, such asmy-app://auth. It is important to make sure the redirect URL used in your app’s code matches a redirect URL configured on the authenticating server. -
Copy and paste the Client ID and Redirect URL into a safe location. They will be used in a later step.
All users that access this application need account privileges
Set developer credentials in the solution
To allow your app users to access ArcGIS location services
-
In Visual Studio, in the Solution Explorer, click App.xaml.cs to open the file.
-
Set the
ArcGISEnvironment.ApiKeyproperty with your API key access token.App.xaml.csprotected override void OnStartup(StartupEventArgs e){base.OnStartup(e);// Set the access token for ArcGIS Maps SDK for .NET.Esri.ArcGISRuntime.ArcGISRuntimeEnvironment.ApiKey = "YOUR_ACCESS_TOKEN";// Call a function to set up the AuthenticationManager for OAuth.UserAuth.ArcGISLoginPrompt.RegisterOAuthConfig();} -
Remove the code that sets up user authentication.
App.xaml.csprotected override void OnStartup(StartupEventArgs e){base.OnStartup(e);// Set the access token for ArcGIS Maps SDK for .NET.Esri.ArcGISRuntime.ArcGISRuntimeEnvironment.ApiKey = "YOUR_ACCESS_TOKEN";// Call a function to set up the AuthenticationManager for OAuth.UserAuth.ArcGISLoginPrompt.RegisterOAuthConfig();}
Best Practice: The access token is stored directly in the code as a convenience for this tutorial. Do not store credentials directly in source code in a production environment.
-
From the Visual Studio Solution explorer window, open the
ArcGISLoginPrompt.csfile. -
Set your values for the client ID (
OAuthClientID) and the redirect URL (OAuthRedirectUrl). These are the user authentication settings you created in the Set up authentication step.ArcGISLoginPrompt.csinternal static class ArcGISLoginPrompt{private const string ArcGISOnlineUrl = "https://www.arcgis.com/sharing/rest";// Specify the Client ID and Redirect URL to use with OAuth authentication.// See the instructions here for creating OAuth app settings:// https://developers.arcgis.com/documentation/security-and-authentication/user-authentication/tutorials/create-oauth-credentials-user-auth/private const string AppClientId = "YOUR_CLIENT_ID";private const string OAuthRedirectUrl = "YOUR_REDIRECT_URL"; -
In Visual Studio, in the Solution Explorer, click App.xaml.cs to open the file.
-
Remove the line of code that sets an API key access token.
App.xaml.csprotected override void OnStartup(StartupEventArgs e){base.OnStartup(e);// Set the access token for ArcGIS Maps SDK for .NET.Esri.ArcGISRuntime.ArcGISRuntimeEnvironment.ApiKey = "YOUR_ACCESS_TOKEN";// Call a function to set up the AuthenticationManager for OAuth.UserAuth.ArcGISLoginPrompt.RegisterOAuthConfig();}
Best Practice: The OAuth credentials are stored directly in the code as a convenience for this tutorial. Do not store credentials directly in source code in a production environment.
Run the solution
Click Debug > Start Debugging (or press <F5> on the keyboard) to run the app. If your app uses user authentication, enter your ArcGIS Online credentials when prompted.
Your app should display the scene that you viewed earlier in the Scene Viewer.
What’s Next?
Learn how to use additional API features, ArcGIS location services, and ArcGIS tools in these tutorials: