What are scene layers?
A scene layer is a type of layer that is optimized for displaying large amounts of 3D data in a scene. A scene layer can display the following data types: 3D object, building, integrated mesh, point, point cloud, or voxel layer. The scene layer complies with the Indexed 3D Scene layer (I3S) format. The I3S format is an open 3D content delivery format used to disseminate 3D GIS data to mobile, web, and desktop clients.
Visualizing your information in 3D makes it easier to intuitively understand and experience geographic information in a realistic way. Even audiences unfamiliar with GIS can understand complex and detailed data by viewing it in a 3D scene on the web. Being able to capture the three-dimensional nature of objects in the real world allows you to analyze, measure, and query information with more precision.
In the
In this article, we write “SceneLayer” to refer to the Point and 3D object SceneLayer API class and we write “scene layer” to refer to the platform level general concept of scene layers.
Below is a table with the corresponding classes and supported functionality in the API:
| Type of scene layer | API class | Supports renderers | Supports labeling | Supports querying | Supports popups | Samples |
|---|---|---|---|---|---|---|
| 3D object scene layer | SceneLayer | yes (see renderers) | no | partially (see queryFeatures) | yes (see popupTemplate) |  |
| Point scene layer | SceneLayer | yes (see renderers) | yes (see labelingInfo) | partially (see queryFeatures) | yes (see popupTemplate) |  |
| Building scene layer | BuildingSceneLayer | yes (see renderers) | no | partially (see BuildingSceneLayer class) | yes (see popupTemplate) | 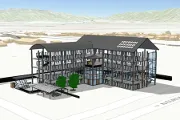 |
| Point cloud scene layer | PointCloudLayer | yes (see supported renderers in PointCloudRenderer) | no | no | no |  |
| Integrated mesh scene layer | IntegratedMeshLayer | no | no | no | no | 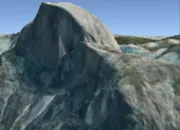 |
| Voxel layer | VoxelLayer | no | no | no | yes (see popupTemplate) |  |
Read more about the types of scene layers at the platform level in the ArcGIS Online and ArcGIS Pro documentation.
Levels of detail for scene layers
To improve performance, scene layers are usually rendered with several levels of detail. At larger scales (close to the ground), all the geometry is loaded and displayed. To maintain good performance when zooming out, much coarser representations of the geometry with fewer vertices and smaller textures are shown. In addition, some features are also removed, a process usually referred to as feature thinning. For example, point scene layers and point cloud layers will have points removed from display at smaller scales.
3D object scene layers
3D object scene layers are used for streaming and displaying a large number of 3D features like buildings and other elements of a city scene.

A 3D object scene layer can be utilized:
- As an individual layer: It stores all the geometry and attributes, but has limited query capabilities.
- within a 3D object layer: This is a unit combining a 3D object scene layer with a 3D object feature layer, enabling ad-hoc uploading, editing and querying of 3D models.
For a comprehensive overview of 3D object layers, see the 3D Object Layer: A Comprehensive Overview blog post. To learn more about 3D object workflows in the ArcGIS Maps SDK for JavaScript, please refer to the corresponding guide page.
Publishing
Publishing steps and the access to attributes will depend on how the 3D object scene layer is used. Here is a breakdown:
 |  |
|---|---|
| Definition: a SceneLayer where attributes are only stored in the cache of the service. The user can configure which attributes will be stored in the cache. In this case only loaded features have access to the attributes, so it’s impossible to make queries on the whole dataset. This type of layer can be used for styling buildings or displaying information about features in the view. | Definition: a unit consisting of a 3D object scene layer and a 3D object feature layer. The scene layer facilitates efficient display and loading, while the associated feature layer stores the data for editing and querying. Attributes and mesh geometry for 3D object features that are configured for the cache are also directly available through the associated feature layer. When publishing layers like this, all features have access to all attributes and complex queries on the layer are supported. For more information, refer to the aforementioned blog post, guide page, and ArcGIS Pro documentation. |
Publishing: First, a scene layer package (.slpk) is created with ArcGIS Pro, City Engine, or a third party software. This package can then be uploaded to:
| Publishing: A 3D object layer can be published:
|
Publishing 3D object layers in ArcGIS Pro
Creating a feature class
- Open ArcGIS Pro and create a new local or global scene.
- Save your project in the desired location. This will generate a geodatabase file (.gdb) with the project name under Databases in the Catalog panel.
- To add a 3D object feature class (stores and manages 3D geometry-type features in a geodatabase), right-click on the .gdb file, select New, and then choose Feature Class.
- Name your feature class and select 3D Object as its type. Click Next.
- In the Fields section, you can add custom attributes to describe your future 3D features. Click Next.
- Select the spatial reference for your feature class. Use the search bar to filter the result. Click Finish.
- Once completed, a new layer with a 3D object feature class as data source will appear in Scene > 3D Layers in the Contents
- Add the storage format that enables support for uploading and downloading models on the web. Open Analysis > Tools, search for Add 3D Formats to Multipatch, select your layer, check Khronos Group glTF binary (.glb), and click Run. The green checkmark indicates the successful storage format addition.
- Open the Create Features pane. In the “Templates” section, click the right-pointing arrow to apply the default editing template.
Sharing to web
- Now, we will share this as a 3D object layer on the web. Ensure you are signed in to the correct portal. Right-click your layer in the Contents tab, point to Sharing, and click Share as a Web Layer.
- In the newly opened pane, name the layer, add descriptive text and tags, and select who to share it with.
- In the first subsection of Configuration, under Caching, choose Cache Online. In the second subsection, enable editing, allowing Add, Delete, and Update. Make sure the Attributes and geometry radio button is checked.
- At the bottom of the window, click Analyze to ensure no errors/warnings are found. Click Publish. Note that publishing will take time, especially the caching phase.
- Once the layer is published, you can verify it in ArcGIS Online by clicking the Manage the web layer link in the success message. In the portal, you will find three new items with the same name: a 3D object scene Layer, a 3D object feature layer, and a service definition. The 3D object scene layer and the 3D object feature layer together form a 3D object layer, combining fast visualization with editing/query capabilities.
Publishing 3D object layers in ArcGIS Online
- Sign in to your ArcGIS organizational account.
- On the ribbon, click on Content, then open the My Content tab and select New Item.
- In the newly opened modal window, click Scene layer.
- Click the 3D object radio button to create an empty 3D object layer and the Next button to confirm.
- The next page informs you about the layer’s spatial reference (WGS 1984) and displays the default configured feature attributes. Click Next.
- Choose the title of the item and the folder in which it should be saved. Assign categories and tags and write a summary describing the layer. Click Save to start the publishing process. Note that the publishing process takes a few minutes to complete.
- Once the publishing is complete, the scene layer item details page is opened automatically. You will find two new items with the same name in the portal: a 3D object scene layer and a 3D object feature layer, forming a 3D object layer.
Where do attributes come from?
Renderers, visual variables, popups, labels, filters, and queries retrieve attributes either from the cache or from the associated feature layer, depending on how the layer is published. The following table summarizes this behavior.
| Renderers / Visual variables | Cached attributes are used. | If the associated feature layer is editable, then attributes on the associated feature layer are used.* Otherwise, cached attributes are used. |
| Filter | Cached attributes are used. | If the associated feature layer is editable, then attributes on the associated feature layer are used.* Otherwise, cached attributes are used. |
| Labels | Cached attributes are used. | If the associated feature layer is editable, then attributes on the associated feature layer are used.* Otherwise, cached attributes are used. |
| Popups | Cached attributes are displayed. | Attributes on the associated feature layer are displayed. |
| Layer query | Not possible. | Layer query gets results from attributes on the associated feature layer. |
| LayerView query | Query gets results from cached attributes for currently loaded features. | If the associated feature layer is editable, then Query gets results from attributes on the associated feature layer.* Otherwise, cached attributes are used. |
* If the layer is edited, the features with edited attributes are rendered with the updated attributes until the number of edited features exceeds 50,000. After that, the edited attributes are not retrieved, and the features are rendered with the cached, outdated attributes. To edit a SceneLayer in
For details about each of these features, read the description of the SceneLayer class.
Tips and tricks
- How can I get statistics on attribute values?
You can use the smartMapping summaryStatistics method on the SceneLayer. If the layer doesn’t have an associated feature layer, then statistics are only displayed for the features that are loaded in the view.
- How do I know what functionality my SceneLayer supports?
For each field you can use the getFieldUsageInfo() method to find out whether popups, labels, renderers or queries using that field are supported:
sceneLayer.then(function () {  // get information on whether `OBJECTID` is available for query:  console.log(sceneLayer.getFieldUsageInfo("OBJECTID"));  // the result shows that layer queries are not available for this field  // this means that either the associated feature layer is not available  // or that the field can't be found in the associated feature layer  /* Object {    supportsLabelingInfo: true,    supportsLayerQuery: false,    supportsPopupTemplate: true,    supportsRenderer: true  }*/
// query layer for features sceneLayer .queryFeatures() .then(function (result) { console.log(result); }) .catch(function (err) { console.error(err); }); // querying the layer will result in an error: // message: "SceneLayer queries are not available without associated feature layer", // name: "scenelayer:query-not-available",});- I3S Converter tool
The scene layer continues to evolve and improve performance and usability. You can take advantage of the newest updates by converting your existing SLPKs with the I3S Converter tool:
- Navigate to the I3S GitHub repository.
- Select the I3SConverter folder.
- Download i3s_converter.exe.
- After running the converter, a version 1.7 scene layer package is created.