Create a web map in Map Viewer that uses the Navigation basemap style and the Santa Monica Parcels feature layer that you created in Step 1. Then, configure your web map for offline use.
Prerequisites
- You need an ArcGIS Online or ArcGIS Enterprise account.
- You need to complete Step 1. Create a feature layer.
Steps
Create a web map
To create a web map
-
Open the Map Viewer and sign into your ArcGIS account.
-
In the left panel, click Layers > Add.
- Click the My content dropdown and select ArcGIS Online.
- In the search box, type World Navigation Map (for Developers).
- Click on the resulting Tile Layer owned by esri_vector, then click Use as basemap.
-
Click the X icon on the top right to close the panel.
Add a feature layer
Add the feature layer that you created in the previous step to your map.
-
In the left panel, click Layers > Add.
- Click the My content dropdown and select ArcGIS Online.
- In the search box, type Santa Monica Parcels.
- Click on the resulting Feature layer (hosted), then click + Add.
-
Click the X icon on the top right to close the panel.
Your web map should now look something like this.
Save the web map
Now that you have a web map, you need to save it to your portal.
- In the left panel, click Save > Save as. At minimum, you need to provide a title and tags for your web map.
By default, your web map sharing level is set to Owner. To access the offline map in your application, you need an access token
Enable web map for offline use
-
In your web browser, find the item ID
An item ID is a unique identifier representing a single item stored, managed, and accessed in a portal, such as a web map, hosted layer, or file. at the end of the URL for the web map you just saved.- For example:
4c4c3a28388446a19278b3a17051730e
- For example:
-
In a new browser tab, copy and paste the following URL and insert your item ID. This will return the item page for your web map, where you can configure it for offline use.
https://www.arcgis.com/home/item.html?id= <ITEM _ID > - For example: https://www.arcgis.com/home/item.html?id=4c4c3a28388446a19278b3a17051730e
-
Click Settings on the top bar of the item page.
-
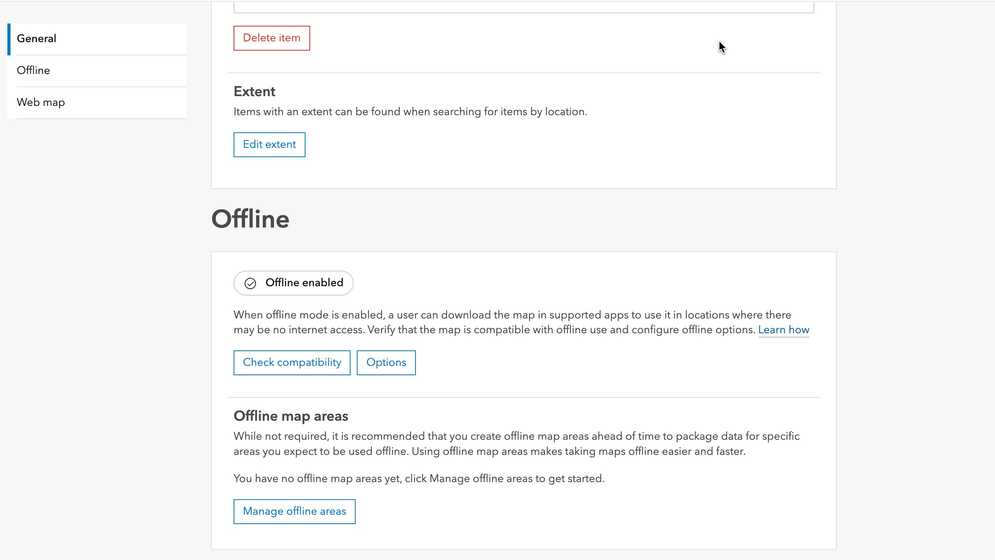
Scroll down to the Offline menu.
-
If you don't see the Offline enabled label at the top left corner, click Check compatibility and turn on Offline.
-
Optionally, you can also manage advanced offline settings for your web map by clicking Options. These settings allow you to choose what data or updates mobile devices get and use a tile package
A tile package is a tiled layer that has been bundled into a single for your offline basemap.tpk/.tpkxfile. The file contains a tile cache of the data and metadata about the layer, packaged into a single, portable file.A basemap is the foundational layer and data that provides the overall visual and geographic context for a map or scene. It typically includes geographic features and labels for land, water, roads, buildings, cities, places, and administrative boundaries, but can also include raster data such as satellite and areal images. .
Under Features and attachments, you can configure download behaviors for both editable and read-only features. Adjusting how attachments and features are delivered can reduce the time it takes to synchronize edits, especially in areas of poor connectivity, as well as the amount of cellular data used.
Under Tables, you can choose how table rows are included in your offline map areas.
Under Basemap and tile package, you can choose which basemap you want to use on your map. If you choose to use a local tile package, you will provide the filename of the package on your device.
-
Click Save. Your web map is enabled for offline use now.