Any Web GIS Administrator can attest to the fundamental importance of managing hosted feature layers in ArcGIS online. Traditionally, adding data en masse to existing hosted feature layers typically involved a three-step process of downloading the feature layer data, merging additional edits, and finally overwriting the original feature layer. While that workflow still suffices in many circumstances, the append() function greatly simplifies the process. It can save you a ton of time if your features layers are large, eliminating the time involved in overwriting the feature layer.
Let's take a look at some example append() workflows below. This guide document refers to the feature layer you will append data into as the target, while the item you append data from is referred to as the source.
Note: Please see the Append (Feature Service/Layer) for technical reference details on the append operation.
Note: When appending features from files, important criteria must be met in order for the append to succeed, and only certain file formats may be supported for a given layer. Please see the documentation for your deployment before attempting to append data:
- ArcGIS Online: Manage hosted feature layers - Add and update features from a file
- ArcGIS Enteprise: Manage hosted feature layers - Add and update features from a file
Import Libraries
import os
import zipfile
import datetime as dt
from copy import deepcopy

from arcgis.gis import GIS
from arcgis.features import GeoAccessor
import arcpy
Helper Function
Throughout this notebook, you'll download items from an ArcGIS Online Organizational portal. You'll subsequently publish these items with a unique timestamp to distinguish the resulting service from any other service owned by the login you employ in this guide. Service names need to be unique across an organization, and the function below will add a unique timestamp to the end of item names so the service you publish is unique and owned by you.
def now_dt():
    return str(int(dt.datetime.now().timestamp()))
Make a GIS Connection
You can establish a GIS connection with the following syntax to continue running through the notebook:
gis = GIS("https://www.arcgis.com", "username", "password")
gis = GIS('home')Append New Features from a File Geodatabase
This first example appends new features from a File Geodatabase into a hosted feature layer. For optimal performance and minimal chance of errors when using append(), Esri strongly recommends the schema for the source file to upload (source) matches the schema of the hosted feature service layer (target). Please note that appending from a file geodatabase is only supported in ArcGIS Online.
In this first section, you'll have matching schema between your File Geodatabase item (named SubDiv_PB11_PG48_parcels) and a hosted feature service layer you will publish.
Download the target feature layer data
The Downingtown Parcels File Geodatabase item exists in the GIS. You'll download the file geodatabase item containing the data you want to publish as a feature layer.
downingtown_parcels_fgdb = gis.content.search('title:Downingtown_PA_Parcels owner:api_data_owner',
                                              item_type='File Geodatabase')[0]
downingtown_parcels_fgdb
You can use Python's os module to ensure you know where the code downloads files. By default, the file downloads to the current working directory as returned by os.getcwd(). Use os.chdir(path_to_your_directory) to change the current working directory to where you want files to download. For example, you could assign variables for specific paths on your file system like below:
cwd = os.getcwd()wd = os.path.join(cwd, "append_guide")os.chdir(wd)
The rest of the guide will use the wd variable as the working directory to manage data downloads for the exercise. You can choose to follow the example, or manage downloads in a way that works best for you.
wd = os.getcwd()if not os.path.exists(os.path.join(wd, "downingtown")):
os.mkdir(os.path.join(wd, "downingtown"))
# Assign a variable to the full path of the new directory to use as your working directory
wd = os.path.join(wd, "downingtown")Extract the file geodatabase. The save_path and file_name parameters will be unique to you and your system. The paths and names used in this guide are solely for demonstration purposes.
downingtown_zip = downingtown_parcels_fgdb.download(save_path=wd, file_name="downingtown_fgdb_"
                                                    + now_dt() + ".zip")
Publish the target feature layer
Set properties for a new item, then add it to the portal with the zip file as the file argument. Publish the item to create a hosted feature layer owned by your account to work though this guide.
downingtown_props = {"title":"Downingtown_PA_Parcels_" + now_dt(),
                   "type":"File Geodatabase",
                   "tags":"Downingtown PA, Pennsylvania, local government, \
                   parcel management",
                   "snippet":"Parcel data for the municipality of Downingtown, \
                   Pennsyslvania in the United States.",
                   "description":"Data downloaded from Chester County, PA \
                   Open Data https://data1-chesco.opendata.arcgis.com"}

if not "Downingtown" in [folder['title'] for folder in gis.users.me.folders]:
    gis.content.folders.create("Downingtown")

downingtown_folder = gis.content.folders.get("Downingtown", gis.users.me.username)
job = downingtown_folder.add(
    **{
        "item_properties" : downingtown_props,
        "file" : downingtown_zip,
    }
)
downingtown_fgdb_item = job.result()
downingtown_item = downingtown_fgdb_item.publish()downingtown_item.title'Downingtown_PA_Parcels_1559344876'
Visualize the feature layer
You can visualize the feature layer using the ArcGIS API for Python's inline map widget; for more info on this, refer to the "Maps" tab of the guides or start here.
downingtown_fl = downingtown_item.layers[0]
downingtown_fl
<FeatureLayer url:"https://services7.arcgis.com/JEwYeAy2cc8qOe3o/arcgis/rest/services/Downingtown_PA_Parcels_1559344876/FeatureServer/0">
downingtown_fl.query(return_count_only=True)2548
m = gis.map("Downingtown, PA")
m.center = [40.0065, -75.7033]
m.zoom = 14
m
m.content.add(downingtown_fl)Let's zoom in to a particular part of Downingtown where a new subdivision has been build but has not been added to the feature layer. Observe the empty square-shaped section in the map after running the cell below.
m.zoom = 16
m.center = [39.9975, -75.7173]
Query the Feature for a specific subdivision. Currently, there are no features for this subdivision. You will be adding the features for the subdivision as PB 11 PG 48 to the parcels feature layer for Downingtown, PA using the append features workflow.
downingtown_fl.query(where="SUBDIV_NUM = 'PB 11 PG 48'")<FeatureSet> 0 features
Get the source item for appending
In order for the append workflow to succeed, you need to add the source file containing the new features as an Item in your GIS. In this case, the data file is already uploaded as an Item for you. From there, get the item id value for this file geodatabase item containing features you want to append to the feature layer. In this case, the Schema from the file geodatabase you'll append matches that of the hosted feature layer.
Note: It is important to verify the Feature Layer you use supports the operation you intend to run. Please query the feature layer for the following properties to confirm:
FeatureLayer.properties.supportsAppend- see Supports append for details.FeatureLayer.properties.supportedAppendFormats- see Supported append formats for details.
down_subdiv_fgdb_item = gis.content.search(query="title:SubDiv* owner:api_data_owner", item_type="File Geodatabase")[0]subdiv_id = down_subdiv_fgdb_item.id
subdiv_id'4181764cd26b4dc0bea29dda673c0c7e'
Append the features
To update the target FeatureLayer object with a new set of features, you can call the append() method on it and give it the source Item containing the new set of features.
Run append with the appropriate parameters to add the subdivision features from the file geodatabase item . Since the file geodatabase schema matches the schema of the Downingtown parcels Feature Layer, only the source_table_name from the file geodatabase item is needed to insert new features.
downingtown_fl.append(item_id=subdiv_id,
                      upload_format='filegdb',
                      source_table_name='subdiv_pb_11_pg_48')
True
NOTE: While technically not required for source file geodatabase items with only one stand-alone table, best practice is to treat the
source_table_nameparameter as required for file geodatabase source items.
Verify the append
There's a response of True, indicating success.
Query the feature layer and then visualize it to verify the results.
downingtown_fl.query(where="SUBDIV_NUM = 'PB 11 PG 48'")<FeatureSet> 28 features
Display layer with appended Features
Let's retrieve the layer again from out portal and add it to a new map to verify the new features were added.
m2 = gis.map("Downingtown, PA")
m2.center = [40.0065, -75.7033]
m2
m2.zoom = 16
m2.center = [39.9975, -75.7173]m2.content.add(downingtown_fl)Append Attribute Values from a CSV
You'll now use append to update attribute values in a hosted feature layer from a csv item. In this case, the schemas do not match between the csv file and the hosted feature service layer you want to append values into.
Instead, you will add a new attribute field to the existing hosted feature service layer, and then use the append() parameter field_mappings to indicate how fields align between the source item and target feature service layer. In addition to the field_mappings parameter that indicates which fields align, you'll also use the append_fields parameter to restrict the operation to the fields you want to update.
# Create a working directory
if not os.path.exists(os.path.join(wd, "country")):
    os.mkdir(os.path.join(wd, "country"))

# Assign a variable to the full path of the new directory
wd = [os.path.join(wd, dir)
      for dir in os.listdir(wd)
      if 'country' in dir][0]
Download the source csv data
Search for and download the csv item so you can add it the portal as the owner of the item. You need to own a csv item to analyze() it. The results from analyzing are required for the source_info parameter in the append function.
sov_csv = gis.content.search("title:World_Sovereignty owner:api_data_owner", item_type="CSV")[0]
sov_csv
sov_csv.download(save_path=wd, file_name="countries_" + now_dt() + ".csv")

country_csv = [os.path.join(wd, csv)
               for csv in os.listdir(wd)
               if csv.endswith(".csv")][0]
country_csv
'DRIVE:\\\\Path\\To\\Data\\append_guide\\country\\countries_1558729983.csv'
Add the source csv item to the GIS
world_sov_props = {"title":"world_sovereignty_" + now_dt(),
                   "type":"CSV",
                   "tags":"indepedence, politics, international boundaries, geopolitics",
                   "snippet":"Data about the sovereignty of many of the world's nations",
                   "description":"Data collected from wikipedia regarding national sovereignty across the world"}

if not "World Sovereignty" in [folder['title']
                               for folder in gis.users.me.folders]:
                           gis.content.folders.create("World Sovereignty")

world_sov_folder = gis.content.folders.get("World Sovereignty", gis.users.me.username)
job = world_sov_folder.add(
    **{
        "item_properties" : world_sov_props,
        "file" : country_csv,
    }
)
ws_item = job.result()

ws_item.id
'4a4b5ba1df424dccb36b13f7cd09b8e2'
Analyze the source csv item
Calling analyze() will give you a dictionary as a response. You'll use the publishParameters value of the dictionary as the source_info parameter when appending from a csv file.
source_info = gis.content.analyze(item=ws_item.id, file_type='csv', location_type='none')
source_info['publishParameters']
{'type': 'csv',
'name': 'data',
'useBulkInserts': True,
'sourceUrl': '',
'locationType': 'none',
'maxRecordCount': 1000,
'columnDelimiter': ',',
'qualifier': '"',
'targetSR': {'wkid': 102100, 'latestWkid': 3857},
'editorTrackingInfo': {'enableEditorTracking': False,
'enableOwnershipAccessControl': False,
'allowOthersToQuery': True,
'allowOthersToUpdate': True,
'allowOthersToDelete': False,
'allowAnonymousToQuery': True,
'allowAnonymousToUpdate': True,
'allowAnonymousToDelete': True},
'layerInfo': {'currentVersion': 10.61,
'id': 0,
'name': '',
'type': 'Table',
'displayField': '',
'description': '',
'copyrightText': '',
'defaultVisibility': True,
'relationships': [],
'isDataVersioned': False,
'supportsAppend': True,
'supportsCalculate': True,
'supportsASyncCalculate': True,
'supportsTruncate': False,
'supportsAttachmentsByUploadId': True,
'supportsAttachmentsResizing': True,
'supportsRollbackOnFailureParameter': True,
'supportsStatistics': True,
'supportsExceedsLimitStatistics': True,
'supportsAdvancedQueries': True,
'supportsValidateSql': True,
'supportsCoordinatesQuantization': True,
'supportsFieldDescriptionProperty': True,
'supportsQuantizationEditMode': True,
'supportsApplyEditsWithGlobalIds': False,
'advancedQueryCapabilities': {'supportsPagination': True,
'supportsPaginationOnAggregatedQueries': True,
'supportsQueryRelatedPagination': True,
'supportsQueryWithDistance': True,
'supportsReturningQueryExtent': True,
'supportsStatistics': True,
'supportsOrderBy': True,
'supportsDistinct': True,
'supportsQueryWithResultType': True,
'supportsSqlExpression': True,
'supportsAdvancedQueryRelated': True,
'supportsCountDistinct': True,
'supportsReturningGeometryCentroid': False,
'supportsQueryWithDatumTransformation': True,
'supportsHavingClause': True,
'supportsOutFieldSQLExpression': True,
'supportsMaxRecordCountFactor': True,
'supportsTopFeaturesQuery': True},
'useStandardizedQueries': False,
'geometryType': 'esriGeometryPoint',
'drawingInfo': {'renderer': {'type': 'simple',
'symbol': {'type': 'esriPMS',
'url': 'RedSphere.png',
'imageData': 'iVBORw0KGgoAAAANSUhEUgAAAEAAAABACAYAAACqaXHeAAAABGdBTUEAALGPC/xhBQAAACBjSFJNAAB6JgAAgIQAAPoAAACA6AAAdTAAAOpgAAA6mAAAF3CculE8AAAACXBIWXMAAA7DAAAOwwHHb6hkAAAAGXRFWHRTb2Z0d2FyZQBQYWludC5ORVQgdjMuNS4xTuc4+QAAB3VJREFUeF7tmPlTlEcexnve94U5mANQbgQSbgiHXHINlxpRIBpRI6wHorLERUmIisKCQWM8cqigESVQS1Kx1piNi4mW2YpbcZONrilE140RCTcy3DDAcL/zbJP8CYPDL+9Ufau7uqb7eZ7P+/a8PS8hwkcgIBAQCAgEBAICAYGAQEAgIBAQCAgEBAICAYGAQEAgIBAQCDx/AoowKXFMUhD3lQrioZaQRVRS+fxl51eBTZUTdZ41U1Rox13/0JF9csGJ05Qv4jSz/YPWohtvLmSKN5iTGGqTm1+rc6weICOBRbZs1UVnrv87T1PUeovxyNsUP9P6n5cpHtCxu24cbrmwKLdj+osWiqrVKhI0xzbmZ7m1SpJ+1pFpvE2DPvGTomOxAoNLLKGLscZYvB10cbYYjrJCb7A5mrxleOBqim+cWJRakZY0JfnD/LieI9V1MrKtwokbrAtU4Vm0A3TJnphJD4B+RxD0u0LA7w7FTE4oprOCMbklEGNrfdGf4IqnQTb4wc0MFTYibZqM7JgjO8ZdJkpMln/sKu16pHZGb7IfptIWg389DPp9kcChWODoMuDdBOhL1JgpisbUvghM7AqFbtNiaFP80RLnhbuBdqi0N+1dbUpWGde9gWpuhFi95yL7sS7BA93JAb+Fn8mh4QujgPeTgb9kAZf3Apd2A+fXQ38yHjOHozB1IAJjOSEY2RSIwVUv4dd4X9wJccGHNrJ7CYQ4GGjLeNNfM+dyvgpzQstKf3pbB2A6m97uBRE0/Ergcxr8hyqg7hrwn0vAtRIKIRX6Y2pMl0RhIj8co9nBGFrvh55l3ngU7YObng7IVnFvGS+BYUpmHziY/Ls2zgP9SX50by/G9N5w6I+ogYvpwK1SoOlHQNsGfWcd9Peqof88B/rTyzF9hAIopAByQzC0JQB9ST5oVnvhnt+LOGsprvUhxNIwa0aY7cGR6Cp7tr8+whkjawIxkRWC6YJI6N+lAKq3Qf/Tx+B77oGfaQc/8hB8w2Xwtw9Bf3kzZspXY/JIDEbfpAB2BKLvVV90Jvjgoac9vpRxE8kciTVCBMMkNirJ7k/tRHyjtxwjKV4Yp3t/6s+R4E+/DH3N6+BrS8E314Dvvg2+/Sb4hxfBf5sP/up2TF3ZhonK1zD6dhwGdwail26DzqgX8MRKiq9ZBpkSkmeYOyPM3m9Jjl+1Z9D8AgNtlAq6bZ70qsZi+q+bwV/7I/hbB8D/dAr8Axq89iz474p/G5++koHJy1sx/lkGdBc2YjA3HF0rHNHuboomuQj/5DgclIvOGCGCYRKFFuTMV7YUAD3VDQaLMfyqBcZORGPy01QKYSNm/rYV/Nd/Av9NHvgbueBrsjDzRQamKKDxT9Kgq1iLkbIUDOSHoiNcgnYHgnYZi+9ZExSbiSoMc2eE2flKcuJLa4KGRQz6/U0wlGaP0feiMH4uFpMXEjBVlYjp6lWY+SSZtim0kulYMiYuJEJXuhTDJ9UYPByOvoIwdCxfgE4bAo0Jh39xLAoVpMwIEQyTyFCQvGpLon9sJ0K3J4OBDDcMH1dj9FQsxkrjMPFRPCbOx2GyfLal9VEcxstioTulxjAFNfROJPqLl6Bnfyg6V7ugz5yBhuHwrZjBdiU5YJg7I8wOpifAKoVIW7uQ3rpOBH2b3ekVjYT2WCRG3o+mIGKgO0OrlIaebU/HYOQDNbQnojB4NJyGD0NPfjA0bwTRE6Q7hsUcWhkWN8yZqSQlWWGECAZLmJfJmbrvVSI8taK37xpbdB/wQW8xPee/8xIGjvlj8IQ/hk4G0JbWcX8MHPVDX4kveoq8ocn3xLM33NCZRcPHOGJYZIKfpQyq7JjHS6yJjcHujLHADgkpuC7h8F8zEVqXSNC2awE69lqhs8AamkO26HrbDt2H7dBVQov2NcW26CiwQtu+BWjdY4n2nZboTbfCmKcCnRyDO/YmyLPnDlHvjDH8G6zhS9/wlEnYR7X00fWrFYuWdVI0ZpuhcbcczW/R2qdAcz6t/bRov4mONeaaoYl+p22rHF0bVNAmKtBvweIXGxNcfFH8eNlC4m6wMWMusEnKpn5hyo48pj9gLe4SNG9QoGGLAk8z5XiaJUd99u8122/IpBA2K9BGg2vWWKAvRYVeLzEa7E1R422m2+MsSTem97nSYnfKyN6/mzATv7AUgqcMrUnmaFlLX3ysM0fj+t/b5lQLtK22QEfyAmiSLKFZpUJ7kBRPXKW4HqCYynWVHKSG2LkyZex1uO1mZM9lKem9Tx9jjY5iNEYo0bKMhn7ZAu0r6H5PpLXCAq0rKJClSjSGynE/QIkrQYqBPe6S2X+AJsY2Ped6iWZk6RlL0c2r5szofRsO9R5S1IfQLRCpQL1aifoYFerpsbkuTImaUJXuXIDiH6/Ys8vm3Mg8L2i20YqsO7fItKLcSXyn0kXccclVqv3MS6at9JU/Ox+ouns+SF6Z4cSupz7l8+z1ucs7LF1AQjOdxfGZzmx8Iu1TRcfnrioICAQEAgIBgYBAQCAgEBAICAQEAgIBgYBAQCAgEBAICAQEAv8H44b/6ZiGvGAAAAAASUVORK5CYII=',
'contentType': 'image/png',
'width': 15,
'height': 15}}},
'allowGeometryUpdates': True,
'hasAttachments': False,
'htmlPopupType': '',
'hasM': False,
'hasZ': False,
'globalIdField': '',
'typeIdField': '',
'fields': [{'name': 'Country',
'type': 'esriFieldTypeString',
'alias': 'Country',
'sqlType': 'sqlTypeNVarchar',
'length': 256,
'nullable': True,
'editable': True,
'domain': None,
'defaultValue': None,
'locationType': 'country'},
{'name': 'Continent',
'type': 'esriFieldTypeString',
'alias': 'Continent',
'sqlType': 'sqlTypeNVarchar',
'length': 256,
'nullable': True,
'editable': True,
'domain': None,
'defaultValue': None,
'locationType': 'unknown'},
{'name': 'First_acquisition_of_sovereignty',
'type': 'esriFieldTypeString',
'alias': 'First acquisition of sovereignty',
'sqlType': 'sqlTypeNVarchar',
'length': 256,
'nullable': True,
'editable': True,
'domain': None,
'defaultValue': None,
'locationType': 'unknown'},
{'name': 'Date_of_last_subordination',
'type': 'esriFieldTypeInteger',
'alias': 'Date of last subordination',
'sqlType': 'sqlTypeInteger',
'nullable': True,
'editable': True,
'domain': None,
'defaultValue': None,
'locationType': 'unknown'},
{'name': 'Previous_governing_power',
'type': 'esriFieldTypeString',
'alias': 'Previous governing power',
'sqlType': 'sqlTypeNVarchar',
'length': 256,
'nullable': True,
'editable': True,
'domain': None,
'defaultValue': None,
'locationType': 'unknown'},
{'name': 'Notes',
'type': 'esriFieldTypeString',
'alias': 'Notes',
'sqlType': 'sqlTypeNVarchar',
'length': 529,
'nullable': True,
'editable': True,
'domain': None,
'defaultValue': None,
'locationType': 'unknown'}],
'indexes': [],
'types': [],
'templates': [{'name': 'New Feature',
'description': '',
'drawingTool': 'esriFeatureEditToolPoint',
'prototype': {'attributes': {'Country': None,
'Continent': None,
'First_acquisition_of_sovereignty': None,
'Date_of_last_subordination': None,
'Previous_governing_power': None,
'Notes': None}}}],
'supportedQueryFormats': 'JSON, geoJSON',
'hasStaticData': False,
'maxRecordCount': -1,
'standardMaxRecordCount': 32000,
'tileMaxRecordCount': 8000,
'maxRecordCountFactor': 1,
'capabilities': 'Create,Delete,Query,Update,Editing'}}From the results of the analyze function, you can list the field headings from the csv file behind the csv item. It's necessary to know the names of the headings to determine what to enter for the source values in the field_mappings parameter of the append function:
for csv_field in source_info['publishParameters']['layerInfo']['fields']:
    print(csv_field['name'])
Country Continent First_acquisition_of_sovereignty Date_of_last_subordination Previous_governing_power Notes
Download the target feature layer data
Search for a shapefile on the portal named International Boundaries. You'll download this shapefile, perform some cleanup to simplify the data, and create a spatially enabled dataframe from it. You will publish a unique hosted feature layer to investigate appending values from a csv file into a hosted feature layer.
country_boundaries_shp = gis.content.search("title:International Bound* owner:api_data_owner",
                                           item_type='Shapefile')[0]
country_boundaries_shp
Download the data and extract the shapefile from the zip archive.
country_zip = country_boundaries_shp.download(
                                    save_path=wd,
                                    file_name="countries_" + now_dt() +
                                    ".zip")

with zipfile.ZipFile(country_zip, 'r') as zf:
    zf.extractall(wd)
Extracting the shapefile in the previous cell created a new directory in the current working directory. Store the path to this directory for use later.
countries_shp = [os.path.join(wd, "countries", shp)
                 for shp in os.listdir(os.path.join(wd, "countries"))
                 if shp.endswith(".shp")][0]
countries_shp
'DRIVE:\\\\Path\\To\\Data\\append_guide\\country\\countries\\countries.shp'
Manage target feature layer schema
Load the shapefile into a Spatially Enabled DataFrame and remove unwanted columns from the source data.
countries_sedf = GeoAccessor.from_featureclass(countries_shp)
countries_sedf.head()| FID | OBJECTID | NAME | ISO3 | ISO2 | FIPS | COUNTRY | ENGLISH | FRENCH | SPANISH | LOCAL | FAO | WAS_ISO | SOVEREIGN | CONTINENT | UNREG1 | UNREG2 | EU | SQKM | SHAPE | |
|---|---|---|---|---|---|---|---|---|---|---|---|---|---|---|---|---|---|---|---|---|
| 0 | 0 | 1 | Åland | ALA | AX | AX | Åland | Åland | Åland | Finland | Europe | Northern Europe | Europe | 0 | 1.243719e+03 | {"rings": [[[20.995666505473764, 60.6422767616... | ||||
| 1 | 1 | 2 | Afghanistan | AFG | AF | AF | Afghanistan | Afghanistan | Afghanistan | Afganistán | Afghanestan | Afghanistan | Afghanistan | Asia | Southern Asia | Asia | 0 | 6.413834e+05 | {"rings": [[[73.2733612030425, 36.888557437342... | |
| 2 | 2 | 3 | Albania | ALB | AL | AL | Albania | Albania | Albanie | Albania | Shqiperia | Albania | Albania | Europe | Southern Europe | Europe | 0 | 2.848611e+04 | {"rings": [[[20.98056793146918, 40.85522079417... | |
| 3 | 3 | 4 | Algeria | DZA | DZ | AG | Algeria | Algeria | Algérie | Argelia | Al Jaza'ir | Algeria | Algeria | Africa | Northern Africa | Africa | 0 | 2.316559e+06 | {"rings": [[[-8.673868179321232, 27.2980728170... | |
| 4 | 4 | 5 | American Samoa | ASM | AS | AQ | American Samoa | American Samoa | Samoa Américaines | Samoa Americana | American Samoa | American Samoa | United States | Oceania | Polynesia | Oceania | 0 | 2.110151e+02 | {"rings": [[[-171.07492065386455, -11.06859588... |
Remove unwanted columns.
NOTE: If running in an environment without
arcpy, theFIDvalue below will report asindex. ChangeFIDtoindexin the list to run the cell.
countries_sedf.drop(labels=["FID","WAS_ISO", "FIPS","ENGLISH","FRENCH","SPANISH"], axis=1, inplace=True)
countries_sedf.head()| OBJECTID | NAME | ISO3 | ISO2 | COUNTRY | LOCAL | FAO | SOVEREIGN | CONTINENT | UNREG1 | UNREG2 | EU | SQKM | SHAPE | |
|---|---|---|---|---|---|---|---|---|---|---|---|---|---|---|
| 0 | 1 | Åland | ALA | AX | Åland | Åland | Finland | Europe | Northern Europe | Europe | 0 | 1.243719e+03 | {"rings": [[[20.995666505473764, 60.6422767616... | |
| 1 | 2 | Afghanistan | AFG | AF | Afghanistan | Afghanestan | Afghanistan | Afghanistan | Asia | Southern Asia | Asia | 0 | 6.413834e+05 | {"rings": [[[73.2733612030425, 36.888557437342... |
| 2 | 3 | Albania | ALB | AL | Albania | Shqiperia | Albania | Albania | Europe | Southern Europe | Europe | 0 | 2.848611e+04 | {"rings": [[[20.98056793146918, 40.85522079417... |
| 3 | 4 | Algeria | DZA | DZ | Algeria | Al Jaza'ir | Algeria | Algeria | Africa | Northern Africa | Africa | 0 | 2.316559e+06 | {"rings": [[[-8.673868179321232, 27.2980728170... |
| 4 | 5 | American Samoa | ASM | AS | American Samoa | American Samoa | American Samoa | United States | Oceania | Polynesia | Oceania | 0 | 2.110151e+02 | {"rings": [[[-171.07492065386455, -11.06859588... |
Publish target countries hosted feature layer
Use the to_featurelayer() method on the spatially enabled dataframe, then move the Feature Layer and underlying File Geodatabase item to the desired folder in the GIS.
countries_item = countries_sedf.spatial.to_featurelayer(title="world_boundaries_" + now_dt(),
                                                      gis=gis,
                                                      tags="Administrative Boundaries, International, Geopolitics")
countries_item.move(folder="World Sovereignty")

countries_shp_item = [item for item in gis.content.search("*", item_type="File Geodatabase")
                      if item.title == countries_item.title][0]
countries_shp_item.move(folder="World Sovereignty")
{'success': True,
'itemId': '017beebf2b7849cebef7f024b19e3dbb',
'owner': 'arcgis_python',
'folder': '43b7f217d2d541e1944207a96eb2b1a0'}Get the target hosted feature layer
world_boundaries_item = [c for
                         c in gis.content.search(query="world_boundaries* \
                                                 AND owner:arcgis_python",
                                                item_type="Feature Layer")][0]
world_boundaries_item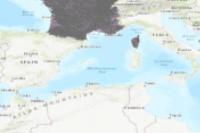
Add attribute field to the target hosted feature layer
List all the current fields in the layer so you can use one as a field template. You'll create a copy from the template, edit its values, then add that field to the layer with the add_to_definition() method.
boundaries_lyr = world_boundaries_item.layers[0]

for field in boundaries_lyr.properties.fields:
    print(f"{field['name']:30}{field['type']}")
OBJECTID esriFieldTypeOID NAME esriFieldTypeString ISO3 esriFieldTypeString ISO2 esriFieldTypeString COUNTRY esriFieldTypeString LOCAL esriFieldTypeString FAO esriFieldTypeString SOVEREIGN esriFieldTypeString CONTINENT esriFieldTypeString UNREG1 esriFieldTypeString UNREG2 esriFieldTypeString EU esriFieldTypeInteger SQKM esriFieldTypeDouble Shape__Area esriFieldTypeDouble Shape__Length esriFieldTypeDouble
Create a dictionary from a deep copy of a field in the feature layer, and update the values of this dictionary to reflect a new field:
dols_field = dict(deepcopy(boundaries_lyr.properties.fields[1]))
dols_field['name'] = "sovereignty_year"
dols_field['alias'] = "SOVEREIGNTY_YEAR"
dols_field['length'] = "10"
dols_field
{'name': 'sovereignty_year',
'type': 'esriFieldTypeString',
'alias': 'SOVEREIGNTY_YEAR',
'sqlType': 'sqlTypeOther',
'length': '10',
'nullable': True,
'editable': True,
'domain': None,
'defaultValue': None}Update feature layer definition with the new field using the add_to_definition() method.
field_list = [dols_field]
boundaries_lyr.manager.add_to_definition({"fields":field_list})
{'success': True}View the list of fields to verify the feature service layer contains the new field. You have to reload the layer in the notebook to reflect the change:
world_boundaries_item = gis.content.search(query="world_* AND owner:arcgis_python",
                                           item_type="Feature Layer")[0]
world_boundaries_lyr = world_boundaries_item.layers[0]

for fld in world_boundaries_lyr.properties.fields:
    print(fld['name'])
OBJECTID NAME ISO3 ISO2 COUNTRY LOCAL FAO SOVEREIGN CONTINENT UNREG1 UNREG2 EU SQKM Shape__Area Shape__Length sovereignty_year
Add a unique index to the new attribute field
When appending data to a layer, you need a foreign key. This way, any attribute field that matches values from the source csv to those in a hosted feature layer must have a unique index in the hosted feature layer field. The name field in the hosted feature layer matches values in the Country field in the csv table, so you need to uniquely index the name field.
Let's list the fields in the layer that contain a unique index.
uk_flds = [f.fields.lower() for f in boundaries_lyr.properties.indexes if f.isUnique]

for fld in boundaries_lyr.properties.fields:
    if fld.name.lower() in uk_flds:
        print(f"{fld.name:30}{fld.type:25}isUnique")
    else:
        print(f"{fld.name:30}{fld.type:25}")
OBJECTID esriFieldTypeOID isUnique NAME esriFieldTypeString ISO3 esriFieldTypeString ISO2 esriFieldTypeString COUNTRY esriFieldTypeString LOCAL esriFieldTypeString FAO esriFieldTypeString SOVEREIGN esriFieldTypeString CONTINENT esriFieldTypeString UNREG1 esriFieldTypeString UNREG2 esriFieldTypeString EU esriFieldTypeInteger SQKM esriFieldTypeDouble Shape__Area esriFieldTypeDouble Shape__Length esriFieldTypeDouble
Create a copy of one index, then edit it to reflect values for a new index. Then add that to the layer definition.
uk_name_idx = dict(deepcopy(boundaries_lyr.properties['indexes'][0]))
uk_name_idx['name'] = 'c_name_uk'
uk_name_idx['fields'] = 'NAME'
uk_name_idx['isUnique'] = True
uk_name_idx['description'] = 'index_name'

uk_name_idx
{'name': 'c_name_uk',
'fields': 'NAME',
'isAscending': True,
'isUnique': True,
'description': 'index_name'}index_list = [uk_name_idx]
boundaries_lyr.manager.add_to_definition({"indexes":index_list}){'success': True}Verify the index was added.
world_boundaries_item = gis.content.search(query="world_* AND owner:arcgis_python",
                                           item_type="Feature Layer")[0]
boundaries_lyr = world_boundaries_item.layers[0]

uk_flds = [f.fields.lower() for f in boundaries_lyr.properties.indexes if f.isUnique]

for fld in boundaries_lyr.properties.fields:
    if fld.name.lower() in uk_flds:
        print(f"{fld.name:30}{fld.type:25}isUnique")
    else:
        print(f"{fld.name:30}{fld.type:25}")
OBJECTID esriFieldTypeOID isUnique NAME esriFieldTypeString isUnique ISO3 esriFieldTypeString ISO2 esriFieldTypeString COUNTRY esriFieldTypeString LOCAL esriFieldTypeString FAO esriFieldTypeString SOVEREIGN esriFieldTypeString CONTINENT esriFieldTypeString UNREG1 esriFieldTypeString UNREG2 esriFieldTypeString EU esriFieldTypeInteger SQKM esriFieldTypeDouble Shape__Area esriFieldTypeDouble Shape__Length esriFieldTypeDouble sovereignty_year esriFieldTypeString
Create a Pandas dataframe and take a look at the first 25 records in the dataframe created from querying the feature layer. You can see the sovereignty_year column has no values for any of the records.
boundaries_df = boundaries_lyr.query(where="OBJECTID < 26", as_df=True)
boundaries_df[["OBJECTID", "NAME", "sovereignty_year"]]| OBJECTID | NAME | sovereignty_year | |
|---|---|---|---|
| 0 | 1 | Åland | None |
| 1 | 2 | Afghanistan | None |
| 2 | 3 | Albania | None |
| 3 | 4 | Algeria | None |
| 4 | 5 | American Samoa | None |
| 5 | 6 | Andorra | None |
| 6 | 7 | Angola | None |
| 7 | 8 | Anguilla | None |
| 8 | 9 | Antarctica | None |
| 9 | 10 | Antigua and Barbuda | None |
| 10 | 11 | Argentina | None |
| 11 | 12 | Armenia | None |
| 12 | 13 | Aruba | None |
| 13 | 14 | Ashmore and Cartier Islands | None |
| 14 | 15 | Australia | None |
| 15 | 16 | Austria | None |
| 16 | 17 | Azerbaijan | None |
| 17 | 18 | Bahamas | None |
| 18 | 19 | Bahrain | None |
| 19 | 20 | Baker Island BN | None |
| 20 | 21 | Baker Island | None |
| 21 | 22 | Bangladesh | None |
| 22 | 23 | Barbados | None |
| 23 | 24 | Belarus | None |
| 24 | 25 | Belgium | None |
Append attribute values from the csv item into target feature layer attribute field
Say want to update the sovereignty_year field you added to the feature layer with values from the Date_of_last_subordination column in the csv item.
You know that the unique values in the hosted feature layer NAME attribute field match the values in the Country field in the csv data.
When field names in the source and target tables vary, the field_mappings parameter of the append method allows you to match them. Thus, in this example, the sovereignty_year and NAME fields of the target feature layer differ from the Date_of_last_subordination and Country fields of the source CSV. The default behavior of the parameter is to match field names between the source and target, so if all headings and field names match, the parameter is optional. With field names that do not match, the parameter argument is a list of dictionaries, each dictionary pairing a name key for the target feature layer to a source key which is the corresponding field in the csv.
The append_fields parameter can be used to further alter the default behavior and restrict which fields will be inserted, have values updated, or have values matched. See the Append (Feature Service/Layer documentation for detailed explanations on all parameters.
You want to update values in the sovereignty_year field, and match values in the NAME field, so each is entered as an argument in the append_fields parameter. The upsert_matching_fields parameter informs the server that when this layer field matches a record from the source field to which its mapped (in field_mappings), update the feature layer with values from the source according to the append_fields list.
boundaries_lyr.append(item_id=sov_csv.id,
                      upload_format = 'csv',
                      field_mappings = [{"name":"sovereignty_year", "source":"Date_of_last_subordination"},
                                        {"name":"NAME", "source":"Country"}],
                      source_info = source_info['publishParameters'],
                      upsert=True,
                      update_geometry=False,
                      append_fields=["sovereignty_year", "NAME"],
                      skip_inserts=True,
                      upsert_matching_field="NAME")
True
Look at the same 25 records to verify the append added attribute values.
app_boundaries_df = boundaries_lyr.query(where="OBJECTID < 26", as_df=True)
app_boundaries_df[["OBJECTID", "NAME", "sovereignty_year"]][:25]| OBJECTID | NAME | sovereignty_year | |
|---|---|---|---|
| 0 | 1 | Åland | None |
| 1 | 2 | Afghanistan | 1823 |
| 2 | 3 | Albania | 1944 |
| 3 | 4 | Algeria | 1962 |
| 4 | 5 | American Samoa | None |
| 5 | 6 | Andorra | 1944 |
| 6 | 7 | Angola | 1975 |
| 7 | 8 | Anguilla | None |
| 8 | 9 | Antarctica | None |
| 9 | 10 | Antigua and Barbuda | 1981 |
| 10 | 11 | Argentina | 1816 |
| 11 | 12 | Armenia | 1991 |
| 12 | 13 | Aruba | None |
| 13 | 14 | Ashmore and Cartier Islands | None |
| 14 | 15 | Australia | 1942 |
| 15 | 16 | Austria | 1955 |
| 16 | 17 | Azerbaijan | 1991 |
| 17 | 18 | Bahamas | 1973 |
| 18 | 19 | Bahrain | 1971 |
| 19 | 20 | Baker Island BN | None |
| 20 | 21 | Baker Island | None |
| 21 | 22 | Bangladesh | 1971 |
| 22 | 23 | Barbados | 1966 |
| 23 | 24 | Belarus | 1991 |
| 24 | 25 | Belgium | 1945 |
Insert New Features and Update Existing Features Using Upsert
You'll now use append() to combine adding new features and correcting attribute value errors. This combination of adding new features (insert), and changing existing feature values (update) is known as an upsert. The append method includes the field_mappings, upsert,skip_updates, skip_inserts, append_fields, and upsert_matching_field parameters to provide you control over how the append occurs.
# Create a working directory
if not os.path.exists(os.path.join(wd, "sierra_leone")):
    os.mkdir(os.path.join(wd, "sierra_leone"))

# Assign the full path of the new directory to a variable
wd = [os.path.join(wd, dir)
      for dir in os.listdir(wd)
      if 'sierra_leone' in dir][0]
Download the target feature layer data
Search for a File Geodatabase named Sierra_Leone.
For the purposes of illustrating the append function in this guide, our api_data_owner user owns a copy of the hosted feature layer to append data into. You'll download a File Geodatabase item as zip file then add it to the portal and publish a unique hosted feature service from that zip file.
sierra_leone_fgdb = gis.content.search(query="Sierra_Leone*",
                                       item_type="File Geodatabase")[0]
sierra_leone_fgdb
sle_zip = sierra_leone_fgdb.download(save_path=wd, file_name="sierra_leone_"
                                     + now_dt() + ".zip")
Publish the target hosted feature layer
if not "Sierra Leone" in [folder['title']
                          for folder in gis.users.me.folders]:
                         gis.content.folders.create(folder="Sierra Leone")

sierra_leone_folder = gis.content.folders.get("World Sovereignty", gis.users.me.username)
sl_props = {
    "title":"sierra_leone_geography_" + now_dt(),
    "type":"File Geodatabase",
    "tags":"Sierra Leone, West Africa, append guide",
    "snippet":"File Geodatabase to illustrate Python API append",
}
job = sierra_leone_folder.add(
    **{
        "item_properties" : sl_props,
        "file" : sle_zip,
    }
)
sle_item = job.result()
sle_boundaries = sle_item.publish()
Visualize the target feature layer
Notice that the Southern region is missing data.
sle_boundaries_lyr = sle_boundaries.layers[0]
sle_boundaries_lyr
<FeatureLayer url:"https://services7.arcgis.com/JEwYeAy2cc8qOe3o/arcgis/rest/services/sierra_leone_geography_1558730610/FeatureServer/0">
m3 = gis.map("SLE")
m3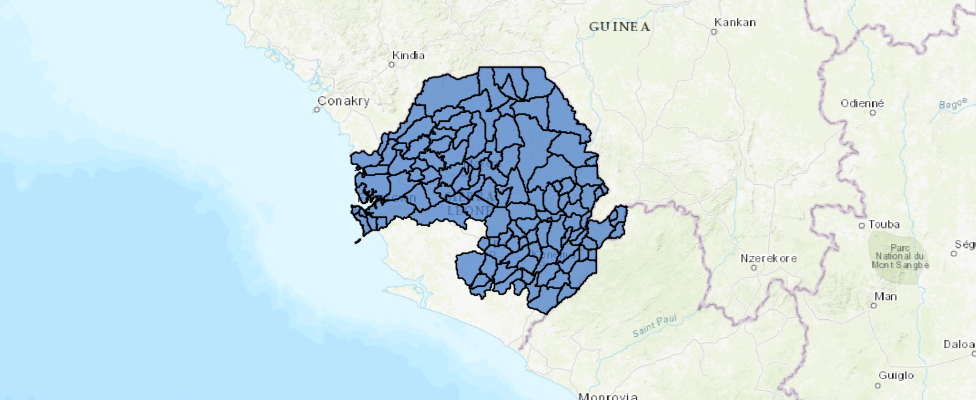
m3.content.add(sle_boundaries_lyr)Query the feature layer to examine attribute errors
As you can see, certain features are missing from the southern part of Sierra Leone. You can also query the data to see that certain features of the Bo Chiefdom have been incorrectly labeled as being in the Eastern District. Finally, certain Bo Chiefdoms have been incorrectly labeled as Boao.
You'll use the Append function to both:
- Insert new missing Chiefdoms in the Southern District
- Upsert the correct spelling for
Boand change incorrectEastern ValuestoSouthern
bo_features = sle_boundaries_lyr.query(where="NAME_2 like 'Bo%' AND \
                                              (NAME_1 = 'Southern' or NAME_1 = 'Eastern')",
                                       as_df=True)
bo_features[["OBJECTID", "NAME_1", "NAME_2", "GID_3"]]| OBJECTID | NAME_1 | NAME_2 | GID_3 | |
|---|---|---|---|---|
| 0 | 154 | Eastern | Boao | SLE.3.1.1_1 |
| 1 | 155 | Eastern | Bo | SLE.3.1.2_1 |
| 2 | 156 | Eastern | Bo | SLE.3.1.3_1 |
| 3 | 157 | Eastern | Bo | SLE.3.1.4_1 |
| 4 | 158 | Southern | Boao | SLE.3.1.5_1 |
| 5 | 159 | Southern | Boao | SLE.3.1.6_1 |
| 6 | 160 | Southern | Boao | SLE.3.1.7_1 |
| 7 | 161 | Southern | Bo | SLE.3.1.8_1 |
| 8 | 162 | Southern | Boao | SLE.3.1.9_1 |
| 9 | 163 | Southern | Bo | SLE.3.1.10_1 |
| 10 | 164 | Eastern | Boao | SLE.3.1.11_1 |
| 11 | 165 | Eastern | Boao | SLE.3.1.12_1 |
| 12 | 166 | Eastern | Bo | SLE.3.1.13_1 |
| 13 | 167 | Eastern | Boao | SLE.3.1.14_1 |
| 14 | 168 | Eastern | Bo | SLE.3.1.15_1 |
Examine attribute fields and indices
When you are appending to a target feature layer, you need a layer attribute field that has unique values to match a field in the source item (a foreign key) from which you'll append features/values.
Generate a list of target feature layer fields with a unique index, then loop over it to examine field names, field types, and whether or not the field contains a unique index.
uk_flds = (f.fields for f in sle_boundaries_lyr.properties.indexes if f.isUnique)for fld in sle_boundaries_lyr.properties.fields:
if fld.name in uk_flds:
print(f"{fld.name:30}{fld.type:25}isUnique")
else:
print(f"{fld.name:30}{fld.type:25}")OBJECTID esriFieldTypeOID isUnique GID_0 esriFieldTypeString NAME_0 esriFieldTypeString NAME_1 esriFieldTypeString NAME_2 esriFieldTypeString GID_3 esriFieldTypeString TYPE_3 esriFieldTypeString Shape__Area esriFieldTypeDouble Shape__Length esriFieldTypeDouble
The OBJECTID field in this layer is uniquely indexed, but does not match the OBJECTID values in the file geodatabase that you are
going to append values from. The GID_3 field is unique to each chiefdom in Sierra Leone. This field exists in both the hosted feature layer and the source file geodatabase, but is not uniquely indexed in this feature layer.
You need to uniquely index this field in the target hosted feature layer in order to use it for the upsert_matching_field parameter.
idx_update_dict ={"name":"gid3_Index","fields":"GID_3","isUnique":True}
sle_boundaries_lyr.manager.add_to_definition({"indexes":[idx_update_dict]}){'success': True}Reload the hosted feature layer to ensure there is a unique index:
sle_item = [item
for item in gis.content.search(query="sierra_leone_geography_*")
if item.type == "Feature Service"][0]
sle_boundaries_lyr = sle_item.layers[0]uk_flds = [f.fields for f in sle_boundaries_lyr.properties.indexes if f.isUnique]
for fld in sle_boundaries_lyr.properties.fields:
    if fld.name in uk_flds:
        print(f"{fld.name:30}{fld.type:25}isUnique")
    else:
        print(f"{fld.name:30}{fld.type:25}")
OBJECTID esriFieldTypeOID isUnique GID_0 esriFieldTypeString NAME_0 esriFieldTypeString NAME_1 esriFieldTypeString NAME_2 esriFieldTypeString GID_3 esriFieldTypeString isUnique TYPE_3 esriFieldTypeString Shape__Area esriFieldTypeDouble Shape__Length esriFieldTypeDouble
Examine the source file geodatabase
sle_southern_chiefdoms = gis.content.search("SLE_Southern*")[0]
sle_southern_chiefdoms
Download the File Geodatabase that is the source for your append data. You can use arcpy to get the name of the feature class and its fields, as you'll need those in arguments in the append() call.
sle_southern_zip = sle_southern_chiefdoms.download(save_path=wd, file_name="sierra_leone_southern.zip")

with zipfile.ZipFile(sle_southern_zip) as zf:
    zf.extractall(wd)
sle_southern_chiefdoms_fgdb = [os.path.join(wd, gdb)
for gdb in os.listdir(wd)
if gdb.startswith("SLE")][0]
sle_southern_chiefdoms_fgdb'DRIVE:\\\\Path\\To\\Data\\append_guide\\sierra_leone\\SLE_Southern_Chiefdoms.gdb'
# Get the feature class name for the `source_table_name` parameter

arcpy.env.workspace = sle_southern_chiefdoms_fgdb
print(f"Root Geodatabase")
if arcpy.ListFeatureClasses():
    for fc in arcpy.ListFeatureClasses():
        print(f"\t{fc}")
if arcpy.ListDatasets():
    for ds in arcpy.ListDatasets():
        if arcpy.ListFeatureClasses(feature_dataset=ds):
            print(f"{'':2}FDS: {ds}")
            for fc in arcpy.ListFeatureClasses(feature_dataset=ds):
                print(f"\t{fc}")
Root Geodatabase Chiefdoms_Southern
# inspect the field names because you'll need certain fields for the `append_fields`
# and the `field_mappings` parameters

for fc in arcpy.ListFeatureClasses():
    sle_southern_desc = arcpy.Describe(fc)

for ch_fld in sle_southern_desc.fields:
    print(f"{ch_fld.name:30}{ch_fld.type}")
print("\n")
for ch_idx in sle_southern_desc.indexes:
    if ch_idx.isUnique:
        uk = "Unique index on: "
    else:
        uk = "Non-Unique index on: "
    print(f"{ch_idx.name:20}{uk:<20}{[f.name for f in ch_idx.fields]}")
OBJECTID OID Shape Geometry GID_0 String NAME_0 String NAME_1 String NAME_2 String GID_3 String TYPE_3 String Shape_Length Double Shape_Area Double FDO_OBJECTID Unique index on: ['OBJECTID'] FDO_Shape Non-Unique index on: ['Shape']
Append using upsert to update attribute values and add new features
The Chiefdoms_Southern feature class contains edits for Bo Chiefdom features where the name is misspelled in the Name_2 attribute and the incorrect region is labeled in the Name_1 attribute. The feature class also contains all the missing chiefdom features to complete the Southern region.
You'll use the append_fields parameter to match values between the source and target (GID_3 in both datasets), as well as inform the function on which fields should have values updated (NAME_1 and NAME_2). The upsert_matching_field informs the server of the matching fields between the datasets. If the field names differed between sources, the field_mappings parameter allows alignment between the fields.
sle_boundaries_lyr.append(source_table_name ="Chiefdoms_Southern",
                          item_id=sle_southern_chiefdoms.id,
                          upload_format="filegdb",
                          upsert=True,
                          skip_updates=False,
                          use_globalids=False,
                          update_geometry=True,
                          append_fields=["GID_3","NAME_1", "NAME_2"],
                          rollback=False,
                          skip_inserts=False,
                          upsert_matching_field="GID_3")
True
Verify results
m4 = gis.map("SLE")
m4
m4.content.add(sle_boundaries_lyr)bo_append_features = sle_boundaries_lyr.query(where="NAME_2 like 'Bo' AND \
(NAME_1 = 'Southern' OR NAME_1 = 'Eastern')",
as_df=True)
bo_append_features| GID_0 | GID_3 | NAME_0 | NAME_1 | NAME_2 | OBJECTID | SHAPE | Shape__Area | Shape__Length | TYPE_3 | |
|---|---|---|---|---|---|---|---|---|---|---|
| 0 | SLE | SLE.3.1.1_1 | Sierra Leone | Southern | Bo | 154 | {"rings": [[[-1273681.0309, 896109.3464], [-12... | 1.239438e+08 | 45455.250384 | Chiefdom |
| 1 | SLE | SLE.3.1.2_1 | Sierra Leone | Southern | Bo | 155 | {"rings": [[[-1281851.8307, 892253.52], [-1281... | 2.429076e+08 | 67019.126611 | Chiefdom |
| 2 | SLE | SLE.3.1.3_1 | Sierra Leone | Southern | Bo | 156 | {"rings": [[[-1306553.6242, 855184.083099999],... | 2.607698e+08 | 88729.800647 | Chiefdom |
| 3 | SLE | SLE.3.1.4_1 | Sierra Leone | Southern | Bo | 157 | {"rings": [[[-1297829.6114, 877901.4813], [-12... | 4.414146e+08 | 115758.103473 | Chiefdom |
| 4 | SLE | SLE.3.1.5_1 | Sierra Leone | Southern | Bo | 158 | {"rings": [[[-1344836.3667, 860856.6523], [-13... | 1.025333e+09 | 138072.230896 | Chiefdom |
| 5 | SLE | SLE.3.1.6_1 | Sierra Leone | Southern | Bo | 159 | {"rings": [[[-1310828.2589, 901460.828600001],... | 1.660301e+08 | 49260.324265 | Chiefdom |
| 6 | SLE | SLE.3.1.7_1 | Sierra Leone | Southern | Bo | 160 | {"rings": [[[-1305017.4523, 855240.213100001],... | 4.293123e+08 | 104077.943988 | Chiefdom |
| 7 | SLE | SLE.3.1.8_1 | Sierra Leone | Southern | Bo | 161 | {"rings": [[[-1297829.6114, 877901.4813], [-12... | 4.590913e+08 | 95926.942063 | Chiefdom |
| 8 | SLE | SLE.3.1.9_1 | Sierra Leone | Southern | Bo | 162 | {"rings": [[[-1266100.1763, 911052.4463], [-12... | 2.519861e+08 | 77495.153980 | Chiefdom |
| 9 | SLE | SLE.3.1.10_1 | Sierra Leone | Southern | Bo | 163 | {"rings": [[[-1335218.3591, 848568.755800001],... | 2.613595e+08 | 75448.219786 | Chiefdom |
| 10 | SLE | SLE.3.1.11_1 | Sierra Leone | Southern | Bo | 164 | {"rings": [[[-1290378.912, 899549.589400001], ... | 2.199070e+08 | 72853.233671 | Chiefdom |
| 11 | SLE | SLE.3.1.12_1 | Sierra Leone | Southern | Bo | 165 | {"rings": [[[-1299974.6255, 900628.880199999],... | 1.206033e+08 | 45788.945198 | Chiefdom |
| 12 | SLE | SLE.3.1.13_1 | Sierra Leone | Southern | Bo | 166 | {"rings": [[[-1305017.4523, 855240.213100001],... | 4.240371e+08 | 102027.604196 | Chiefdom |
| 13 | SLE | SLE.3.1.14_1 | Sierra Leone | Southern | Bo | 167 | {"rings": [[[-1300319.7599, 911536.0275], [-13... | 8.765839e+08 | 122943.384157 | Chiefdom |
| 14 | SLE | SLE.3.1.15_1 | Sierra Leone | Southern | Bo | 168 | {"rings": [[[-1284167.2357, 854993.091600001],... | 4.250339e+08 | 111351.000957 | Chiefdom |
Conclusion
You used the Feature Layer append() method to perform inserts of new features and updates of existing features. Particularly for large feature service layers, the append operation provides performance benefits to overwriting services. Using append can ease the challenge of managing data, providing flexiblity for updating your service data.