Use the ArcGIS Vector Tile Style Editor to post-style your vector tile layer.
Prerequisites
- You need an ArcGIS Location Platform or ArcGIS Online account.
- You need to complete Step 3. Publish a vector tile layer.
Steps
Access the ArcGIS Vector Tile Style Editor
In most cases, you style the features in a feature layer before publishing a vector tile layer. If you want to update the style after publishing the vector tile layer, use the ArcGIS Vector Tile Style Editor.
-
Go to the item page of the vector tile layer you published in the previous step.
-
On the right side of the page, click Edit in Vector Tile Style Editor.
Edit layer styles
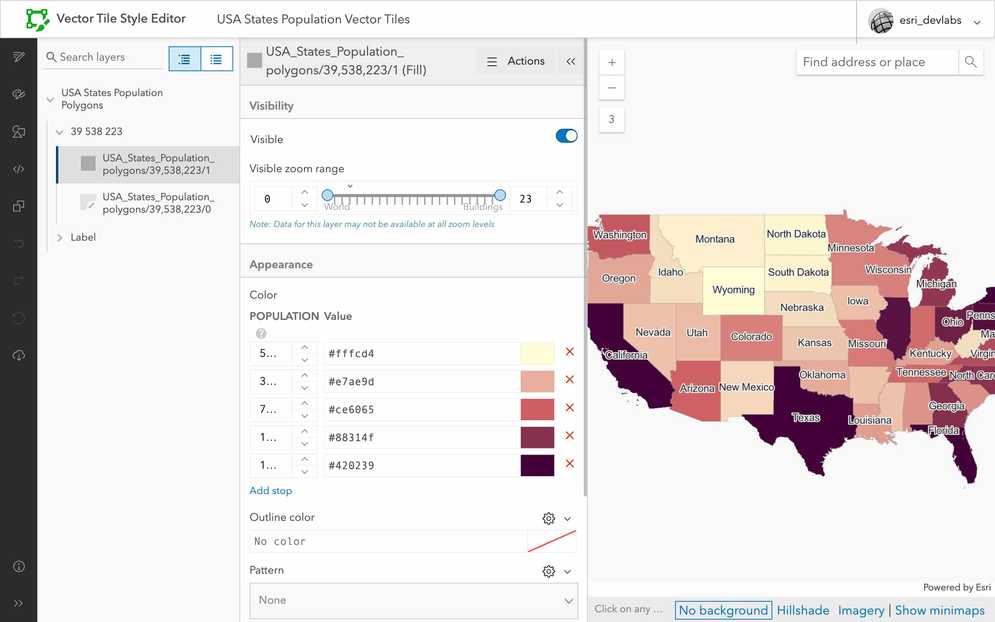
Remove the outlines from the polygon features using the Edit layer styles panel.
-
In the left sidebar, click Edit layer styles.
-
Click the USA States Population Polygons > 39 538 223 > USA_States_Population_polygons/39,538,223/0.
-
In the USA_States_Population_polygons/39,538,223/0 (Line) window, click Actions > Remove layer.

-
Confirm that the outlines are removed from the polygon features.
-
Copy the polygon layer ID, USA_States_Population_polygons/39,538,223/1, and store it somewhere safe. You will need this in a later step.
Edit label visibility
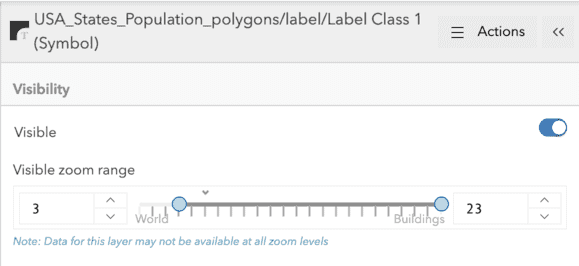
Update the label settings so that state labels become visible starting at zoom level 3.
-
Click the USA States Population Polygons > Label > USA_States_Population_polygons/label/Label Class 1 (Symbol).
-
Under Visibility > Visible zoom range, set the first number to
3.
-
Zoom in and out on the map to confirm that the labels begin appearing at zoom level 3.
Save the layer
After styling the layer, save the style. Saving the style will create a new vector tile layer item you can display in an application.
-
In the left navigation panel, click Save as.
-
In the window that appears, set the following:
- Title: USA States Population (no outline)
- Tags:
vectorvtseoutlinepopulation
-
To use the new styled layer in an app, go to the item page and get its item ID from the URL, for example:
- URL:
https://arcgis.com/home/item.html?id=31eb749371c441e0b3ac5db4f60ecba9 - Item ID:
31eb749371c441e0b3ac5db4f60ecba9
- URL:
-
Copy the item ID and store it somewhere safe. You will need this in a later step.