This sample demonstrates how to utilize snapping with the Sketch widget. This sample
also takes advantage of the Magnifier to make it easier to snap to the vertices of existing graphics.
For instance, the Magnifier provides a magnified image on the view, which means a user does not have to zoom as much in order to locate a vertex or feature on the Map.
Magnifier
This sample demonstrates how to configure the Magnifier, and display it wherever the cursor appears on the Map.
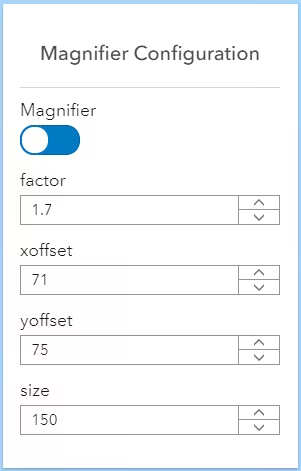
// enable the Magnifierview.magnifier.visible = true;view.magnifier.factor = 1.7; // magnification factorview.magnifier.size = 150; // magnifier image sizeview.magnifier.offset = { x: 75, y: 75 }; // x and y offset values
// uses the mouse cursor location to position the Magnifierview.on("pointer-move", (evt) => {  view.magnifier.position = { x: evt.x, y: evt.y };});
This sample allows a user to configure the Magnifier properties via the Calcite Design System Components.
This allows a user to turn the Magnifier visibility on/off, increase/decrease the magnification factor,
increase/decrease the magnifier size, and update the offset.
Snapping
This sample shows an example of how to configure snapping programmatically, or by using the Sketch widget’s User Interface (UI). Please refer to the SnappingOptions documentation for a list of known limitations when working with snapping and the Sketch widget.
The following code snippet illustrates how to turn snapping on by default for both feature snapping and self snapping. This requires the SnappingOptions.enabled property to be set to true.
A user can also use the UI to turn snapping on/off, but it’s useful to know how to set this up programmatically as well. This sample also shows how to pass the GraphicsLayer programmatically to the featureSources, which enables feature snapping on this layer. This can also be done
via the UI in the Sketch widget under “Snapping layers”. Just to be clear, the snappingOptions code in the following code snippet is not necessary when using the Sketch widget. All of this can be configured via the UI of the widget. This code is meant to show an example of how to set this up programmatically in an application.
// setup the Sketch widget with all snapping enabled by defaultconst sketch = new Sketch({ layer: graphicsLayer, view: view, // graphic will be selected as soon as it is created creationMode: "update", snappingOptions: { // autocasts as SnappingOptions() enabled: true, // enable snapping on the graphicslayer by default featureSources: [{ layer: graphicsLayer, enabled: true }], }, visibleElements: { // hide/show sketch elements createTools: { circle: false, // hide the circle tool }, selectionTools: { "lasso-selection": false, // hide the lasso-selection tool }, },});Snapping can be toggled on/off with either the snapping options UI in the Sketch widget, or while drawing and holding the Ctrl keyboard shortcut.
The following demonstrates an example of how the sample utilizes the snapping functionality of the Sketch widget.