The general steps to build an app with ArcGIS Instant Apps are:
1. Create a web map
To create a web app using ArcGIS Instant Apps, you need to start by creating a web map. To do this, go to ArcGIS.com or ArcGIS Enterprise portal and click Map to open the Map Viewer. Use the map viewer to add layers, set the symbols, zoom to an extent, and set up pop ups and other properties.

2. Select a template
Now that you have a web map, click Create app > Instant Apps to create a web app based on that map. You will be taken to the Instant App template gallery allowing you to choose a template to use as the basis for your web app.

3. Configure the app
You can customize the look and feel of your web app and add additional layers. Once you are satisfied with the configuration, click the Publish button to create the web app.

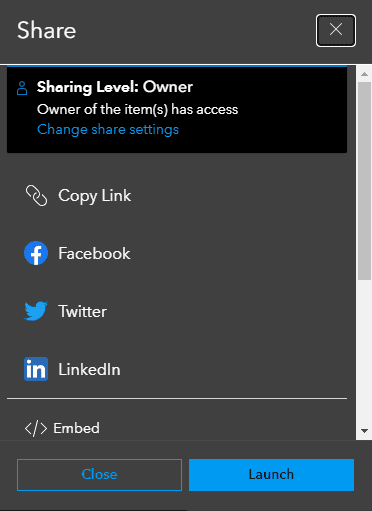
4. Publish and share your app
When publishing your web app is complete, the Share window is displayed allowing you to select the option on how to share your app with others. The window also includes a link to your app to share via using social media or embed in another web app.