Learn how to create and display a scene from a web scene stored in ArcGIS.
This tutorial shows you how to create and display a scene from a web scene. All web scenes are stored in ArcGIS with a unique item ID. You will access an existing web scene by item ID and display its layers. The web scene contains feature layers for the Santa Monica Mountains in California.
Prerequisites
Before starting this tutorial:
-
You need an ArcGIS Location Platform or ArcGIS Online account.
-
Confirm that your system meets the minimum system requirements.
-
An IDE for Java.
Steps
Open a Java project with Gradle
-
To start the tutorial, complete the Display a scene tutorial, or download and unzip the Display a scene solution into a new folder.
-
Open the build.gradle file as a project in IntelliJ IDEA.
-
If you downloaded the solution, get an access token and set the API key.
An API key gives your app access to secure resources used in this tutorial.
-
Go to the Create an API key tutorial to obtain a new API key access token using your ArcGIS Location Platform or ArcGIS Online account. Ensure that the following privilege is enabled: Location services > Basemaps > Basemap styles service. Copy the access token as it will be used in the next step.
-
In the IntelliJ IDEA > Project tool window, open src/main/java/com.example.app and double-click App.
-
In the
start()method, set the API key property on theArcGISRuntimeEnvironmentwith your access token. Replace YOUR_ACCESS_TOKEN with your copied access token. Be sure to surround your access token with double quotes as it is a string.App.javaUse dark colors for code blocks ArcGISRuntimeEnvironment.setApiKey("YOUR_ACCESS_TOKEN");
-
Prepare files before coding the app
Modify the files from the Display a scene tutorial so that they can be used in this tutorial: you will add imports, change the application title, and remove unnecessary code.
-
In IntelliJ IDEA's Project tool window, open src/main/java/com.example.app and double-click App.
-
Add the following imports, replacing those from the
Display a scenetutorial.App.javaUse dark colors for code blocks package com.example.app; import com.esri.arcgisruntime.ArcGISRuntimeEnvironment; import com.esri.arcgisruntime.mapping.ArcGISScene; import com.esri.arcgisruntime.mapping.view.SceneView; import com.esri.arcgisruntime.portal.Portal; import com.esri.arcgisruntime.portal.PortalItem; import javafx.application.Application; import javafx.scene.Scene; import javafx.scene.layout.StackPane; import javafx.stage.Stage; public class App extends Application { -
In the
start()life-cycle method, change the title that will appear on the application window toDisplay a web scene tutorial.App.javaUse dark colors for code blocks @Override public void start(Stage stage) { // set the title and size of the stage and show it stage.setTitle("Display a web scene tutorial"); stage.setWidth(800); stage.setHeight(700); stage.show(); -
In
start()method, delete the code for base surface, surface elevation, camera, and camera viewpoint. The web scene defines these characteristics, so you don't have to set them in your app.App.javaUse dark colors for code blocks // create a scene view to display the scene and add it to the stack pane sceneView = new SceneView(); stackPane.getChildren().add(sceneView); ArcGISScene scene = new ArcGISScene(BasemapStyle.ARCGIS_IMAGERY_STANDARD); // set the scene on the scene view sceneView.setArcGISScene(scene); // add base surface for elevation data Surface surface = new Surface(); String elevationServiceUrl = "https://elevation3d.arcgis.com/arcgis/rest/services/WorldElevation3D/Terrain3D/ImageServer"; surface.getElevationSources().add(new ArcGISTiledElevationSource(elevationServiceUrl)); // add an exaggeration factor to increase the 3D effect of the elevation. surface.setElevationExaggeration(2.5f); scene.setBaseSurface(surface); Point cameraLocation = new Point(-118.794, 33.909, 5330.0, SpatialReferences.getWgs84()); Camera camera = new Camera(cameraLocation, 355.0, 72.0, 0.0); sceneView.setViewpointCamera(camera); -
In
start()method, delete the code that creates anArcGISSceneby passing a basemap. In this tutorial, you will instead pass a portal item.App.javaUse dark colors for code blocks // create a scene view to display the scene and add it to the stack pane sceneView = new SceneView(); stackPane.getChildren().add(sceneView); ArcGISScene scene = new ArcGISScene(BasemapStyle.ARCGIS_IMAGERY_STANDARD); // set the scene on the scene view sceneView.setArcGISScene(scene);
Get the web scene item ID
You can use ArcGIS tools to create and view web scenes. Use the Scene Viewer to identify the web scene item ID. This item ID will be used later in the tutorial.
- Go to the LA Trails and Parks web scene in the Scene Viewer in ArcGIS Online. This web scene displays trails, trailheads and parks in the Santa Monica Mountains.
- Make a note of the item ID at the end of the browser's URL. The item ID should be 579f97b2f3b94d4a8e48a5f140a6639b.
Display the web scene
You can display a web scene using the web scene's item ID. Create a scene from the web scene portal item, and display it in your app.
-
In the
start()method, create a newPortal(java.lang.String,boolean)referencing ArcGIS Online as theportalparameter andUrl falsefor theloginparameter.Required App.javaUse dark colors for code blocks 54 55 56 57 58 59 61 62 63Add line. // create a scene view to display the scene and add it to the stack pane sceneView = new SceneView(); stackPane.getChildren().add(sceneView); // create a scene from a web scene portal item and set it to the scene view Portal portal = new Portal("http://www.arcgis.com/", false); // set the scene on the scene view sceneView.setArcGISScene(scene); -
Create a
PortalItemfor the web scene by passing theportaland the web scene's item ID as parameters. -
Create an
ArcGISScene(com.esri.arcgisruntime.portal.PortalItem)using theportalas the constructor parameter.Item App.javaUse dark colors for code blocks 54 55 56 57 58 59 60 61 63 65 66 67Add line. Add line. // create a scene view to display the scene and add it to the stack pane sceneView = new SceneView(); stackPane.getChildren().add(sceneView); // create a scene from a web scene portal item and set it to the scene view Portal portal = new Portal("http://www.arcgis.com/", false); PortalItem portalItem = new PortalItem(portal, "579f97b2f3b94d4a8e48a5f140a6639b"); ArcGISScene scene = new ArcGISScene(portalItem); // set the scene on the scene view sceneView.setArcGISScene(scene); -
Use the existing code to display the new
ArcGISScene(com.esri.arcgisruntime.portal.PortalItem)on thescenewithView setArcGISScene().App.javaUse dark colors for code blocks Copy 54 55 56 57 58 59 60 61 62 63 64 65// create a scene view to display the scene and add it to the stack pane sceneView = new SceneView(); stackPane.getChildren().add(sceneView); // create a scene from a web scene portal item and set it to the scene view Portal portal = new Portal("http://www.arcgis.com/", false); PortalItem portalItem = new PortalItem(portal, "579f97b2f3b94d4a8e48a5f140a6639b"); ArcGISScene scene = new ArcGISScene(portalItem); // set the scene on the scene view sceneView.setArcGISScene(scene); -
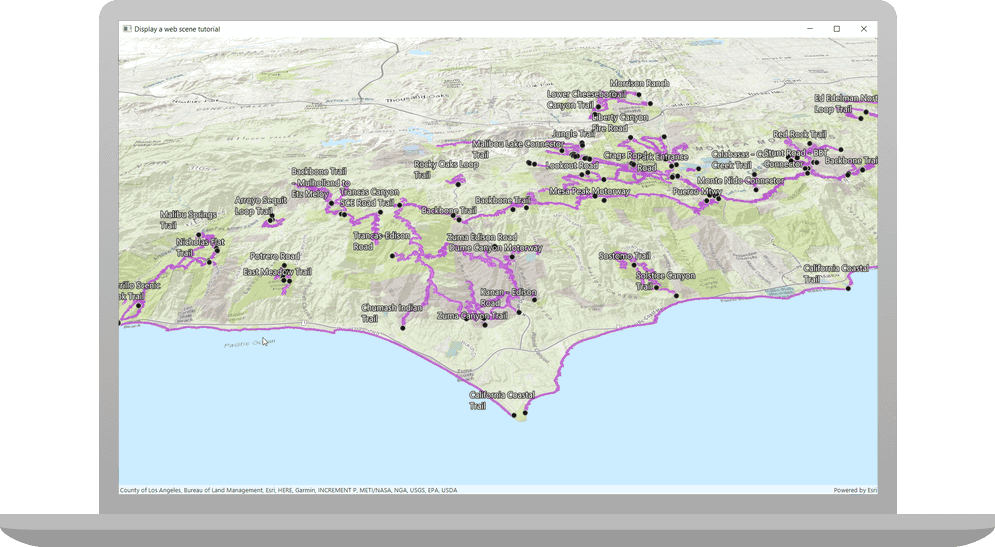
Run the app. Ensure to run the app as a Gradle task and not as an application in your IDE. In the Gradle tool window, under Tasks > application, double-click run.
Your app should display the scene that you viewed earlier in the Scene Viewer.
What's Next?
Learn how to use additional API features, ArcGIS location services, and ArcGIS tools in these tutorials: