SwiftUI is a declarative, state-driven framework that requires you to manage any maps, scenes, and associated data that your map view
State properties
ArcGIS Maps SDK for Swift allows you to display and interact with mapMapView and SceneView classes, respectively. These classes conform to Apple’s SwiftUI View and describe what to display (declarative). The view is constantly recomputed as its properties are updated. However, everytime the view or its super view changes, we do not want the view’s map or scene recreated. You can use the @State property wrapper to ensure that SwiftUI maintains these properties.
The code below displays a topological-styled basemap within a map view
import ArcGIS
struct ContentView: View {
    // Create a map property using the State wrapper    @State private var map = Map(basemapStyle: .arcGISTopographic)
    var body: some View {        MapView(map: map)    }}
If you are creating a simple mapping application that contains just a few properties in the View, you can implement all of them using just the @State wrapper, as shown above. For more information about preserving state see Apple’s Managing user interface state.
Model
If you are working with a more complex application, you may want to preserve the state of many different Swift Maps SDK types, such as Map, Scene, Viewpoint, and GraphicsOverlay. In this situation, the View can get inflated with the many @State properties. To avoid this problem, you can use a model that’s separate from the view to store, process, and test these data types. Define a model class that conforms to the ObservableObject protocol and then refer to this model in your view as a StateObject.
Let’s see how to implement this. First, create a class called Model that conforms to the ObservableObject protocol. In this case, create the model in an extension to the ContentView. Then, create map as an instance property in the Model class.
private extension ContentView {
    // Define a class that conforms to the ObservableObject protocol. This is the model.    class Model: ObservableObject {        let map: Map
        // Create a new instance of map        init() {            map = Map(basemapStyle: .arcGISTopographic)        }    }}
To establish a dependency between the model and the view, instantiate a Model object in the ContentView using the @StateObject property wrapper. The model property now becomes the single source of truth for the view. The @StateObject wrapper ensures that the model property does not get destroyed when the view struct redraws. Finally, initialize a MapView using the model’s map.
struct ContentView: View {
    // Create a model using the StateObject wrapper    @StateObject private var model = Model()
    var body: some View {        MapView(map: model.map)    }}
The model gives a cleaner separation of responsibilities between the view and the data. It helps you to organize your code and remove some of the program state and logic from your view structs, effectively separating logic from layout. For more information see Apple’s Managing model data in your app.
Examples
Location display example
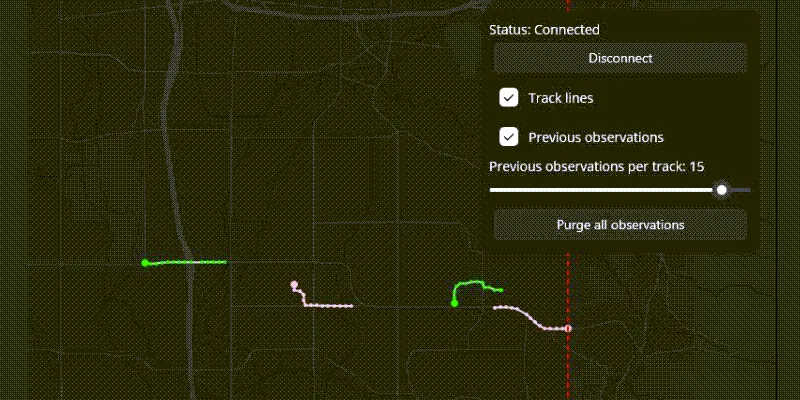
For a more involved example, let’s display your device’s current location as a blue dot in the map viewLocation Display functionality provided with the ArcGIS Maps SDK for Swift. Location display can retrieve the device’s current location from a location data source and display it on top of a map. As the device moves, the map view can respond to new locations by updating the position of the location symbol on the display.
Let’s implement this using the model pattern discussed above. In the model, create a new instance of the LocationDisplay, specify its location data source (LocationDataSource), and define functions to start and stop the location data source.
private extension ContentView {
    // Define a model that conforms to the ObservableObject protocol.    class Model: ObservableObject {
        let map: Map
        // The location display.        let locationDisplay: LocationDisplay
        // Create a new instance of the map and location display.        init() {            map = Map(basemapStyle: .arcGISTopographic)            // Specify that the location data source obtains the device’s location from its operating system.            locationDisplay = LocationDisplay(dataSource: SystemLocationDataSource())            locationDisplay.autoPanMode = .recenter        }
        // Start the location datasource to display the location as a blue dot on the map view.        func startLocationDataSource() async {            // Request location permission from the device's user.            // Set the permission text in info.plist in advance.            let locationManager = CLLocationManager()            locationManager.requestWhenInUseAuthorization()            do {                try await locationDisplay.dataSource.start()            } catch {                print(error.localizedDescription)            }        }
        // Stop the location datasource to remove blue dot from the map view.        func stopLocationDataSource() {            Task {                await locationDisplay.dataSource.stop()            }        }    }}
Next, consume and preserve the state of the model with the @StateObject property wrapper. Initialize the map view with the model’s map, and call the map view’s locationDisplay view modifier with the model’s location display. Call the asynchronous startLocationDataSource function to start the location display data source and display the blue dot on the map view.
import SwiftUIimport ArcGISimport CoreLocation
struct ContentView: View {
    @StateObject private var model = Model()
var body: some View { MapView(map: model.map) .locationDisplay(model.locationDisplay) .task { await model.startLocationDataSource() } .onDisappear { model.stopLocationDataSource() } }}For more details and examples see:
- Apple’s SwiftUI code apps.
- Apple’s Managing user interface state.
- Apple’s Managing model data in your app.
- The following ArcGIS Maps SDK for Swift samples and tutorials.
Samples

Find route
Display directions for a route between two points.
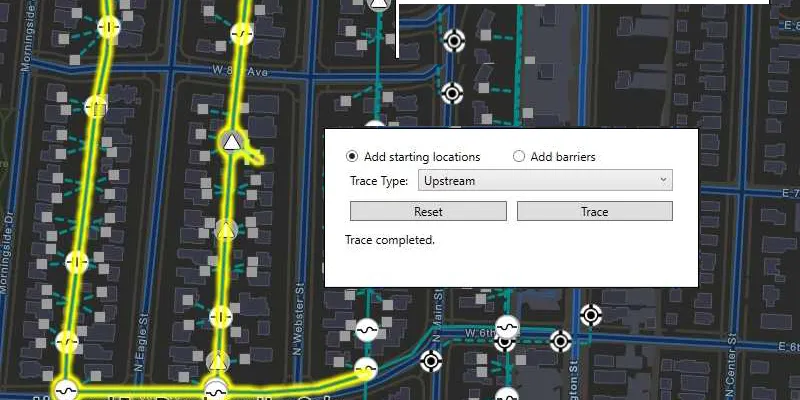
Trace utility network