Learn how to create and display a scene
Like a map
In this tutorial, you create and display a scene
The scene and code will be used as the starting point for other 3D tutorials.
Prerequisites
Before starting this tutorial:
-
You need an ArcGIS Location Platform or ArcGIS Online account.
-
Your system meets the system requirements.
Set up authentication
To access the secure ArcGIS location services
You can implement API key authentication or user authentication in this tutorial. Compare the differences below:
API key authentication
- Users are not required to sign in.
- Requires creating an API key credential
API key credentials are an item that contains the parameters used to create and manage long-lived access tokens for API key authentication. They are a type of developer credential. with the correct privileges. - API keys
An API key is a long-lived access token created using API key credentials. They are valid for up to one year and are typically embedded directly into client applications. are long-lived access tokens. - Service usage is billed to the API key owner/developer.
- Simplest authentication method to implement.
- Recommended approach for new ArcGIS developers.
Learn more in API key authentication.
User authentication
- Users are required to sign in with an ArcGIS account
An ArcGIS account is an identity with a user type and set of privileges that can access specific ArcGIS products, tools, APIs, services, and resources. The main account types that can be used for development are an ArcGIS Location Platform account, ArcGIS Online account, and ArcGIS Enterprise account. ArcGIS Location Platform and ArcGIS Online accounts are also associated with a subscription. . - User accounts must have privilege
Privileges are a set of permissions assigned to ArcGIS accounts, developer credentials, and applications that grant access to secure resources and functionality in ArcGIS. to access the ArcGIS servicesA service, also known as an ArcGIS service, is software that supports an ArcGIS REST API and provides geospatial functionality or data. A service can be hosted by Esri or in ArcGIS Enterprise. used in application. - Requires creating OAuth credentials
OAuth credentials are an item that contains parameters required to implement user authentication or app authentication, including a .client_id,client_secret, and redirect URIs. They are a type of developer credential. - Application uses a redirect URL and client ID.
- Service usage is billed to the organization of the user signed into the application.
Learn more in User authentication.
To complete this tutorial, click on the tab in the switcher below for your authentication type of choice, either API key authentication or User authentication.
Create a new API key access token
-
Complete the Create an API key tutorial and create an API key with the following privilege(s)
Privileges are a set of permissions assigned to ArcGIS accounts, developer credentials, and applications that grant access to secure resources and functionality in ArcGIS. :- Privileges
- Location services > Basemaps
- Privileges
-
Copy and paste the API key access token into a safe location. It will be used in a later step.
Create new OAuth credentials to access the secure resources used in this tutorial.
-
Complete the Create OAuth credentials for user authentication tutorial to obtain a Client ID and Redirect URL.
A
Client IDuniquely identifies your app on the authenticating server. If the server cannot find an app with the provided Client ID, it will not proceed with authentication.The
Redirect URL(also referred to as a callback url) is used to identify a response from the authenticating server when the system returns control back to your app after an OAuth login. Since it does not necessarily represent a valid endpoint that a user could navigate to, the redirect URL can use a custom scheme, such asmy-app://auth. It is important to make sure the redirect URL used in your app’s code matches a redirect URL configured on the authenticating server. -
Copy and paste the Client ID and Redirect URL into a safe location. They will be used in a later step.
All users that access this application need account privileges
Develop or Download
You have two options for completing this tutorial:
Option 1: Develop the code
Create a new Xcode project
To get started, use Xcode to create an iOS app and configure it to reference the API.
-
Open Xcode. In the menu bar, click File > New > Project.
- In the Choose a template for your new project: window, set the following properties:
- Multiplatform iOS
- Application App
- Click Next.
- In the Choose options for your new project: window, set the following properties:
- Product Name:
<your app name> - Organization Identifier:
<your organization> - Interface: SwiftUI
- Language: Swift
- Product Name:
- Uncheck all other options.
- Click Next.
- Choose a location to store your project. Click Create.
- In the Choose a template for your new project: window, set the following properties:
-
In the Project Navigator, click
<your app name>App. In the Editor, right click on the struct name,<your app name>App. Select Refactor > Rename… to rename the struct toMainApp. Click the Rename button in the top right to confirm the new name. This will rename the struct and file in all affected areas. This file and struct will be namedMainAppfor all tutorials here on out. -
Add a reference to the API using Swift Package Manager.
-
In the MainApp.swift file, some errors may appear after importing ArcGIS. Resolve the errors by distinguishing the
Scene protocolfromScene. To do so, add theSwiftUIprefix toScene.MainApp.swiftvar body: some SwiftUI.Scene {WindowGroup {ContentView()}}
Set developer credentials
To allow your app users to access ArcGIS location services
Pass your API Key access token to the ArcGISEnvironment.
-
In the Project Navigator, click MainApp.swift.
-
Implement an initializer in the
MainAppstruct and set theArcGISEnvironment.apiKeyproperty with your API key access token.MainApp.swiftimport SwiftUIimport ArcGIS@mainstruct MainApp: App {init() {ArcGISEnvironment.apiKey = APIKey("<#YOUR-ACCESS-TOKEN#>")}
Best Practice: The access token is stored directly in the code as a convenience for this tutorial. Do not store credentials directly in source code in a production environment.
Use the Authenticator toolkit component to manage your OAuth credentialsclient_id, client_secret, and redirect URIs. They are a type of developer credential. ArcGISEnvironment.
-
Add the ArcGIS Maps SDK for Swift Toolkit package to your application by following these instructions.
-
In the Project Navigator, click MainApp.swift.
- Add
import ArcGISToolkitinto the code. - Declare and initialize an
Authenticatortoolkit component in theMainAppstruct. - Implement an initializer in the
MainAppstruct. - Create a new instance of the
Authenticatorusing anOAuthUserConfiguration - Add your
PortalURL,clientIDandredirectURLvalues. - Pass the
authenticatorto theArcGISEnvironment.authenticationManagerto handle any challenges.
MainApp.swiftimport SwiftUIimport ArcGISimport ArcGISToolkit@mainstruct MainApp: App {@ObservedObject var authenticator: Authenticatorinit() {authenticator = Authenticator(oAuthUserConfigurations: [OAuthUserConfiguration(portalURL: URL(string: "<#YOUR-PORTAL-URL#>")!,clientID: ""<#YOUR-CLIENT-ID#>"",redirectURL: URL(string: "<#YOUR-REDIRECT-URL#>")!)])ArcGISEnvironment.authenticationManager.handleChallenges(using: authenticator)}- In the body, add an
.authenticator(authenticator)modifier to theContentView.
MainApp.swiftvar body: some SwiftUI.Scene {WindowGroup {ContentView().authenticator(authenticator)}} - Add
Best Practice: The OAuth credentials are stored directly in the code as a convenience for this tutorial. Do not store credentials directly in source code in a production environment.
Create a scene data model
Create a scene
-
In Xcode, in the Project Navigator, click ContentView.swift.
-
In the editor, add an
importstatement to reference the API. -
Add a
@Stateproperty wrapper named scene of typeScenewith a default value. Create ascenewith anarcGISImageryStandardbasemap style and return it.ContentView.swift15 collapsed lines// Copyright 2023 Esri//// Licensed under the Apache License, Version 2.0 (the "License");// you may not use this file except in compliance with the License.// You may obtain a copy of the License at//// https://www.apache.org/licenses/LICENSE-2.0//// Unless required by applicable law or agreed to in writing, software// distributed under the License is distributed on an "AS IS" BASIS,// WITHOUT WARRANTIES OR CONDITIONS OF ANY KIND, either express or implied.// See the License for the specific language governing permissions and// limitations under the License.import SwiftUIimport ArcGISstruct ContentView: View {@State private var scene: ArcGIS.Scene = {let scene = Scene(basemapStyle: .arcGISImageryStandard)return scene}()var body: some View {SceneView(scene: scene)}}Note that
Sceneis prefixed withArcGISin order to provide clarity from theScene protocol. -
In the Project Navigator, click MainApp.swift.
Configure the scene
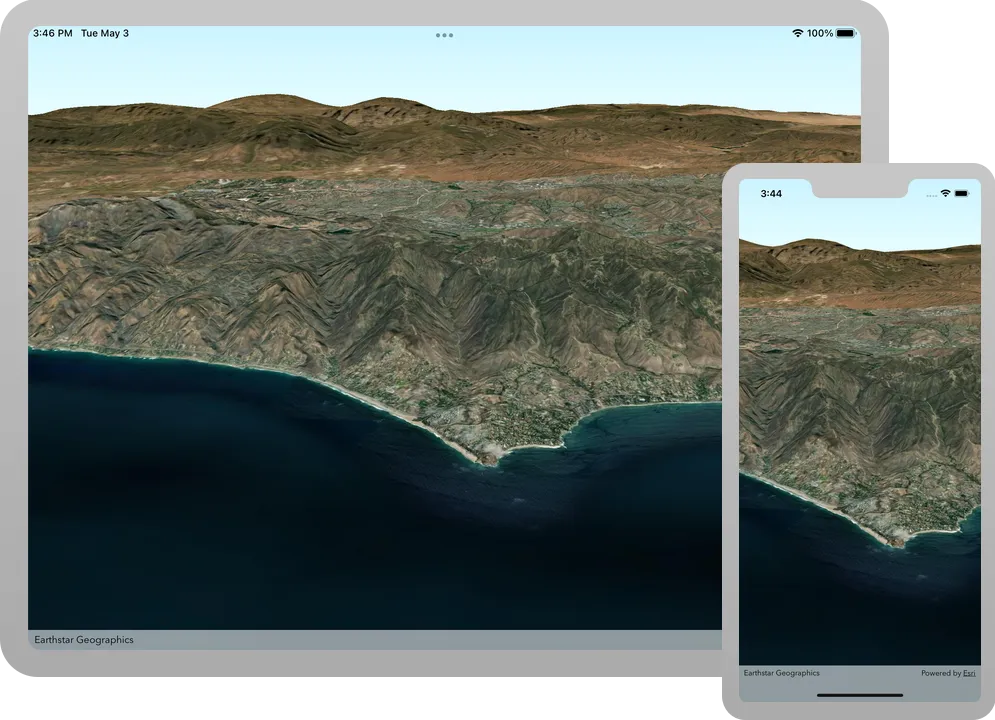
Scenes contain many properties that can be adjusted. Define a Surface on which layers are draped and center the scene on the Santa Monica Mountains.
-
In the Project Navigator, click ContentView.swift.
-
In the editor, create an
ArcGISTiledElevationSourceand add it to a newSurface.An elevation source can define a surface with 3D terrain in a scene. Without an elevation source, the default globe surface is used to display the scene.
ContentView.swift19 collapsed lines// Copyright 2023 Esri//// Licensed under the Apache License, Version 2.0 (the "License");// you may not use this file except in compliance with the License.// You may obtain a copy of the License at//// https://www.apache.org/licenses/LICENSE-2.0//// Unless required by applicable law or agreed to in writing, software// distributed under the License is distributed on an "AS IS" BASIS,// WITHOUT WARRANTIES OR CONDITIONS OF ANY KIND, either express or implied.// See the License for the specific language governing permissions and// limitations under the License.import SwiftUIimport ArcGISstruct ContentView: View {@State private var scene: ArcGIS.Scene = {let scene = Scene(basemapStyle: .arcGISImageryStandard)// Create an elevation source to show relief in the scene.let worldElevationServiceURL = URL(string: "https://elevation3d.arcgis.com/arcgis/rest/services/WorldElevation3D/Terrain3D/ImageServer")!let elevationSource = ArcGISTiledElevationSource(url: worldElevationServiceURL)// Create a Surface with the elevation data.let surface = Surface()surface.addElevationSource(elevationSource)// Add an exaggeration factor to increase the 3D effect of the elevation.surface.elevationExaggeration = 2.5// Apply the surface to the scene.scene.baseSurface = surfacereturn scene}()8 collapsed linesvar body: some View {SceneView(scene: scene)}} -
Set the initial viewpoint of the
sceneusing aPointand aCamera.The position from which you view the scene is defined by a
Camera. The following properties of the cameraA camera defines the rendering viewpoint of a 3D scene in a scene view. are used to define an observation point in the scene:- 3D location: Latitude, longitude, and altitude
- Heading: Azimuth of the camera’s direction
- Pitch: Up and down angle
- Roll: Side-to-side angle
ContentView.swift19 collapsed lines// Copyright 2023 Esri//// Licensed under the Apache License, Version 2.0 (the "License");// you may not use this file except in compliance with the License.// You may obtain a copy of the License at//// https://www.apache.org/licenses/LICENSE-2.0//// Unless required by applicable law or agreed to in writing, software// distributed under the License is distributed on an "AS IS" BASIS,// WITHOUT WARRANTIES OR CONDITIONS OF ANY KIND, either express or implied.// See the License for the specific language governing permissions and// limitations under the License.import SwiftUIimport ArcGISstruct ContentView: View {@State private var scene: ArcGIS.Scene = {let scene = Scene(basemapStyle: .arcGISImageryStandard)// Create an elevation source to show relief in the scene.let worldElevationServiceURL = URL(string: "https://elevation3d.arcgis.com/arcgis/rest/services/WorldElevation3D/Terrain3D/ImageServer")!let elevationSource = ArcGISTiledElevationSource(url: worldElevationServiceURL)// Create a Surface with the elevation data.let surface = Surface()surface.addElevationSource(elevationSource)// Add an exaggeration factor to increase the 3D effect of the elevation.surface.elevationExaggeration = 2.5// Apply the surface to the scene.scene.baseSurface = surface// Create a point that defines the observer's (camera) initial location in the scene.// The point defines a longitude, latitude, and altitude of the initial camera location.let point = Point(x: -118.804, y: 34.027, z: 5330.0, spatialReference: .wgs84)// Create a Camera uing the point, the direction the camera should face (heading), and its pitch and roll (rotation and tilt).let camera = Camera(location: point, heading: 355.0, pitch: 72.0, roll: 0)// Set an initial viewpoint for the scene using the camera and observation point.scene.initialViewpoint = Viewpoint(boundingGeometry: point, camera: camera)return scene}()8 collapsed linesvar body: some View {SceneView(scene: scene)}}
Add a scene view to the UI
A scene viewModel class.
-
To the body, add a
SceneViewinitialized withscene. This will create aSceneViewwith the newly created scene.ContentView.swift51 collapsed lines// Copyright 2023 Esri//// Licensed under the Apache License, Version 2.0 (the "License");// you may not use this file except in compliance with the License.// You may obtain a copy of the License at//// https://www.apache.org/licenses/LICENSE-2.0//// Unless required by applicable law or agreed to in writing, software// distributed under the License is distributed on an "AS IS" BASIS,// WITHOUT WARRANTIES OR CONDITIONS OF ANY KIND, either express or implied.// See the License for the specific language governing permissions and// limitations under the License.import SwiftUIimport ArcGISstruct ContentView: View {@State private var scene: ArcGIS.Scene = {let scene = Scene(basemapStyle: .arcGISImageryStandard)// Create an elevation source to show relief in the scene.let worldElevationServiceURL = URL(string: "https://elevation3d.arcgis.com/arcgis/rest/services/WorldElevation3D/Terrain3D/ImageServer")!let elevationSource = ArcGISTiledElevationSource(url: worldElevationServiceURL)// Create a Surface with the elevation data.let surface = Surface()surface.addElevationSource(elevationSource)// Add an exaggeration factor to increase the 3D effect of the elevation.surface.elevationExaggeration = 2.5// Apply the surface to the scene.scene.baseSurface = surface// Create a point that defines the observer's (camera) initial location in the scene.// The point defines a longitude, latitude, and altitude of the initial camera location.let point = Point(x: -118.804, y: 34.027, z: 5330.0, spatialReference: .wgs84)// Create a Camera uing the point, the direction the camera should face (heading), and its pitch and roll (rotation and tilt).let camera = Camera(location: point, heading: 355.0, pitch: 72.0, roll: 0)// Set an initial viewpoint for the scene using the camera and observation point.scene.initialViewpoint = Viewpoint(boundingGeometry: point, camera: camera)return scene}()var body: some View {SceneView(scene: scene)}2 collapsed lines}
Run the solution
Press Command + R to run the app.
If you are using the Xcode simulator your system must meet these minimum requirements: macOS 14 (Sonoma), Xcode 16, iOS 18. If you are using a physical device, then refer to the system requirements.
You should see a scene
Alternatively, you can download the tutorial solution, as follows.
Option 2: Download the solution
-
Click the
Download solutionlink under Solution and unzip the file to a location on your machine. -
Open the
.xcodeprojfile in Xcode.
Since the downloaded solution does not contain authentication credentials, you must add the developer credentials that you created in the Set up authentication section.
Set developer credentials in the solution
To allow your app users to access ArcGIS location services
Pass your API Key access token to the ArcGISEnvironment.
-
In the Project Navigator, click MainApp.swift.
-
Set the
AuthenticationModeto.apiKey.MainApp.swift// Change the `AuthenticationMode` to `.apiKey` if your application uses API key authentication.private var authenticationMode: AuthenticationMode { .apiKey } -
Set the
apiKeyproperty with your API key access token.MainApp.swift31 collapsed lines// Copyright 2022 Esri//// Licensed under the Apache License, Version 2.0 (the "License");// you may not use this file except in compliance with the License.// You may obtain a copy of the License at//// https://www.apache.org/licenses/LICENSE-2.0//// Unless required by applicable law or agreed to in writing, software// distributed under the License is distributed on an "AS IS" BASIS,// WITHOUT WARRANTIES OR CONDITIONS OF ANY KIND, either express or implied.// See the License for the specific language governing permissions and// limitations under the License.import SwiftUIimport ArcGISimport ArcGISToolkit@mainstruct MainApp: App {// The authentication mode.private enum AuthenticationMode {case apiKeycase user}// Change the `AuthenticationMode` to `.apiKey` if your application uses API key authentication.private var authenticationMode: AuthenticationMode { .apiKey }// Please enter an API key access token if your application uses API key authentication.private let apiKey = APIKey("<#YOUR-ACCESS-TOKEN#>")43 collapsed lines// Setup an `Authenticator` with OAuth configuration if your application uses OAuth credentials.@ObservedObject var authenticator = Authenticator(oAuthUserConfigurations: [OAuthUserConfiguration(// Please enter OAuth credentials for user authentication.portalURL: URL(string: "<#YOUR-PORTAL-URL#>")!,clientID: "<#YOUR-CLIENT-ID#>",redirectURL: URL(string: "<#YOUR-REDIRECT-URL#>")!)])func setAuthentication() {switch authenticationMode {case .apiKey:ArcGISEnvironment.apiKey = apiKeycase .user:ArcGISEnvironment.authenticationManager.arcGISAuthenticationChallengeHandler = authenticator}}init() {setAuthentication()}var body: some SwiftUI.Scene {WindowGroup {ContentView().authenticator(authenticator).ignoresSafeArea()}}}
Best Practice: The access token is stored directly in the code as a convenience for this tutorial. Do not store credentials directly in source code in a production environment.
Use the Authenticator toolkit component to manage your OAuth credentialsclient_id, client_secret, and redirect URIs. They are a type of developer credential. ArcGISEnvironment.
-
In the Project Navigator, click MainApp.swift.
-
Set the
AuthenticationModeto.user.MainApp.swift// Change the `AuthenticationMode` to `.user` if your application uses OAuth credentials.private var authenticationMode: AuthenticationMode { .user } -
Set your
portalURL,clientIDandredirectURLvalues.MainApp.swift36 collapsed lines// Copyright 2022 Esri//// Licensed under the Apache License, Version 2.0 (the "License");// you may not use this file except in compliance with the License.// You may obtain a copy of the License at//// https://www.apache.org/licenses/LICENSE-2.0//// Unless required by applicable law or agreed to in writing, software// distributed under the License is distributed on an "AS IS" BASIS,// WITHOUT WARRANTIES OR CONDITIONS OF ANY KIND, either express or implied.// See the License for the specific language governing permissions and// limitations under the License.import SwiftUIimport ArcGISimport ArcGISToolkit@mainstruct MainApp: App {// The authentication mode.private enum AuthenticationMode {case apiKeycase user}// Change the `AuthenticationMode` to `.user` if your application uses OAuth credentials.private var authenticationMode: AuthenticationMode { .apiKey }// Please enter an API key access token if your application uses API key authentication.private let apiKey = APIKey("<#YOUR-ACCESS-TOKEN#>")// Setup an `Authenticator` with OAuth configuration if your application uses OAuth credentials.@ObservedObject var authenticator = Authenticator(oAuthUserConfigurations: [OAuthUserConfiguration(// Please enter OAuth credentials for user authentication.portalURL: URL(string: "<#YOUR-PORTAL-URL#>")!,clientID: "<#YOUR-CLIENT-ID#>",redirectURL: URL(string: "<#YOUR-REDIRECT-URL#>")!)])28 collapsed linesfunc setAuthentication() {switch authenticationMode {case .apiKey:ArcGISEnvironment.apiKey = apiKeycase .user:ArcGISEnvironment.authenticationManager.arcGISAuthenticationChallengeHandler = authenticator}}init() {setAuthentication()}var body: some SwiftUI.Scene {WindowGroup {ContentView().authenticator(authenticator).ignoresSafeArea()}}}
Best Practice: The OAuth credentials are stored directly in the code as a convenience for this tutorial. Do not store credentials directly in source code in a production environment.
Run the solution
Press Command + R to run the app.
If you are using the Xcode simulator your system must meet these minimum requirements: macOS 14 (Sonoma), Xcode 16, iOS 18. If you are using a physical device, then refer to the system requirements.
You should see a scene
What’s next?
Learn how to use additional API features, ArcGIS location services, and ArcGIS tools in these tutorials: