You can navigate sceneSceneView or LocalSceneView) by:
- Using built-in navigation, such as panning, zooming, and changing pitch.
- By programmatically changing camera position.
Built-in navigation
The scene views have a number of built-in gestures that allow you to navigate a scene using touch screen, mouse, or keyboard.
Basic navigation
Navigation for scene views is the same as navigation for a map view. The following table summarizes the built-in navigation capabilities of the SceneView and LocalSceneView controls:
| Navigation | Mouse | Touch | Key Action (on iOS and Mac Catalyst) |
|---|---|---|---|
| Zoom in | • Scroll backward • Hold shift + drag up • Double tap | • Two finger pinch open  • Single finger double-tap  | • = |
| Zoom out | • Scroll forward • Hold shift + drag down | • Two finger pinch close  • Two finger single-tap | • - |
| Continuous zoom in/out | • N/A | • Single finger double-tap, ending in a vertical up/down drag  | • N/A |
| Move/Pan | • Tap and drag | • Single finger drag • Flick  | • ↑ • ↓ • ← • → |
| Rotate the scene | • Hold down ⌥ and drag left/right | • Two finger rotate  | • ⌥← for left • ⌥→ for right |
| Rotate to North | • N/A | • N/A | • ⌘0 • shift ⌘↑ |
| Camera look-around effect | • N/A | • Single finger double-tap and hold. The camera’s heading changes when you drag left/right and the pitch changes at the current location when you drag up/down | • N/A |
| Tilt up/down | • Hold down ⌥ and drag up/down | • N/A | • ⌥↑ to tilt up • ⌥↓ to tilt down |
| Tilt to zero | • N/A | • N/A | • shift 0 |
Advanced navigation
Scene views have additional navigation not found in a map view:
| Navigation | User Action | Key Action (on iOS and Mac Catalyst) |
|---|---|---|
| Tilt the scene | • Two-finger drag  | • ⌥↑ for tilt up • ⌥↓ for tilt down • ⇧0 for tilt to 0 |
Programmatically change camera position
Your applications can programmatically navigate a 3D scene by creating a new camera and setting it to the view you are working with. A camera defines the location from which you are viewing the scene.
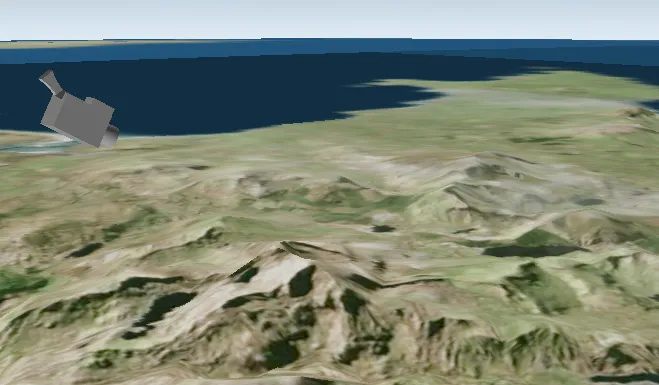
The camera is shown in this image for illustration purposes; when you set camera settings (location, pitch), think of the camera class as a real-life camera you’re adjusting the position of.
Set the camera
For example, to point the camera to toward the Snowdon mountainside, use these values:
- For 3D location, use 53.06 latitude, -4.04 longitude, 1289 meters above sea level
- For heading, use 295 degrees
- For pitch, use 71 degrees
- For roll, use 0 degrees
static let snowdonCamera = Camera( latitude: 53.06, longitude: -4.04, altitude: 1289, heading: 295, pitch: 71, roll: 0 )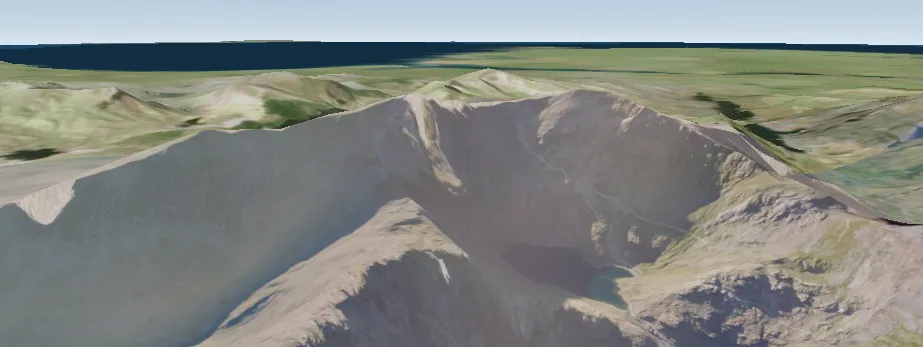
Apply the new camera to the scene view using SceneViewProxy.setViewpointCamera(_:), or animate the transition to it with SceneViewProxy.setViewpointCamera(_:duration:).
SceneViewReader { sceneViewProxy in SceneView(scene: scene) .task { await sceneViewProxy.setViewpointCamera(ScenesNavigateView.snowdonCamera) } }Move and adjust the camera
After you set a camera, you can update the scene view display by creating and applying a new camera. You can define the new camera with absolute values for location and orientation, or derive it from the current camera using relative values.
For example, using the relative approach, your code can preserve the current camera location, pitch, and roll, but rotate the heading by 45 degrees.
When the scene view’s current viewpoint camera changes, the onCameraChanged closure is invoked with the updated camera. Store the current camera in a private @State property. To adjust the viewpoint relative to the camera’s current position or orientation, use the stored camera to create a new camera, then apply the new camera with SceneViewProxy.setViewpointCamera(_:).