Learn how to create and display a scene
Like a map
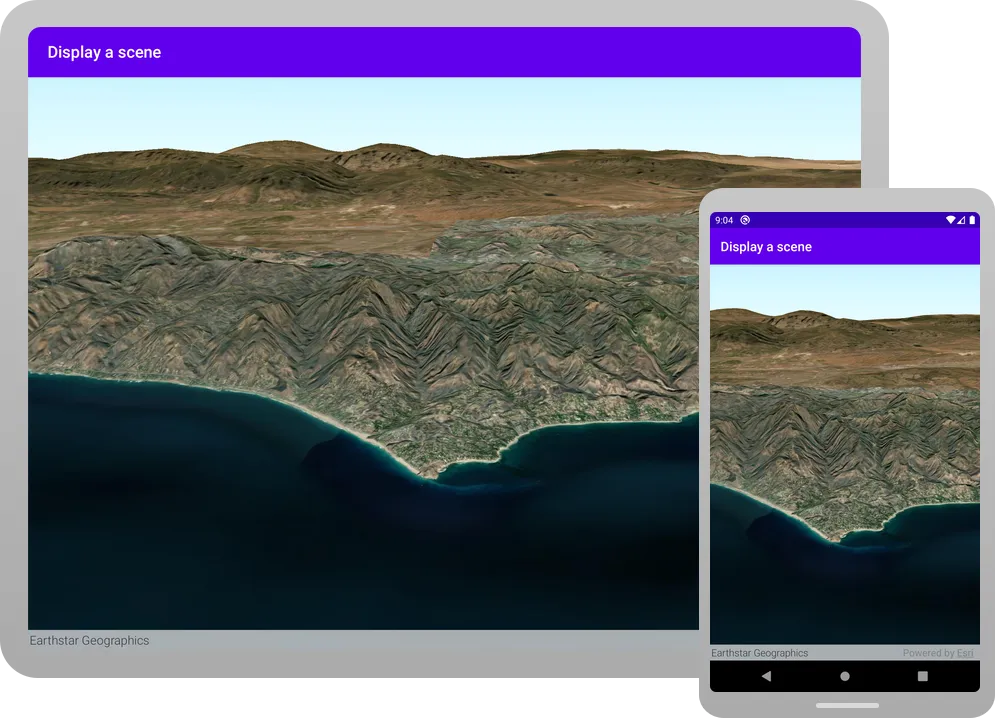
In this tutorial, you create and display a scene
The scene and code will be used as the starting point for other 3D tutorials.
Prerequisites
Before starting this tutorial, you need the following:
-
An ArcGIS Location Platform or ArcGIS Online account.
-
A development and deployment environment that meets the system requirements.
-
An IDE for Android development in Kotlin.
Set up authentication
To access the secure ArcGIS location services
You can implement API key authentication or user authentication in this tutorial. Compare the differences below:
API key authentication
- Users are not required to sign in.
- Requires creating an API key credential
API key credentials are an item that contains the parameters used to create and manage long-lived access tokens for API key authentication. They are a type of developer credential. with the correct privileges. - API keys
An API key is a long-lived access token created using API key credentials. They are valid for up to one year and are typically embedded directly into client applications. are long-lived access tokens. - Service usage is billed to the API key owner/developer.
- Simplest authentication method to implement.
- Recommended approach for new ArcGIS developers.
Learn more in API key authentication.
User authentication
- Users are required to sign in with an ArcGIS account
An ArcGIS account is an identity with a user type and set of privileges that can access specific ArcGIS products, tools, APIs, services, and resources. The main account types that can be used for development are an ArcGIS Location Platform account, ArcGIS Online account, and ArcGIS Enterprise account. ArcGIS Location Platform and ArcGIS Online accounts are also associated with a subscription. . - User accounts must have privilege
Privileges are a set of permissions assigned to ArcGIS accounts, developer credentials, and applications that grant access to secure resources and functionality in ArcGIS. to access the ArcGIS servicesA service, also known as an ArcGIS service, is software that supports an ArcGIS REST API and provides geospatial functionality or data. A service can be hosted by Esri or in ArcGIS Enterprise. used in application. - Requires creating OAuth credentials
OAuth credentials are an item that contains parameters required to implement user authentication or app authentication, including a .client_id,client_secret, and redirect URIs. They are a type of developer credential. - Application uses a redirect URL and client ID.
- Service usage is billed to the organization of the user signed into the application.
Learn more in User authentication.
To complete this tutorial, click on the tab in the switcher below for your authentication type of choice, either API key authentication or User authentication.
Create a new API key access token
-
Complete the Create an API key tutorial and create an API key with the following privilege(s)
Privileges are a set of permissions assigned to ArcGIS accounts, developer credentials, and applications that grant access to secure resources and functionality in ArcGIS. :- Privileges
- Location services > Basemaps
- Privileges
-
Copy and paste the API key access token into a safe location. It will be used in a later step.
Create new OAuth credentials to access the secure resources used in this tutorial.
-
Complete the Create OAuth credentials for user authentication tutorial to obtain a Client ID and Redirect URL.
A
Client IDuniquely identifies your app on the authenticating server. If the server cannot find an app with the provided Client ID, it will not proceed with authentication.The
Redirect URL(also referred to as a callback url) is used to identify a response from the authenticating server when the system returns control back to your app after an OAuth login. Since it does not necessarily represent a valid endpoint that a user could navigate to, the redirect URL can use a custom scheme, such asmy-app://auth. It is important to make sure the redirect URL used in your app’s code matches a redirect URL configured on the authenticating server. -
Copy and paste the Client ID and Redirect URL into a safe location. They will be used in a later step.
All users that access this application need account privileges
Develop or download
You have two options for completing this tutorial:
Option 1: Develop the code
Create a new Android Studio project
Use Android Studio to create an app and configure it to reference the API.
-
Open Android Studio.
-
In the Welcome to Android Studio window, click New Project.
Or if you already have Android Studio opened, click File > New > New Project in the menu bar.
-
In the New Project window, make sure Phone and Tablet tab is selected, and then select Empty Activity. Click Next.
-
In the next window, set the following options and then click Finish.
- Name:
SceneTutorial. - Package name: Change to
com.example.app. Or change to match your organization. - Save location: Set to a new folder.
- Minimum SDK: API 28 (“Pie”; Android 9.0)
- Build configuration language: Kotlin DSL (build.gradle.kts)
- Name:
-
-
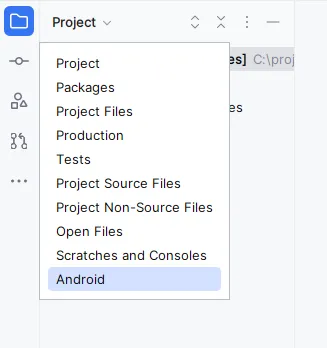
In the Android view, make sure that your current view is Android. These tutorial instructions refer to that view.
If your view name is something other than Android (such as Project or Packages), click on the dropdown arrow and select Android from the list.
-
From the Android view, open Gradle Scripts > build.gradle.kts (Project: Tutorial). Replace the contents of the file with the following code:
build.gradle.kts (Project: Tutorial)// Top-level build file where you can add configuration options common to all sub-projects/modules.plugins {alias(libs.plugins.android.application) apply falsealias(libs.plugins.kotlin.android) apply falsealias(libs.plugins.kotlin.compose) apply false} -
From the Android view, open Gradle Scripts > build.gradle.kts (Module :app). Replace the contents of the file with the expanded code below:
build.gradle.kts (Module: app)63 collapsed linesplugins {alias(libs.plugins.android.application)alias(libs.plugins.kotlin.android)alias(libs.plugins.kotlin.compose)}android {namespace = "com.example.app"compileSdk = libs.versions.compileSdk.get().toInt()defaultConfig {applicationId = "com.example.app"minSdk = libs.versions.minSdk.get().toInt()targetSdk = libs.versions.targetSdk.get().toInt()versionCode = 1versionName = "1.0"testInstrumentationRunner = "androidx.test.runner.AndroidJUnitRunner"vectorDrawables {useSupportLibrary = true}}buildTypes {release {isMinifyEnabled = falseproguardFiles(getDefaultProguardFile("proguard-android-optimize.txt"), "proguard-rules.pro")}}compileOptions {sourceCompatibility = JavaVersion.VERSION_17targetCompatibility = JavaVersion.VERSION_17}kotlinOptions {jvmTarget = "17"}buildFeatures {compose = true}packaging {resources {excludes += "/META-INF/{AL2.0,LGPL2.1}"}}}dependencies {implementation(libs.androidx.core.ktx)implementation(libs.androidx.lifecycle.runtime.ktx)implementation(libs.androidx.activity.compose)implementation(platform(libs.androidx.compose.bom))implementation(libs.androidx.ui)implementation(libs.androidx.ui.graphics)implementation(libs.androidx.ui.tooling.preview)implementation(libs.androidx.material3)testImplementation(libs.junit)androidTestImplementation(libs.androidx.junit)androidTestImplementation(libs.androidx.espresso.core)androidTestImplementation(platform(libs.androidx.compose.bom))androidTestImplementation(libs.androidx.ui.test.junit4)debugImplementation(libs.androidx.ui.tooling)debugImplementation(libs.androidx.ui.test.manifest)// ArcGIS Maps for Kotlin - SDK dependencyimplementation(libs.arcgis.maps.kotlin)// Toolkit dependenciesimplementation(platform(libs.arcgis.maps.kotlin.toolkit.bom))implementation(libs.arcgis.maps.kotlin.toolkit.geoview.compose)implementation(libs.arcgis.maps.kotlin.toolkit.authentication)2 collapsed lines} -
From the Android view, open Gradle Scripts > libs.versions.toml
. In the[versions]section, you need to declare the version number for <ProductName />. And in the[libraries]` section, you need to add the library declarations for the following:arcgis-maps-kotlinarcgis-maps-kotlin-toolkit-bomarcgis-maps-kotlin-toolkit-geoview-composearcgis-maps-kotlin-toolkit-authentication
The version for the Toolkit BOM applies to all the Toolkit modules you declare.
Gradle version catalogs are the standard Android approach to declaring dependency versions. They are preferred over specifying versions numbers in the
build.gradle.ktsor listing version numbers in aversion.gradle. Note that in recent releases of Android Studio, the New Project Wizard generatesbuild.gradle.ktsandgradle/libs.versions.tomlfiles that support this standard.Gradle version catalogs can also use BOM files to specify a single version number for all artifacts in the BOM. For more details, see
Using the BOMin theREADMEof the ArcGIS Maps SDK for Kotlin Toolkit.Expand the code below, copy the entire expanded contents, and paste it into
libs.version.tomlfile, replacing the original contents generated by the New Project Wizard.gradle/libs.versions.toml[versions]arcgisMapsKotlin = "300.0.0"# Version numbers added by Android Studio New Project Wizardagp = "8.12.1"kotlin = "2.2.10"coreKtx = "1.17.0"37 collapsed linesjunit = "4.13.2"junitVersion = "1.3.0"espressoCore = "3.7.0"lifecycleRuntimeKtx = "2.9.2"activityCompose = "1.10.1"composeBom = "2025.08.00"# Other version numberscompileSdk = "36"minSdk = "28"targetSdk = "36"[libraries]arcgis-maps-kotlin = { group = "com.esri", name = "arcgis-maps-kotlin", version.ref = "arcgisMapsKotlin" }arcgis-maps-kotlin-toolkit-bom = { group = "com.esri", name = "arcgis-maps-kotlin-toolkit-bom", version.ref = "arcgisMapsKotlin" }arcgis-maps-kotlin-toolkit-geoview-compose = { group = "com.esri", name = "arcgis-maps-kotlin-toolkit-geoview-compose" }arcgis-maps-kotlin-toolkit-authentication = { group = "com.esri", name = "arcgis-maps-kotlin-toolkit-authentication" }androidx-core-ktx = { group = "androidx.core", name = "core-ktx", version.ref = "coreKtx" }junit = { group = "junit", name = "junit", version.ref = "junit" }androidx-junit = { group = "androidx.test.ext", name = "junit", version.ref = "junitVersion" }androidx-espresso-core = { group = "androidx.test.espresso", name = "espresso-core", version.ref = "espressoCore" }androidx-lifecycle-runtime-ktx = { group = "androidx.lifecycle", name = "lifecycle-runtime-ktx", version.ref = "lifecycleRuntimeKtx" }androidx-activity-compose = { group = "androidx.activity", name = "activity-compose", version.ref = "activityCompose" }androidx-compose-bom = { group = "androidx.compose", name = "compose-bom", version.ref = "composeBom" }androidx-ui = { group = "androidx.compose.ui", name = "ui" }androidx-ui-graphics = { group = "androidx.compose.ui", name = "ui-graphics" }androidx-ui-tooling = { group = "androidx.compose.ui", name = "ui-tooling" }androidx-ui-tooling-preview = { group = "androidx.compose.ui", name = "ui-tooling-preview" }androidx-ui-test-manifest = { group = "androidx.compose.ui", name = "ui-test-manifest" }androidx-ui-test-junit4 = { group = "androidx.compose.ui", name = "ui-test-junit4" }androidx-material3 = { group = "androidx.compose.material3", name = "material3" }[plugins]android-application = { id = "com.android.application", version.ref = "agp" }kotlin-android = { id = "org.jetbrains.kotlin.android", version.ref = "kotlin" }kotlin-compose = { id = "org.jetbrains.kotlin.plugin.compose", version.ref = "kotlin" } -
From the Android view, open Gradle Scripts > settings.gradle.kts. Replace the contents of the file with the expanded code below:
settings.gradle.kts (Project Settings)14 collapsed linespluginManagement {repositories {google {content {includeGroupByRegex("com\\.android.*")includeGroupByRegex("com\\.google.*")includeGroupByRegex("androidx.*")}}mavenCentral()gradlePluginPortal()}}dependencyResolutionManagement {repositoriesMode.set(RepositoriesMode.FAIL_ON_PROJECT_REPOS)repositories {google()mavenCentral()maven { url = uri("https://esri.jfrog.io/artifactory/arcgis") }}}rootProject.name = "SceneTutorial"include(":app") -
Sync the Gradle changes. Click the Sync now prompt or click the refresh icon (Sync Project with Gradle Files) in the toolbar. This may take several minutes.
-
From the Android view, open app > manifests > AndroidManifest.xml. Update the Android manifest to allow internet access.
Insert these new elements within the
manifestelement. Do not alter or remove any other statements.Depending on what ArcGIS functionality you add in future tutorials, it is likely you will need to add additional permissions to your manifest.
AndroidManifest.xml2 collapsed lines<?xml version="1.0" encoding="utf-8"?><manifest xmlns:android="http://schemas.android.com/apk/res/android"xmlns:tools="http://schemas.android.com/tools"><uses-permission android:name="android.permission.INTERNET" />41 collapsed lines<applicationandroid:allowBackup="true"android:dataExtractionRules="@xml/data_extraction_rules"android:fullBackupContent="@xml/backup_rules"android:icon="@mipmap/ic_launcher"android:label="@string/app_name"android:roundIcon="@mipmap/ic_launcher_round"android:supportsRtl="true"android:theme="@style/Theme.SceneTutorial"tools:targetApi="31"><activityandroid:name=".MainActivity"android:exported="true"android:label="@string/app_name"android:theme="@style/Theme.SceneTutorial"><intent-filter><action android:name="android.intent.action.MAIN" /><category android:name="android.intent.category.LAUNCHER" /></intent-filter></activity><activityandroid:name="com.arcgismaps.toolkit.authentication.AuthenticationActivity"android:configChanges="keyboard|keyboardHidden|orientation|screenSize"android:exported="true"android:launchMode="singleTop" ><intent-filter><action android:name="android.intent.action.VIEW" /><category android:name="android.intent.category.DEFAULT" /><category android:name="android.intent.category.BROWSABLE" /><dataandroid:scheme="your_redirect_url_scheme"android:host="your_redirect_url_host" /></intent-filter></activity></application></manifest>
Create a scene
-
From the Android view, right click on app > kotlin+java > com.example.app, select New > package from the list. Enter com.example.app.screens as the package name. Hit Enter on your keyboard. This step creates a new package that will contain all the UI files.
-
Right click on the screens package you just created, select New > Kotlin Class/File from the list. In the pop-up window, select File and enter MainScreen as the file name. Hit Enter on your keyboard.
-
In MainScreen.kt, delete any lines of code that were inserted automatically by Android Studio. Then add the following OptIn annotation, package name, and imports.
MainScreen.kt@file:OptIn(ExperimentalMaterial3Api::class)package com.example.app.screensimport androidx.compose.foundation.layout.fillMaxSizeimport androidx.compose.foundation.layout.paddingimport androidx.compose.material3.ExperimentalMaterial3Apiimport androidx.compose.material3.Scaffoldimport androidx.compose.material3.Textimport androidx.compose.material3.TopAppBarimport androidx.compose.runtime.Composableimport androidx.compose.runtime.rememberimport androidx.compose.ui.Modifierimport androidx.compose.ui.res.stringResourceimport com.arcgismaps.geometry.Pointimport com.arcgismaps.geometry.SpatialReferenceimport com.arcgismaps.mapping.ArcGISSceneimport com.arcgismaps.mapping.ArcGISTiledElevationSourceimport com.arcgismaps.mapping.BasemapStyleimport com.arcgismaps.mapping.Surfaceimport com.arcgismaps.mapping.Viewpointimport com.arcgismaps.mapping.view.Cameraimport com.arcgismaps.toolkit.geoviewcompose.SceneViewimport com.example.app.R -
You will start by creating a function named
createScene().Inside that function, you will create an
ArcGISScene, assign a base surface to it, and use the top-level composable functionrememberto retain state across recompositions.Then you will create a camera location and a
Camera, use them to create aViewpoint, and then assign the view point to theinitialViewpointproperty of theArcGISScene.-
Create a top-level function named
createScene()that returns anArcGISScene.MainScreen.kt25 collapsed lines@file:OptIn(ExperimentalMaterial3Api::class)package com.example.app.screensimport androidx.compose.foundation.layout.fillMaxSizeimport androidx.compose.foundation.layout.paddingimport androidx.compose.material3.ExperimentalMaterial3Apiimport androidx.compose.material3.Scaffoldimport androidx.compose.material3.Textimport androidx.compose.material3.TopAppBarimport androidx.compose.runtime.Composableimport androidx.compose.runtime.rememberimport androidx.compose.ui.Modifierimport androidx.compose.ui.res.stringResourceimport com.arcgismaps.geometry.Pointimport com.arcgismaps.geometry.SpatialReferenceimport com.arcgismaps.mapping.ArcGISSceneimport com.arcgismaps.mapping.ArcGISTiledElevationSourceimport com.arcgismaps.mapping.BasemapStyleimport com.arcgismaps.mapping.Surfaceimport com.arcgismaps.mapping.Viewpointimport com.arcgismaps.mapping.view.Cameraimport com.arcgismaps.toolkit.geoviewcompose.SceneViewimport com.example.app.Rfun createScene(): ArcGISScene {} -
Create a new
ArcGISTiledElevationSource. Then create aSurfaceand, inside theapplyblock forSurface, add the elevation source to theelevationSourcesproperty, and set theelevationExaggerationproperty to 2.5f, which increases the 3D effect of the elevation.An elevation source can define a surface with 3D terrain in a scene. Without an elevation source, the default globe surface is used to display the scene.
MainScreen.kt25 collapsed lines@file:OptIn(ExperimentalMaterial3Api::class)package com.example.app.screensimport androidx.compose.foundation.layout.fillMaxSizeimport androidx.compose.foundation.layout.paddingimport androidx.compose.material3.ExperimentalMaterial3Apiimport androidx.compose.material3.Scaffoldimport androidx.compose.material3.Textimport androidx.compose.material3.TopAppBarimport androidx.compose.runtime.Composableimport androidx.compose.runtime.rememberimport androidx.compose.ui.Modifierimport androidx.compose.ui.res.stringResourceimport com.arcgismaps.geometry.Pointimport com.arcgismaps.geometry.SpatialReferenceimport com.arcgismaps.mapping.ArcGISSceneimport com.arcgismaps.mapping.ArcGISTiledElevationSourceimport com.arcgismaps.mapping.BasemapStyleimport com.arcgismaps.mapping.Surfaceimport com.arcgismaps.mapping.Viewpointimport com.arcgismaps.mapping.view.Cameraimport com.arcgismaps.toolkit.geoviewcompose.SceneViewimport com.example.app.Rfun createScene(): ArcGISScene {// add base surface for elevation dataval elevationSource = ArcGISTiledElevationSource("https://elevation3d.arcgis.com/arcgis/rest/services/WorldElevation3D/Terrain3D/ImageServer")val surface = Surface().apply {elevationSources.add(elevationSource)// add an exaggeration factor to increase the 3D effect of the elevation.elevationExaggeration = 2.5f}} -
Create a
Pointfor the camera and assign it to the variablecameraLocation. Then create aCamera, passing the camera ocation and values for the camera’s heading, pitch, and roll.MainScreen.kt25 collapsed lines@file:OptIn(ExperimentalMaterial3Api::class)package com.example.app.screensimport androidx.compose.foundation.layout.fillMaxSizeimport androidx.compose.foundation.layout.paddingimport androidx.compose.material3.ExperimentalMaterial3Apiimport androidx.compose.material3.Scaffoldimport androidx.compose.material3.Textimport androidx.compose.material3.TopAppBarimport androidx.compose.runtime.Composableimport androidx.compose.runtime.rememberimport androidx.compose.ui.Modifierimport androidx.compose.ui.res.stringResourceimport com.arcgismaps.geometry.Pointimport com.arcgismaps.geometry.SpatialReferenceimport com.arcgismaps.mapping.ArcGISSceneimport com.arcgismaps.mapping.ArcGISTiledElevationSourceimport com.arcgismaps.mapping.BasemapStyleimport com.arcgismaps.mapping.Surfaceimport com.arcgismaps.mapping.Viewpointimport com.arcgismaps.mapping.view.Cameraimport com.arcgismaps.toolkit.geoviewcompose.SceneViewimport com.example.app.Rfun createScene(): ArcGISScene {// add base surface for elevation dataval elevationSource = ArcGISTiledElevationSource("https://elevation3d.arcgis.com/arcgis/rest/services/WorldElevation3D/Terrain3D/ImageServer")val surface = Surface().apply {elevationSources.add(elevationSource)// add an exaggeration factor to increase the 3D effect of the elevation.elevationExaggeration = 2.5f}val cameraLocation = Point(x = -118.794,y = 33.909,z = 5330.0,spatialReference = SpatialReference.wgs84())val camera = Camera(locationPoint = cameraLocation,heading = 355.0,pitch = 72.0,roll = 0.0)} -
Create an
ArcGISScenewith aBasemapStyle.ArcGISImagery. Then callapply()on the newArcGISScene. ThecreateScene()function returns thisArcGISScene.For more information on
apply(), see Kotlin scope functions.MainScreen.kt25 collapsed lines@file:OptIn(ExperimentalMaterial3Api::class)package com.example.app.screensimport androidx.compose.foundation.layout.fillMaxSizeimport androidx.compose.foundation.layout.paddingimport androidx.compose.material3.ExperimentalMaterial3Apiimport androidx.compose.material3.Scaffoldimport androidx.compose.material3.Textimport androidx.compose.material3.TopAppBarimport androidx.compose.runtime.Composableimport androidx.compose.runtime.rememberimport androidx.compose.ui.Modifierimport androidx.compose.ui.res.stringResourceimport com.arcgismaps.geometry.Pointimport com.arcgismaps.geometry.SpatialReferenceimport com.arcgismaps.mapping.ArcGISSceneimport com.arcgismaps.mapping.ArcGISTiledElevationSourceimport com.arcgismaps.mapping.BasemapStyleimport com.arcgismaps.mapping.Surfaceimport com.arcgismaps.mapping.Viewpointimport com.arcgismaps.mapping.view.Cameraimport com.arcgismaps.toolkit.geoviewcompose.SceneViewimport com.example.app.Rfun createScene(): ArcGISScene {// add base surface for elevation dataval elevationSource = ArcGISTiledElevationSource("https://elevation3d.arcgis.com/arcgis/rest/services/WorldElevation3D/Terrain3D/ImageServer")val surface = Surface().apply {elevationSources.add(elevationSource)// add an exaggeration factor to increase the 3D effect of the elevation.elevationExaggeration = 2.5f}val cameraLocation = Point(x = -118.794,y = 33.909,z = 5330.0,spatialReference = SpatialReference.wgs84())val camera = Camera(locationPoint = cameraLocation,heading = 355.0,pitch = 72.0,roll = 0.0)return ArcGISScene(BasemapStyle.ArcGISImagery).apply {}} -
In the
applyblock, set thebaseSurfaceproperty of theArcGISScenetosurface.MainScreen.kt25 collapsed lines@file:OptIn(ExperimentalMaterial3Api::class)package com.example.app.screensimport androidx.compose.foundation.layout.fillMaxSizeimport androidx.compose.foundation.layout.paddingimport androidx.compose.material3.ExperimentalMaterial3Apiimport androidx.compose.material3.Scaffoldimport androidx.compose.material3.Textimport androidx.compose.material3.TopAppBarimport androidx.compose.runtime.Composableimport androidx.compose.runtime.rememberimport androidx.compose.ui.Modifierimport androidx.compose.ui.res.stringResourceimport com.arcgismaps.geometry.Pointimport com.arcgismaps.geometry.SpatialReferenceimport com.arcgismaps.mapping.ArcGISSceneimport com.arcgismaps.mapping.ArcGISTiledElevationSourceimport com.arcgismaps.mapping.BasemapStyleimport com.arcgismaps.mapping.Surfaceimport com.arcgismaps.mapping.Viewpointimport com.arcgismaps.mapping.view.Cameraimport com.arcgismaps.toolkit.geoviewcompose.SceneViewimport com.example.app.Rfun createScene(): ArcGISScene {// add base surface for elevation dataval elevationSource = ArcGISTiledElevationSource("https://elevation3d.arcgis.com/arcgis/rest/services/WorldElevation3D/Terrain3D/ImageServer")val surface = Surface().apply {elevationSources.add(elevationSource)// add an exaggeration factor to increase the 3D effect of the elevation.elevationExaggeration = 2.5f}val cameraLocation = Point(x = -118.794,y = 33.909,z = 5330.0,spatialReference = SpatialReference.wgs84())val camera = Camera(locationPoint = cameraLocation,heading = 355.0,pitch = 72.0,roll = 0.0)return ArcGISScene(BasemapStyle.ArcGISImagery).apply {baseSurface = surface}} -
Create a
ViewpointusingcameraLocationandcameraand set it as the initial viewpoint for the scene.MainScreen.kt25 collapsed lines@file:OptIn(ExperimentalMaterial3Api::class)package com.example.app.screensimport androidx.compose.foundation.layout.fillMaxSizeimport androidx.compose.foundation.layout.paddingimport androidx.compose.material3.ExperimentalMaterial3Apiimport androidx.compose.material3.Scaffoldimport androidx.compose.material3.Textimport androidx.compose.material3.TopAppBarimport androidx.compose.runtime.Composableimport androidx.compose.runtime.rememberimport androidx.compose.ui.Modifierimport androidx.compose.ui.res.stringResourceimport com.arcgismaps.geometry.Pointimport com.arcgismaps.geometry.SpatialReferenceimport com.arcgismaps.mapping.ArcGISSceneimport com.arcgismaps.mapping.ArcGISTiledElevationSourceimport com.arcgismaps.mapping.BasemapStyleimport com.arcgismaps.mapping.Surfaceimport com.arcgismaps.mapping.Viewpointimport com.arcgismaps.mapping.view.Cameraimport com.arcgismaps.toolkit.geoviewcompose.SceneViewimport com.example.app.Rfun createScene(): ArcGISScene {// add base surface for elevation dataval elevationSource = ArcGISTiledElevationSource("https://elevation3d.arcgis.com/arcgis/rest/services/WorldElevation3D/Terrain3D/ImageServer")val surface = Surface().apply {elevationSources.add(elevationSource)// add an exaggeration factor to increase the 3D effect of the elevation.elevationExaggeration = 2.5f}val cameraLocation = Point(x = -118.794,y = 33.909,z = 5330.0,spatialReference = SpatialReference.wgs84())val camera = Camera(locationPoint = cameraLocation,heading = 355.0,pitch = 72.0,roll = 0.0)return ArcGISScene(BasemapStyle.ArcGISImagery).apply {baseSurface = surfaceinitialViewpoint = Viewpoint(cameraLocation, camera)}}
-
Create a MainScreen to hold the scene
-
In MainScreen.kt, create a composable function named
MainScreen, which will callSceneView.MainScreen.kt59 collapsed lines@file:OptIn(ExperimentalMaterial3Api::class)package com.example.app.screensimport androidx.compose.foundation.layout.fillMaxSizeimport androidx.compose.foundation.layout.paddingimport androidx.compose.material3.ExperimentalMaterial3Apiimport androidx.compose.material3.Scaffoldimport androidx.compose.material3.Textimport androidx.compose.material3.TopAppBarimport androidx.compose.runtime.Composableimport androidx.compose.runtime.rememberimport androidx.compose.ui.Modifierimport androidx.compose.ui.res.stringResourceimport com.arcgismaps.geometry.Pointimport com.arcgismaps.geometry.SpatialReferenceimport com.arcgismaps.mapping.ArcGISSceneimport com.arcgismaps.mapping.ArcGISTiledElevationSourceimport com.arcgismaps.mapping.BasemapStyleimport com.arcgismaps.mapping.Surfaceimport com.arcgismaps.mapping.Viewpointimport com.arcgismaps.mapping.view.Cameraimport com.arcgismaps.toolkit.geoviewcompose.SceneViewimport com.example.app.Rfun createScene(): ArcGISScene {// add base surface for elevation dataval elevationSource = ArcGISTiledElevationSource("https://elevation3d.arcgis.com/arcgis/rest/services/WorldElevation3D/Terrain3D/ImageServer")val surface = Surface().apply {elevationSources.add(elevationSource)// add an exaggeration factor to increase the 3D effect of the elevation.elevationExaggeration = 2.5f}val cameraLocation = Point(x = -118.794,y = 33.909,z = 5330.0,spatialReference = SpatialReference.wgs84())val camera = Camera(locationPoint = cameraLocation,heading = 355.0,pitch = 72.0,roll = 0.0)return ArcGISScene(BasemapStyle.ArcGISImagery).apply {baseSurface = surfaceinitialViewpoint = Viewpoint(cameraLocation, camera)}}@Composablefun MainScreen() {} -
Add a
rememberblock and callcreateScene()inside it. Assignrememberto a local variable namedscene.The top-level composable function
rememberis used to retain state across recompositions.MainScreen.kt59 collapsed lines@file:OptIn(ExperimentalMaterial3Api::class)package com.example.app.screensimport androidx.compose.foundation.layout.fillMaxSizeimport androidx.compose.foundation.layout.paddingimport androidx.compose.material3.ExperimentalMaterial3Apiimport androidx.compose.material3.Scaffoldimport androidx.compose.material3.Textimport androidx.compose.material3.TopAppBarimport androidx.compose.runtime.Composableimport androidx.compose.runtime.rememberimport androidx.compose.ui.Modifierimport androidx.compose.ui.res.stringResourceimport com.arcgismaps.geometry.Pointimport com.arcgismaps.geometry.SpatialReferenceimport com.arcgismaps.mapping.ArcGISSceneimport com.arcgismaps.mapping.ArcGISTiledElevationSourceimport com.arcgismaps.mapping.BasemapStyleimport com.arcgismaps.mapping.Surfaceimport com.arcgismaps.mapping.Viewpointimport com.arcgismaps.mapping.view.Cameraimport com.arcgismaps.toolkit.geoviewcompose.SceneViewimport com.example.app.Rfun createScene(): ArcGISScene {// add base surface for elevation dataval elevationSource = ArcGISTiledElevationSource("https://elevation3d.arcgis.com/arcgis/rest/services/WorldElevation3D/Terrain3D/ImageServer")val surface = Surface().apply {elevationSources.add(elevationSource)// add an exaggeration factor to increase the 3D effect of the elevation.elevationExaggeration = 2.5f}val cameraLocation = Point(x = -118.794,y = 33.909,z = 5330.0,spatialReference = SpatialReference.wgs84())val camera = Camera(locationPoint = cameraLocation,heading = 355.0,pitch = 72.0,roll = 0.0)return ArcGISScene(BasemapStyle.ArcGISImagery).apply {baseSurface = surfaceinitialViewpoint = Viewpoint(cameraLocation, camera)}}@Composablefun MainScreen() {val scene = remember {createScene()}} -
You will now call several composable functions from Android Jetpack Compose. Call
Scaffoldand pass aTopAppBarwith aTextthat contains the app name (R.string.app_name).MainScreen.kt59 collapsed lines@file:OptIn(ExperimentalMaterial3Api::class)package com.example.app.screensimport androidx.compose.foundation.layout.fillMaxSizeimport androidx.compose.foundation.layout.paddingimport androidx.compose.material3.ExperimentalMaterial3Apiimport androidx.compose.material3.Scaffoldimport androidx.compose.material3.Textimport androidx.compose.material3.TopAppBarimport androidx.compose.runtime.Composableimport androidx.compose.runtime.rememberimport androidx.compose.ui.Modifierimport androidx.compose.ui.res.stringResourceimport com.arcgismaps.geometry.Pointimport com.arcgismaps.geometry.SpatialReferenceimport com.arcgismaps.mapping.ArcGISSceneimport com.arcgismaps.mapping.ArcGISTiledElevationSourceimport com.arcgismaps.mapping.BasemapStyleimport com.arcgismaps.mapping.Surfaceimport com.arcgismaps.mapping.Viewpointimport com.arcgismaps.mapping.view.Cameraimport com.arcgismaps.toolkit.geoviewcompose.SceneViewimport com.example.app.Rfun createScene(): ArcGISScene {// add base surface for elevation dataval elevationSource = ArcGISTiledElevationSource("https://elevation3d.arcgis.com/arcgis/rest/services/WorldElevation3D/Terrain3D/ImageServer")val surface = Surface().apply {elevationSources.add(elevationSource)// add an exaggeration factor to increase the 3D effect of the elevation.elevationExaggeration = 2.5f}val cameraLocation = Point(x = -118.794,y = 33.909,z = 5330.0,spatialReference = SpatialReference.wgs84())val camera = Camera(locationPoint = cameraLocation,heading = 355.0,pitch = 72.0,roll = 0.0)return ArcGISScene(BasemapStyle.ArcGISImagery).apply {baseSurface = surfaceinitialViewpoint = Viewpoint(cameraLocation, camera)}}@Composablefun MainScreen() {val scene = remember {createScene()}Scaffold(topBar = { TopAppBar(title = { Text(text = stringResource(id = R.string.app_name)) }) }) {}} -
In the trailing lambda for
Scaffold, call theSceneViewcomposable defined in the ArcGIS Maps SDK for Kotlin Toolkit. Pass a Modifier that has maximum size and default padding. And passsceneas thearcGISSceneparameterMainScreen.kt59 collapsed lines@file:OptIn(ExperimentalMaterial3Api::class)package com.example.app.screensimport androidx.compose.foundation.layout.fillMaxSizeimport androidx.compose.foundation.layout.paddingimport androidx.compose.material3.ExperimentalMaterial3Apiimport androidx.compose.material3.Scaffoldimport androidx.compose.material3.Textimport androidx.compose.material3.TopAppBarimport androidx.compose.runtime.Composableimport androidx.compose.runtime.rememberimport androidx.compose.ui.Modifierimport androidx.compose.ui.res.stringResourceimport com.arcgismaps.geometry.Pointimport com.arcgismaps.geometry.SpatialReferenceimport com.arcgismaps.mapping.ArcGISSceneimport com.arcgismaps.mapping.ArcGISTiledElevationSourceimport com.arcgismaps.mapping.BasemapStyleimport com.arcgismaps.mapping.Surfaceimport com.arcgismaps.mapping.Viewpointimport com.arcgismaps.mapping.view.Cameraimport com.arcgismaps.toolkit.geoviewcompose.SceneViewimport com.example.app.Rfun createScene(): ArcGISScene {// add base surface for elevation dataval elevationSource = ArcGISTiledElevationSource("https://elevation3d.arcgis.com/arcgis/rest/services/WorldElevation3D/Terrain3D/ImageServer")val surface = Surface().apply {elevationSources.add(elevationSource)// add an exaggeration factor to increase the 3D effect of the elevation.elevationExaggeration = 2.5f}val cameraLocation = Point(x = -118.794,y = 33.909,z = 5330.0,spatialReference = SpatialReference.wgs84())val camera = Camera(locationPoint = cameraLocation,heading = 355.0,pitch = 72.0,roll = 0.0)return ArcGISScene(BasemapStyle.ArcGISImagery).apply {baseSurface = surfaceinitialViewpoint = Viewpoint(cameraLocation, camera)}}@Composablefun MainScreen() {val scene = remember {createScene()}Scaffold(topBar = { TopAppBar(title = { Text(text = stringResource(id = R.string.app_name)) }) }) {SceneView(modifier = Modifier.fillMaxSize().padding(it),arcGISScene = scene)}}
Call MainScreen inside MainActivity class
-
Open the app > kotlin+java > com.example.app > MainActivity.kt. Delete all lines of code in the file. Then add the package declaration, import statements, and the
MainActivityclass.MainActivity.ktpackage com.example.appimport android.os.Bundleimport androidx.activity.ComponentActivityimport androidx.activity.compose.setContentimport androidx.activity.enableEdgeToEdgeimport com.arcgismaps.ApiKeyimport com.arcgismaps.ArcGISEnvironmentimport com.arcgismaps.httpcore.authentication.OAuthUserConfigurationimport com.arcgismaps.toolkit.authentication.AuthenticatorStateimport com.arcgismaps.toolkit.authentication.DialogAuthenticatorimport com.example.app.screens.MainScreenimport com.example.app.ui.theme.SceneTutorialThemeclass MainActivity : ComponentActivity() {} -
In the
setContentblock of theonCreate()lifecycle function, you will call the composable functionMainScreen, with default theming applied. To do this, addonCreate()with the following code.MainActivity.ktclass MainActivity : ComponentActivity() {override fun onCreate(savedInstanceState: Bundle?) {super.onCreate(savedInstanceState)enableEdgeToEdge()setContent {SceneTutorialTheme {MainScreen()}}}}
Set developer credentials
To allow your app users to access ArcGIS Location Services
-
In the Android view of Android Studio, open app > kotlin+java > com.example.app > MainActivity.
-
In the
onCreate()lifecycle method of theMainActivityclass, set theArcGISEnvironment.apiKeyproperty by callingApiKey.create(). Pass in your API key access token as a string and don’t forget the double quotes. Do this before thesetContentblock.MainActivity.kt13 collapsed linespackage com.example.appimport android.os.Bundleimport androidx.activity.ComponentActivityimport androidx.activity.compose.setContentimport androidx.activity.enableEdgeToEdgeimport com.arcgismaps.ApiKeyimport com.arcgismaps.ArcGISEnvironmentimport com.example.app.screens.MainScreenimport com.example.app.ui.theme.TutorialThemeclass MainActivity : ComponentActivity() {override fun onCreate(savedInstanceState: Bundle?) {super.onCreate(savedInstanceState)ArcGISEnvironment.apiKey = ApiKey.create("YOUR_ACCESS_TOKEN")enableEdgeToEdge()setContent {TutorialTheme {MainScreen()}}}}
Best Practice: The access token is stored directly in the code as a convenience for this tutorial. Do not store credentials directly in source code in a production environment.
-
In the Android view of Android Studio, open app > kotlin+java > com.example.app > MainActivity. In the
MainActivityclass, create an instance ofAuthenticatorState, which is from the authentication module of ArcGIS Maps SDK for Kotlin Toolkit. Add this before thesetContentblock.MainActivity.kt13 collapsed linespackage com.example.appimport android.os.Bundleimport androidx.activity.ComponentActivityimport androidx.activity.compose.setContentimport androidx.activity.enableEdgeToEdgeimport com.arcgismaps.ApiKeyimport com.arcgismaps.ArcGISEnvironmentimport com.arcgismaps.httpcore.authentication.OAuthUserConfigurationimport com.arcgismaps.toolkit.authentication.AuthenticatorStateimport com.arcgismaps.toolkit.authentication.DialogAuthenticatorimport com.example.app.screens.MainScreenimport com.example.app.ui.theme.TutorialThemeclass MainActivity : ComponentActivity() {private val authenticatorState = AuthenticatorState()override fun onCreate(savedInstanceState: Bundle?) {super.onCreate(savedInstanceState)enableEdgeToEdge()setContent {TutorialTheme {MainScreen()}}}} -
In the
onCreate()lifecycle method of theMainActivityclass, set theauthenticatorState.oAuthUserConfigurationsproperty by instantiatingOAuthUserConfiguration, adding it to a list, and assigning the list. Pass in theclientIdandredirectURLthat you created in an earlier step.A redirectURL is composed of a scheme and a host component. The format for the redirect url is
scheme://host. For example, if the redirect url ismyscheme://myhostthen the scheme ismyschemeand the host ismyhost. You must use the RedirectURL that you supplied for your app in theuser authenticationpart of the Set up authentication step.MainActivity.kt17 collapsed linespackage com.example.appimport android.os.Bundleimport androidx.activity.ComponentActivityimport androidx.activity.compose.setContentimport androidx.activity.enableEdgeToEdgeimport com.arcgismaps.ApiKeyimport com.arcgismaps.ArcGISEnvironmentimport com.arcgismaps.httpcore.authentication.OAuthUserConfigurationimport com.arcgismaps.toolkit.authentication.AuthenticatorStateimport com.arcgismaps.toolkit.authentication.DialogAuthenticatorimport com.example.app.screens.MainScreenimport com.example.app.ui.theme.TutorialThemeclass MainActivity : ComponentActivity() {private val authenticatorState = AuthenticatorState()override fun onCreate(savedInstanceState: Bundle?) {super.onCreate(savedInstanceState)authenticatorState.oAuthUserConfigurations = listOf(OAuthUserConfiguration(portalUrl = "https://www.arcgis.com",clientId = "YOUR_CLIENT_ID",redirectUrl = "YOUR_REDIRECT_URL"))enableEdgeToEdge()setContent {TutorialTheme {MainScreen()}}}2 collapsed lines} -
In the
setContentblock, call theDialogAuthenticatorcomposable function and pass in theauthenticatorState. CallDialogAuthenticatorafterMainScreen().MainActivity.kt17 collapsed linespackage com.example.appimport android.os.Bundleimport androidx.activity.ComponentActivityimport androidx.activity.compose.setContentimport androidx.activity.enableEdgeToEdgeimport com.arcgismaps.ApiKeyimport com.arcgismaps.ArcGISEnvironmentimport com.arcgismaps.httpcore.authentication.OAuthUserConfigurationimport com.arcgismaps.toolkit.authentication.AuthenticatorStateimport com.arcgismaps.toolkit.authentication.DialogAuthenticatorimport com.example.app.screens.MainScreenimport com.example.app.ui.theme.TutorialThemeclass MainActivity : ComponentActivity() {private val authenticatorState = AuthenticatorState()override fun onCreate(savedInstanceState: Bundle?) {super.onCreate(savedInstanceState)authenticatorState.oAuthUserConfigurations = listOf(OAuthUserConfiguration(portalUrl = "https://www.arcgis.com",clientId = "YOUR_CLIENT_ID",redirectUrl = "YOUR_REDIRECT_URL"))enableEdgeToEdge()setContent {TutorialTheme {MainScreen()DialogAuthenticator(authenticatorState)}}}2 collapsed lines} -
Open app > manifests > AndroidManifest.xml. Add an
<activity>tag that declares the OAuth user sign-in activity. Set theandroid:schemeandandroid:hostusing the scheme and host from your RedirectURL.A redirectURL is composed of a scheme and a host component. The format for the redirect url is
scheme://host. For example, if the redirect url ismyscheme://myhostthen the scheme ismyschemeand the host ismyhost. You must use the RedirectURL that you supplied for your app in theuser authenticationpart of the Set up authentication step.AndroidManifest.xml30 collapsed lines<?xml version="1.0" encoding="utf-8"?><manifest xmlns:android="http://schemas.android.com/apk/res/android"xmlns:tools="http://schemas.android.com/tools"><uses-permission android:name="android.permission.INTERNET" /><applicationandroid:allowBackup="true"android:dataExtractionRules="@xml/data_extraction_rules"android:fullBackupContent="@xml/backup_rules"android:icon="@mipmap/ic_launcher"android:label="@string/app_name"android:roundIcon="@mipmap/ic_launcher_round"android:supportsRtl="true"android:theme="@style/Theme.Tutorial"tools:targetApi="31"><activityandroid:name=".MainActivity"android:exported="true"android:label="@string/app_name"android:theme="@style/Theme.Tutorial"><intent-filter><action android:name="android.intent.action.MAIN" /><category android:name="android.intent.category.LAUNCHER" /></intent-filter></activity><activityandroid:name="com.arcgismaps.toolkit.authentication.AuthenticationActivity"android:configChanges="keyboard|keyboardHidden|orientation|screenSize"android:exported="true"android:launchMode="singleTop" ><intent-filter><action android:name="android.intent.action.VIEW" /><category android:name="android.intent.category.DEFAULT" /><category android:name="android.intent.category.BROWSABLE" /><dataandroid:scheme="your_redirect_url_scheme"android:host="your_redirect_url_host" /></intent-filter></activity>3 collapsed lines</application></manifest>
Best Practice: The OAuth credentials are stored directly in the code as a convenience for this tutorial. Do not store credentials directly in source code in a production environment.
Run your app
-
Click Run > Run > app to run the app.
In Android Studio, you have two choices for running your app: an actual Android device or the Android Emulator.
Android device
Connect your computer to your Android device, using USB or Wi-Fi. For more details, see How to connect your Android device.
Android Emulator
Create an AVD (Android Virtual Device) to run in the Android Emulator. For details, see Run apps on the Android Emulator.
Selecting a device
When you build and run an app in Android Studio, you must first select a device. From the Android Studio toolbar, you can access the drop-down list of your currently available devices, both virtual and physical.
 .
.If you cannot access the list on the toolbar, click Tools > Device Manager.
You should see a scene
If your app displays but the scene view is blank, you might need to adjust your emulator’s settings.
With the emulator displayed, do the following:
-
Click the Extended Controls icon in the upper right corner of the emulator window.
-
In the Extended Controls dialog, click on Settings > Advanced > OpenGL ES API Level (requires restart).
-
Click the dropdown menu, and select Renderer maximum (up to OpenGL ES 3.1).
-
Restart your emulator.
Alternatively, you can download the tutorial solution, as follows.
Option 2: Download the solution
-
Click the Download solution link in the right-hand side of this page.
-
Unzip the file to a location on your machine.
-
Run Android Studio.
-
Go to File > Open…. Navigate to the solution folder and click Open.
On Windows: If you are in the Welcome to Android Studio dialog, click Open and navigate to the solution folder. Then click Open.
Since the downloaded solution does not contain authentication credentials, you must add the developer credentials that you created in the Set up authentication section.
Set developer credentials in the solution
To allow your app users to access ArcGIS location services
-
In the Android view of Android Studio, open app > kotlin+java > com.example.app > MainActivity. Set the
AuthenticationModeto.API_KEY.MainActivity.kt14 collapsed linespackage com.example.appimport android.os.Bundleimport androidx.activity.ComponentActivityimport androidx.activity.compose.setContentimport androidx.activity.enableEdgeToEdgeimport com.arcgismaps.ApiKeyimport com.arcgismaps.ArcGISEnvironmentimport com.arcgismaps.httpcore.authentication.OAuthUserConfigurationimport com.arcgismaps.toolkit.authentication.AuthenticatorStateimport com.arcgismaps.toolkit.authentication.DialogAuthenticatorimport com.example.app.screens.MainScreenimport com.example.app.ui.theme.TutorialThemeclass MainActivity : ComponentActivity() {private enum class AuthenticationMode { API_KEY, USER_AUTH }private val authenticationMode = AuthenticationMode.API_KEY42 collapsed linesprivate val authenticatorState = AuthenticatorState()override fun onCreate(savedInstanceState: Bundle?) {super.onCreate(savedInstanceState)when (authenticationMode) {AuthenticationMode.API_KEY -> {ArcGISEnvironment.apiKey = ApiKey.create("YOUR_ACCESS_TOKEN")}AuthenticationMode.USER_AUTH -> {authenticatorState.oAuthUserConfigurations = listOf(OAuthUserConfiguration(portalUrl = "https://www.arcgis.com",clientId = "YOUR_CLIENT_ID",redirectUrl = "YOUR_REDIRECT_URL"))}}enableEdgeToEdge()setContent {TutorialTheme {MainScreen()if (authenticationMode == AuthenticationMode.USER_AUTH) {DialogAuthenticator(authenticatorState)}}}}} -
Set the
apiKeyproperty with your API key access token.MainActivity.kt22 collapsed linespackage com.example.appimport android.os.Bundleimport androidx.activity.ComponentActivityimport androidx.activity.compose.setContentimport androidx.activity.enableEdgeToEdgeimport com.arcgismaps.ApiKeyimport com.arcgismaps.ArcGISEnvironmentimport com.arcgismaps.httpcore.authentication.OAuthUserConfigurationimport com.arcgismaps.toolkit.authentication.AuthenticatorStateimport com.arcgismaps.toolkit.authentication.DialogAuthenticatorimport com.example.app.screens.MainScreenimport com.example.app.ui.theme.TutorialThemeclass MainActivity : ComponentActivity() {private enum class AuthenticationMode { API_KEY, USER_AUTH }private val authenticationMode = AuthenticationMode.API_KEYprivate val authenticatorState = AuthenticatorState()override fun onCreate(savedInstanceState: Bundle?) {super.onCreate(savedInstanceState)when (authenticationMode) {AuthenticationMode.API_KEY -> {ArcGISEnvironment.apiKey = ApiKey.create("YOUR_ACCESS_TOKEN")}30 collapsed linesAuthenticationMode.USER_AUTH -> {authenticatorState.oAuthUserConfigurations = listOf(OAuthUserConfiguration(portalUrl = "https://www.arcgis.com",clientId = "YOUR_CLIENT_ID",redirectUrl = "YOUR_REDIRECT_URL"))}}enableEdgeToEdge()setContent {TutorialTheme {MainScreen()if (authenticationMode == AuthenticationMode.USER_AUTH) {DialogAuthenticator(authenticatorState)}}}}}
Best Practice: The access token is stored directly in the code as a convenience for this tutorial. Do not store credentials directly in source code in a production environment.
-
In the Android view of Android Studio, open app > kotlin+java > com.example.app > MainActivity. Set the
AuthenticationModeto.USER_AUTH.MainActivity.ktclass MainActivity : ComponentActivity() {private enum class AuthenticationMode { API_KEY, USER_AUTH }private val authenticationMode = AuthenticationMode.USER_AUTH -
Set your
clientIDandredirectURLvalues. You must use the RedirectURL that you supplied for your app in theuser authenticationpart of the Set up authentication step.MainActivity.ktAuthenticationMode.USER_AUTH -> {authenticatorState.oAuthUserConfigurations = listOf(OAuthUserConfiguration(portalUrl = "https://www.arcgis.com",clientId = "YOUR_CLIENT_ID",redirectUrl = "YOUR_REDIRECT_URL")) -
Open app > manifests > AndroidManifest.xml.
-
Set the
android:schemeandandroid:hostusing the scheme and host from your RedirectURL.A redirectURL is composed of a scheme and a host component. The format for the redirect url is
scheme://host. For example, if the redirect url ismyscheme://myhostthen the scheme ismyschemeand the host ismyhost.AndroidManifest.xml41 collapsed lines<?xml version="1.0" encoding="utf-8"?><manifest xmlns:android="http://schemas.android.com/apk/res/android"xmlns:tools="http://schemas.android.com/tools"><uses-permission android:name="android.permission.INTERNET" /><applicationandroid:allowBackup="true"android:dataExtractionRules="@xml/data_extraction_rules"android:fullBackupContent="@xml/backup_rules"android:icon="@mipmap/ic_launcher"android:label="@string/app_name"android:roundIcon="@mipmap/ic_launcher_round"android:supportsRtl="true"android:theme="@style/Theme.Tutorial"tools:targetApi="31"><activityandroid:name=".MainActivity"android:exported="true"android:label="@string/app_name"android:theme="@style/Theme.Tutorial"><intent-filter><action android:name="android.intent.action.MAIN" /><category android:name="android.intent.category.LAUNCHER" /></intent-filter></activity><activityandroid:name="com.arcgismaps.toolkit.authentication.AuthenticationActivity"android:configChanges="keyboard|keyboardHidden|orientation|screenSize"android:exported="true"android:launchMode="singleTop" ><intent-filter><action android:name="android.intent.action.VIEW" /><category android:name="android.intent.category.DEFAULT" /><category android:name="android.intent.category.BROWSABLE" /><dataandroid:scheme="your_redirect_url_scheme"android:host="your_redirect_url_host" />6 collapsed lines</intent-filter></activity></application></manifest>
Best Practice: The OAuth credentials are stored directly in the code as a convenience for this tutorial. Do not store credentials directly in source code in a production environment.
Run the app
Click Run > Run > app to run the app.
You should see a scene
What’s next?
Learn how to use additional API features, ArcGIS location services, and ArcGIS tools in these tutorials: