With ArcGIS Maps SDK for Swift, you can build applications that allow your users to perform specific operations on a map view
- Identify a feature in a map view.
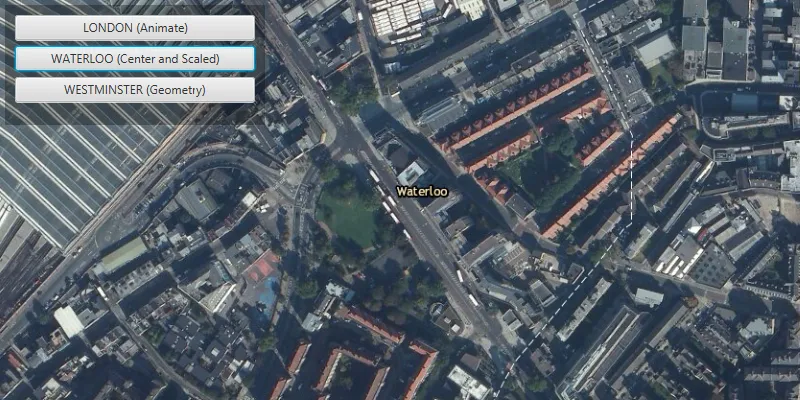
- Set a view point with animation.
- Convert a screen coordinate to a geographical location.
- Export a scene view’s image.
These operations are provided by the map view and scene view proxy structures called MapViewProxy and SceneViewProxy, respectively. MapView and SceneView structures conform to the SwiftUI.View protocol and provide view modifiers to customize the view’s appearance or behavior. Proxies, however, are different and expose properties and methods that aren’t suitable as a view’s initializer parameter or a view modifier. Let’s explore how to use map view and scene view proxy.
MapViewProxy and SceneViewProxy
The MapViewProxy type exposes methods that you can perform on a map viewMapViewProxy directly. Instead, you wrap your MapView in a MapViewReader and it exposes an instance of a MapViewProxy in its closure. The proxy allows access to the map view’s size, coordinate space, read-only properties, and methods that operate on the map or scene view itself. SwiftUI also adopts this coding pattern with the ScrollViewProxy and GeometryProxy.
The code below sets the map view’s viewpoint scale once the map has loaded. The MapViewReader wraps the MapView and exposes the mapViewProxy in its closure. When the MapView is created, a task view modifier loads the map and calls the setViewpointScale method on the mapViewProxy as follows:
var body: some View {
    // Wrap the MapView in MapViewReader and expose its MapViewProxy.    MapViewReader { mapViewProxy in        MapView(map: map, viewpoint: viewpoint)
            // The task view modifier sets the view point scale            // after the map has loaded.            .task {                do {                    try await map.load()                    await mapViewProxy.setViewpointScale(1e7)                } catch {                    self.error = error                }            }    }}
To perform operations on a scene viewSceneViewReader, SceneView, and SceneViewProxy with the same coding pattern.
Examples
Display identify results in a PopupView
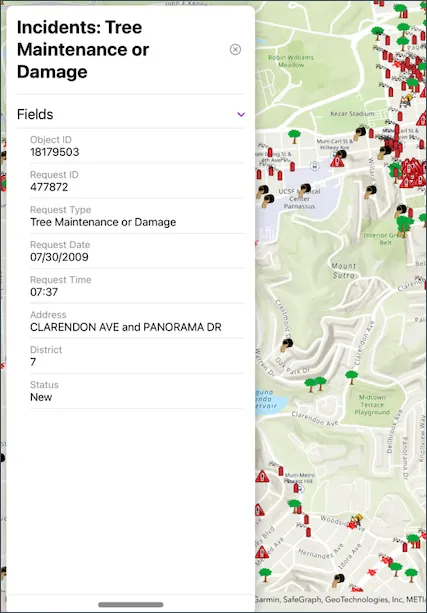
This example demonstrates how you can use the identifyLayers operation to allow your users to tap on a map view and display the popup information for the first feature near that tapped location. A PopupView, provided by the ArcGIS Toolkit, displays the popup information in a floatingPanel on the map view.
Steps
-
Import the SwiftUI, ArcGIS and ArcGISToolkit frameworks into your application.
-
Instantiate a
Mapusing a web map’s portal item that contains a feature layer. -
Use the @State property wrapper to ensure that SwiftUI preserves the state of properties such as the
map,identifyScreenPoint, the currentpopup, and a boolean to indicate if the PopupView should be displayed. -
Instantiate the
MapViewwith themapand wrap it inMapViewReaderso that itsMapViewProxyis exposed. -
Handle the map view’s onSingleTapGesture and store the user’s tapped point in the
tappedScreenPointproperty. -
Specify an asynchronous task modifier to perform an action when the
tappedScreenPointvalue changes. In the task’s closure, call the proxy’s identifyLayers operation to identify features close to thetappedScreenPoint. Obtain the first identifyLayerResult, store its popup, and setshowPopupto true. -
Set up a floatingPanel view modifier. Note: This is an ArcGISToolkit component.
-
Add the
popupto a PopupView and display it within thefloatingPanel. Note:PopupViewis also an ArcGISToolkit component.
// Import frameworks.import SwiftUIimport ArcGISimport ArcGISToolkit
struct IdentifyView: View {    // Instantiate a map.    @State private var map = Map(        item: PortalItem(            portal: .arcGISOnline(connection: .anonymous),            id: .incidentsInSanFrancisco        )    )
    // Preserve property state.    @State private var tappedScreenPoint: CGPoint    @State private var popup: Popup?    @State private var showPopup = false
    var body: some View {
        // Wrap the MapView in MapViewReader and expose its MapViewProxy.        MapViewReader { mapViewProxy in            MapView(map: map)
                // Handle a single tap gesture. Save the tapped screen point.                .onSingleTapGesture { screenPoint, _ in                    tappedScreenPoint = screenPoint                }
                // Call the proxy's `identifyLayers` method when the value                // of the `tappedScreenPoint` property changes.                .task(id: tappedScreenPoint) {                    guard let tappedScreenPoint = tappedScreenPoint,                          let identifyResult = try? await mapViewProxy.identifyLayers(                            screenPoint: tappedScreenPoint,                            tolerance: 12,                            returnPopupsOnly: false                          )                    else { return }                    self.popup = identifyResult.first?.popups.first                    self.showPopup = self.popup != nil                }
                // Show the popup information in an PopupView and display                // it inside a FloatingPanel within the MapView.                // Note: These are ArcGIS Toolkit components.                .floatingPanel(                    selectedDetent: .constant(.full),                    horizontalAlignment: .leading,                    isPresented: $showPopup                ) { [popup] in                    PopupView(popup: popup!, isPresented: $showPopup)                        .showCloseButton(true)                        .padding()                }        }    }}
private extension PortalItem.ID {    /// The ID used in the "Incidents in San Francisco" portal item.    static var incidentsInSanFrancisco: Self { Self("fb788308ea2e4d8682b9c05ef641f273")! }}
The code above displays a predefined popup for the identified feature as follows: