Update the orientation of a graphic using expressions based on its attributes.
Use case
Instead of reading the attribute and changing the rotation on the symbol for a single graphic (a manual CPU operation), you can bind the rotation to an expression that applies to the whole overlay (an automatic GPU operation). This usually results in a noticeable performance boost (smooth rotations).
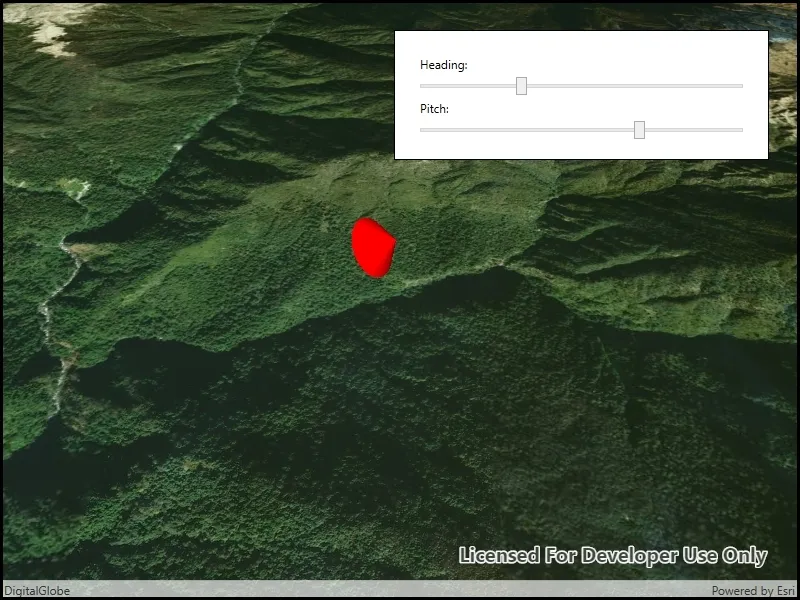
How to use the sample
Adjust the heading and pitch sliders to rotate the cone.
How it works
- Create a new graphics overlay.
- Create a simple renderer and set its scene properties.
- Set the heading expression to
[HEADING]. - Apply the renderer to the graphics overlay.
- Create a graphic and add it to the overlay.
- To update the graphic’s rotation, update the HEADING or PITCH property in the graphic’s attributes.
Relevant API
- Graphic.Attributes
- GraphicsOverlay
- SceneProperties
- SceneProperties.HeadingExpression
- SceneProperties.PitchExpression
- SimpleRenderer
- SimpleRenderer.SceneProperties
Tags
3D, expression, graphics, heading, pitch, rotation, scene, symbology
Sample code
// Copyright 2019 Esri.//// Licensed under the Apache License, Version 2.0 (the "License"); you may not use this file except in compliance with the License.// You may obtain a copy of the License at: http://www.apache.org/licenses/LICENSE-2.0//// Unless required by applicable law or agreed to in writing, software distributed under the License is distributed on an// "AS IS" BASIS, WITHOUT WARRANTIES OR CONDITIONS OF ANY KIND, either express or implied. See the License for the specific// language governing permissions and limitations under the License.
using Esri.ArcGISRuntime.Geometry;using Esri.ArcGISRuntime.Mapping;using Esri.ArcGISRuntime.Symbology;using Esri.ArcGISRuntime.UI;using Color = System.Drawing.Color;
namespace ArcGIS.WPF.Samples.ScenePropertiesExpressions{    [ArcGIS.Samples.Shared.Attributes.Sample(        name: "Scene properties expressions",        category: "GraphicsOverlay",        description: "Update the orientation of a graphic using expressions based on its attributes.",        instructions: "Adjust the heading and pitch sliders to rotate the cone.",        tags: new[] { "3D", "expression", "graphics", "heading", "pitch", "rotation", "scene", "symbology" })]    public partial class ScenePropertiesExpressions    {        public ScenePropertiesExpressions()        {            InitializeComponent();            Initialize();        }
        private void Initialize()        {            // Set up the scene with an imagery basemap.            MySceneView.Scene = new Scene(BasemapStyle.ArcGISImageryStandard);
            // Set the initial viewpoint for the scene.            MapPoint point = new MapPoint(83.9, 28.4, 1000, SpatialReferences.Wgs84);            Camera initialCamera = new Camera(point, 1000, 0, 50, 0);            MySceneView.SetViewpointCamera(initialCamera);
            // Create a graphics overlay.            GraphicsOverlay overlay = new GraphicsOverlay();            overlay.SceneProperties.SurfacePlacement = SurfacePlacement.Relative;            MySceneView.GraphicsOverlays.Add(overlay);
            // Add a renderer using rotation expressions.            SimpleRenderer renderer = new SimpleRenderer();            renderer.SceneProperties.HeadingExpression = "[HEADING]";            renderer.SceneProperties.PitchExpression = "[PITCH]";
            // Apply the renderer to the graphics overlay.            overlay.Renderer = renderer;
            // Create a red cone graphic.            SimpleMarkerSceneSymbol coneSymbol = SimpleMarkerSceneSymbol.CreateCone(Color.Red, 100, 100);            coneSymbol.Pitch = -90;            MapPoint conePoint = new MapPoint(83.9, 28.41, 200, SpatialReferences.Wgs84);            Graphic cone = new Graphic(conePoint, coneSymbol);
            // Add the cone graphic to the overlay.            overlay.Graphics.Add(cone);
// Listen for changes in slider values and update graphic properties. HeadingSlider.ValueChanged += (sender, e) => { cone.Attributes["HEADING"] = HeadingSlider.Value; }; PitchSlider.ValueChanged += (sender, e) => { cone.Attributes["PITCH"] = PitchSlider.Value; }; } }}<UserControl x:Class="ArcGIS.WPF.Samples.ScenePropertiesExpressions.ScenePropertiesExpressions" xmlns="http://schemas.microsoft.com/winfx/2006/xaml/presentation" xmlns:x="http://schemas.microsoft.com/winfx/2006/xaml" xmlns:esri="http://schemas.esri.com/arcgis/runtime/2013"> <Grid> <esri:SceneView x:Name="MySceneView" /> <Border Style="{StaticResource BorderStyle}"> <StackPanel> <Label Content="Heading:" /> <Slider x:Name="HeadingSlider" Maximum="360" Minimum="0" /> <Label Content="Pitch:" /> <Slider x:Name="PitchSlider" Maximum="90" Minimum="-90" /> </StackPanel> </Border> </Grid></UserControl>